Showing posts with label Bread. Show all posts

Corn Dog Muffin Bites {Guiltless 1 WW+ Appetizer}

When I chose what to make for the big game last weekend I knew one thing had to be on the list... these Pinterest inspired corn dog bites that I found over at Iowa Girl Eats. I don't know who pinned them first but it was love at first site! And it was a treat I was sure the kids would enjoy. Sure my son would peel off all of the corn bread and give it to his sister but both of them would enjoy these awesome, simple treats.

And I was right! These babies were a hit. And most of them were gone by the end of the first quarter. Luckily I made these in two batches so while one was being devoured the other was baking. Not that eating these cold would be bad. I wouldn't know anything about that though... That lone little doggy laying on the plate calling out my name after the game... YUM!

Inspired by Iowa Girl Eats


Corn Dog Muffin Bites
  • 1/4 cup melted butter
  • 1/4 cup unsweetened applesauce
  • 1/2 cup sugar
  • 2 eggs
  • 1 cup 1% low-fat buttermilk
  • 1/2 teaspoon baking soda
  • 1 cup cornmeal
  • 1 cup all purpose flour
  • 1/2 teaspoon salt
  • 8 97% Fat Free Hebrew National hot dogs, cut into 1″ bites (6 pieces per dog)
Preheat oven to 375 degrees. Combine butter, applesauce and sugar in a bowl, and whisk to combine. Add eggs and whisk to incorporate. Add buttermilk and whisk to incorporate.

In a separate bowl, combine baking soda, cornmeal, flour, and salt, and stir to combine. Whisk into wet ingredients in two batches.

Spray a mini muffin tin with non-stick spray, and spoon 1 Tablespoon of batter into each mini muffin cup. Place one hot dog bite into the middle of each cup.

Bake for 10-12 minutes, or until cornbread is golden brown. Cool in mini muffin tin for 5 minutes before serving. Store leftovers in the refrigerator, and re-heat for 20-30 seconds before serving.

Makes 48 | 1 WW+ each

NI per muffin:
46 cals | 7g carbs | 1g fat | 2g protein | 0g fiber | 118g sodium

Double Chocolate Zucchini Bread {4 WW+ Breakfast}

I love the end of summer. For one it starts to cool down at night and secondly my mother-in-law is always sure to bring over some yummy (but very large) zucchini. Figuring out ways to use up the zucchini is always fun and shredding it to put in baked goods and savory meals is usually the way to go. Especially since my son has a fascination with our food processor.

When searching for a recipe to use up some of our zucchini I stumbled upon a delicious looking muffin recipe. Chocolate and zucchini? Why it's a match made in heaven! This bread tastes exactly like a chocolate cake. My son would have had no clue that there was zucchini in it had he not been the one to help mix the ingredients together. And the mini chocolate chips just add a bit of deliciousness and push this bread over the edge. Next time I might consider adding a few walnuts to the mix. Mmmm....

Inspiration: Meg's Everyday Indulgence


Double Chocolate Zucchini Bread
  • 2 cups all-purpose flour 
  • 1 cup unsweetened cocoa
  • 1 teaspoon table salt
  • 2 teaspoons baking soda
  • 1 teaspoon ground allspice
  • 1 1/2 teaspoons ground cinnamon 
  • 1 1/2 cups unpacked brown sugar 
  • 1 cup unsweetened applesauce
  • 3/4 cup regular egg substitute
  • 1 teaspoon vanilla extract
  • 1/2 cup buttermilk
  • 2 cups zucchini, shredded
  • 1 cup mini chocolate chips
Preheat oven to 350 degrees. Prepare 2 loaf pans with nonstick cooking spray.

In a large bowl whisk together flour, cocoa, salt, baking soda, allspice and cinnamon; set aside.

In a medium bowl whisk together the sugar and applesauce. Beat in egg substitute until just combined. Stir in vanilla, buttermilk, zucchini and chocolate chips. Gently stir the liquid ingredients into the dry ingredients until just combined.

Divide batter equally among the two loaf pans. Bake until toothpick inserted into the center comes out clean and muffin tops are springy to the touch, 45 to 55 minutes; rotating halfway through baking time. Cool loafs in pan for 5 minutes, then transfer to wire rack and cool 5 minutes before serving.

Serves 20 | 4 WW+ Points

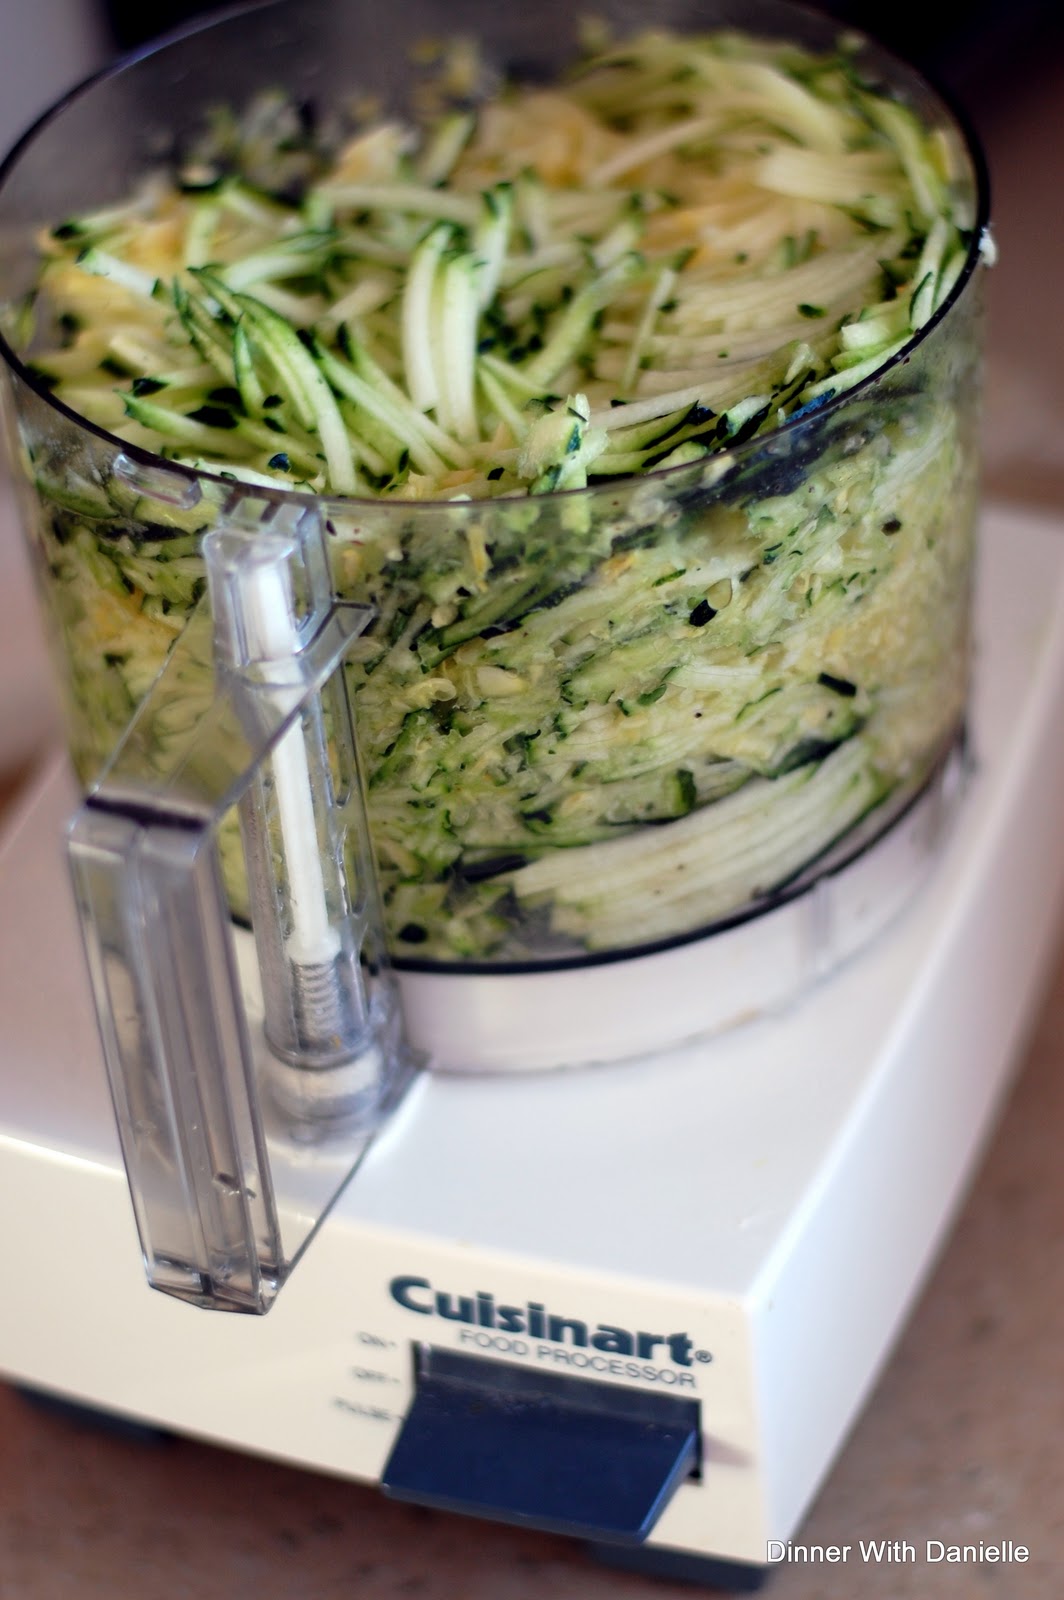
Side Note: One LARGE freshly picked zucchini from my mother-in-law's garden yielded this much shredded zucchini!


Homemade Hamburger Buns {7 WW+ Bread/Side}

I love everything  about making bread. The smells, the texture, the taste. It's amazing how creating one little roll or loaf makes me so happy and proud. I did it. I played with yeast and it didn't turn into a rock. So when my husband asked about making buns for an upcoming holiday dinner we were hosting at the beginning of summer I went in search of a great recipe.

I suggested a recipe over on Annie's Eats since Annie has never failed me with her recipes. My husband glanced over it, said ok, and started doing something else. So when it was time to make the buns I was surprised when he announced that he'd be making them. Wait, what? He was going to attempt to play with yeast? Ok, go for it honey!

And boy was I happy that he took over. The recipe he chose was not my suggestion. He went with his trusty King Arthur Flour website and chose a bun recipe from them. The buns turned out great however they weren't as soft as we like our buns to be. So he took it upon himself to search for another recipe (on the same site) and wanted to try it out this weekend after I announced I was making root beer pulled pork for dinner. And he found a recipe that I am sure will become a weekly regular in this house. These buns are perfect for not only hamburgers but sandwiches as well. And boy are they soft and fluffy!

Inspiration: King Arthur Flour


Homemade Buns
  • 3/4 to 1 cup* lukewarm water
  • 2 tablespoons butter
  • 1 large egg
  • 2 cups King Arthur Unbleached All-Purpose Flour
  • 1 1/2 cups King Arthur Whole Wheat Flour
  • 1/4 cup sugar
  • 1 1/4 teaspoons salt
  • 1 tablespoon instant yeast
  • 2 tablespoons melted butter, reserved for topping
Mix and knead all of the dough ingredients, except the melted butter, by hand, mixer, or bread machine (we went with the bread machine) to make a soft, smooth dough. Cover the dough, and let it rise for 1 to 2 hours, or until it's nearly doubled in bulk.
Gently deflate the dough, and divide it into 8 pieces. Shape each piece into a round ball; flatten to about 3" across. Place the buns on a lightly greased or parchment-lined baking sheet, cover, and let rise for about an hour, until noticeably puffy.

Brush the buns with about half of the melted butter. Bake the buns in a preheated 375°F oven for 15 to 18 minutes, until golden. Remove them from the oven, and brush with the remaining melted butter. This will give the buns a satiny, buttery crust.

Cool the buns on a rack.

Serves 8 | 7 WW+ Points (and so worth it!)

*For best results (a smooth, slightly soft dough), use the smaller amount of water in summer (or in a humid environment), the greater amount in winter (or in a dry climate); and something in between the rest of the time.

Almond Chocolate Banana Bread {9 WW+ Breakfast}

We always have a bunch of bananas on our countertops. It's just the easiest way to get breakfast on the go when we're running from one activity or another. So sometimes we're left with a few very ripe bananas that no one is willing to eat. And we have to use them up so I am always looking for a good banana bread recipe. I've finally found one that I think I'll stick with for a while.

The best part about this recipe is that it's so light and airy. The bread is not dense at all. I think the cake flour really helps. And it was a total accident that I used cake flour instead of AP or whole wheat flour because we were out of everything else. I am NEVER out of flour. I mean I use it weekly so we're always buying it but I'm glad I was out. The substitution was great! And the addition of a chocolate bar made the bread even more amazing.

I recommend enjoying this banana bread the same day it's baked for the best results. I found that when I placed it in an airtight container for safe keeping that it lost that delicious crunch to the crust of the bread. And I think that the crust was the other reason why I fell in love with this recipe. But if you must, you can store and serve later. I'm sure it'll be gobbled up quickly though!

Inspired By FamilyFun


The Best Banana Bread
  • 2 cups cake flour
  • 1 teaspoon baking powder
  • 1/2 teaspoon baking soda
  • 1/2 teaspoon salt
  • 1/2 cup (1 stick) unsalted butter, softened
  • 3/4 cup sugar
  • 2 eggs, at room temperature
  • 1 teaspoon vanilla extract
  • 3 medium-large very ripe bananas (1 cup mashed)
  • 1/2 cup plain non-fat greek yogurt
  • 1 Hershey's Chocolate Bar with Almonds, broken into small pieces

Heat the oven to 325ยบ. Line a 5- by 9-inch loaf pan, preferably one with a light interior, with enough waxed paper to drape over the long sides. This will make the baked bread a cinch to remove and the pan easy to clean. Set the pan aside

Sift together the flour, baking powder, baking soda, and salt into a medium bowl. In a large bowl, cream the butter using an electric mixer. Gradually add the sugar, scraping down the sides of the bowl as necessary. Add the eggs one at a time, beating well after each addition. Next, add the vanilla extract and blend briefly. Set both bowls aside.

Peel the bananas and place them in a separate bowl. Mash them with a fork or a potato masher and measure out 1 cup. Add the sour cream and stir to blend. Set the bowl aside.

Using a wooden spoon, blend a third of the dry mixture into the butter-sugar mixture. Add the rest of the ingredients in this order, stirring well after each addition: half of the banana mixture, half of the remaining dry mixture, the rest of the banana mixture, the rest of the dry mixture. Next, fold in chocolate pieces.

Scrape the batter into the prepared pan and smooth the top with a spoon. Bake on the center oven rack until a tester inserted deep into the center of the bread comes out clean, about 70 to 75 minutes.

Transfer the bread to a cooling rack and cool it in the pan for about 20 minutes. Using the waxed paper, lift the bread from the pan and place it on the rack. Pull down the sides of the paper and allow the bread to cool thoroughly before slicing.

10 Servings | 9 WW+ Points

Rosemary Corn Muffins {5 WW+ Side}

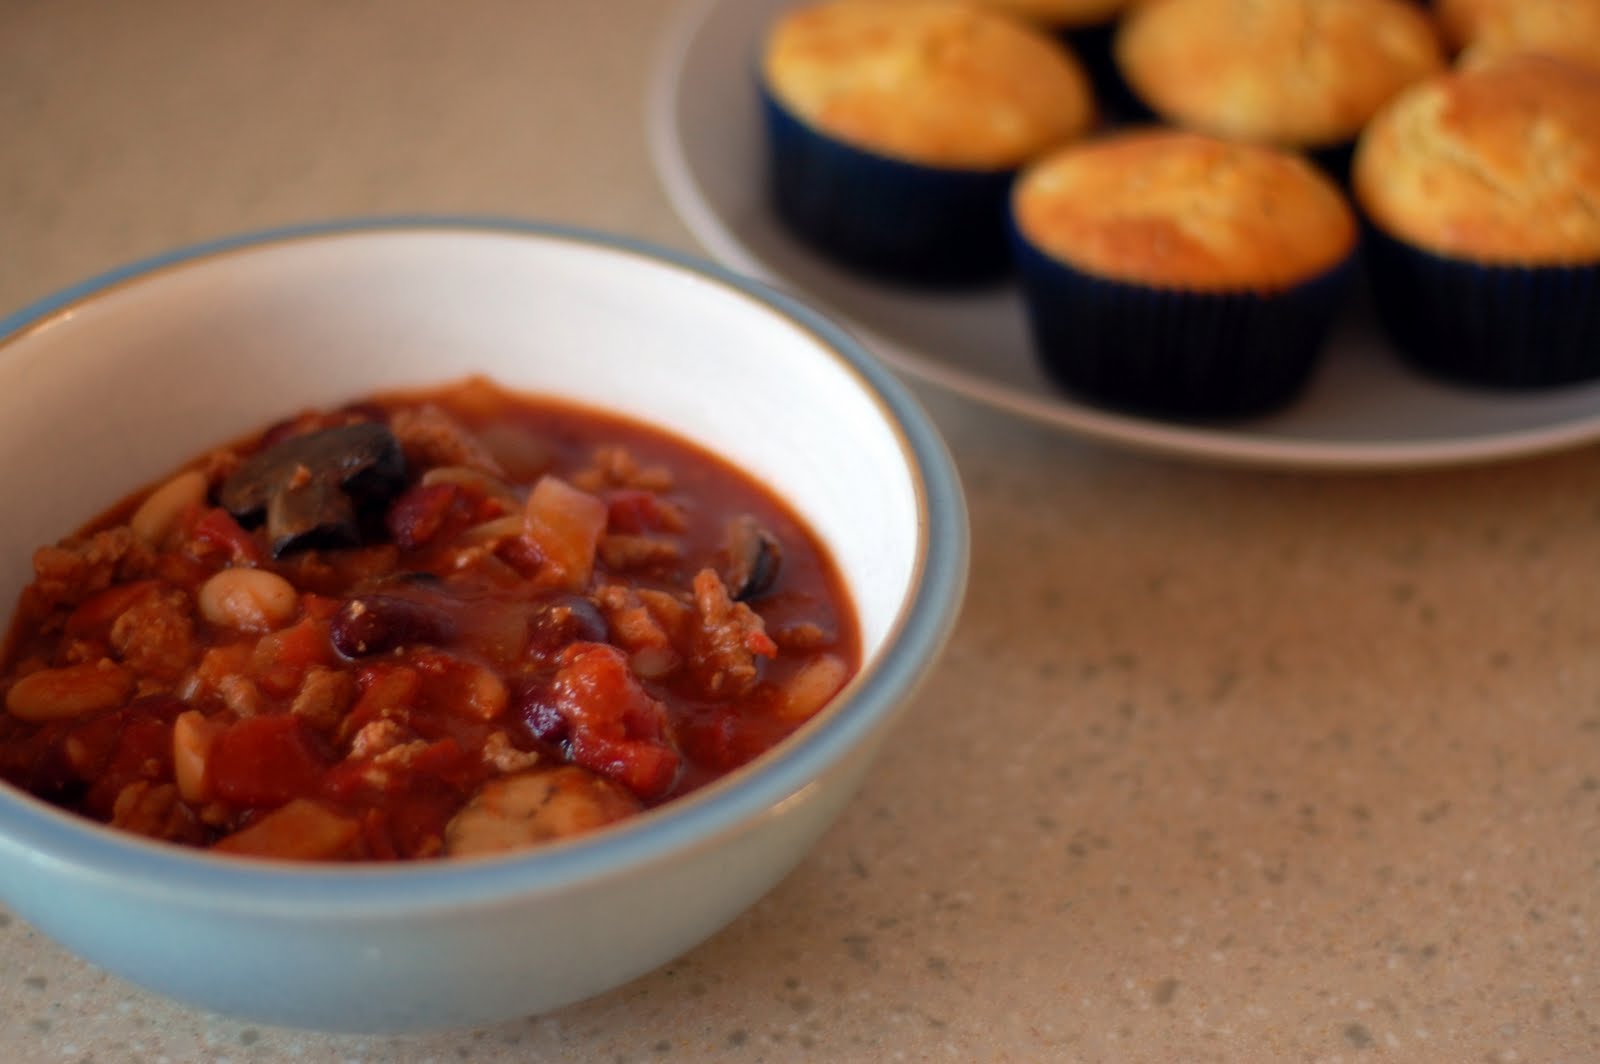
Chili is something I throw together quite often. I have posted various recipes on this blog and always seem to be changing it up. The one thing I don't do is spice up the side, usually broccoli or a corn muffin or corn cake. So tonight I had some extra time (read: youngest was sleeping and oldest was playing quietly in his room) to whip up some corn bread muffins with just a little oomph in them.

The rosemary just makes these muffins so much more than corn muffins. And while they are pointy, they're worth it. Plus chili usually doesn't add up to too many points when you add as many veggies in as I do. This time I even threw in some mushrooms I had left over. Yum!

Inspiration: Dorie Greenspan's Baking from My Home to Yours


Rosemary Corn Muffins
  • 1 cup all-purpose flour
  • 1 cup corn meal
  • 1 teaspoon baking soda
  • 2 1/2 tablespoons baking powder
  • 1 teaspoon salt
  • 1 pinch nutmeg
  • 1/4 cup sugar
  • 1 tablespoon rosemary, finely chopped 
  • 3 tablespoons butter, melted and cooled
  • 1 egg
  • 1 egg yolk
  • 3 tablespoons canola oil
  • 1 cup buttermilk 
  • 1 cup baby corn ears

Preheat oven to 400 degrees and prep muffin tin with either cooking spray or liners.

Mix dry ingredients together. If you'd like more rosemary flavor, mix rosemary and sugar and rub together with your fingers. Set aside.

Whisk wet ingredients together (leave corn out) and pour into dry ingredients. Whisk or stir together with a spatula. Don't overstir and don't worry about lumps! Once everything is combined fold in the corn.

Fill muffin tin and bake for 15-18 minutes or until the tops are golden brown. Let cool on a wire rack and enjoy with a nice bowl of chili!

Apple Carrot Nut Muffins {3 WW+ Breakfast}

I was hosting a playgroup playdate at my house yesterday morning and didn't really have much planned in the form of snacks. I had the usual toddler fair of dried cranberries, cheerios and pretzels but nothing of substance for the mamas. So I asked Ethan what he wanted. And like your typical kid he asked for cupcakes. So I made the next best thing.

I grabbed one of my recipe books and started flipping. And fell upon a recipe that I had all of the ingredients for (sans a few substitutions). And the results were pretty darn yummy. I'll definitely be making these muffins for future get togethers.

Inspiration: Williams Sonoma Essentials of Baking


Apple Carrot Nut Muffins
  • 1 cup all-purpose flour
  • 1 cup bread flour
  • 1/3 cup SPLENDA® brown sugar blend (or 2/3 cup regular brown sugar)
  • 2 teaspoon baking powder
  • 1/2 teaspoon baking soda
  • 1/2 teaspoon table salt
  • 2 egg
  • 1 1/2 cup vanilla fat-free yogurt
  • 1/4 cup butter
  • 2 small apples, 1 shredded and 1 diced small
  • 1 cup shredded carrots
  • 1/2 cup pecan halves, chopped
  • 1 tablespoon sugar
  • 1 teaspoon ground cinnamon

Preheat oven to 425 degrees. Grease 2 muffin tins or prep with cupcake liners.

In a large bowl whisk flours, sugar, baking powder, soda & salt together until well mixed.  In a seperate large bowl whisk eggs. Add yogurt and butter. Stir until combined.

Add liquid ingredients to dry ingredients and mix just until incorporated together, about 15 strokes. Do not overmix. Fold in apples, carrots & pecan halves.

Fill muffin tins 2/3rds of the way full. Mix 1 tablespoon sugar with 1 teaspoon cinnamon. Top each muffin with sugar blend. Bake for 15-18 minutes or until golden brown.

24 servings | 3 WW+ Points*

*by omitting the nuts you can reduce this recipe to 2 WW+ points each

A great quick breakfast alternative for those on the go

Chocolate Chip Pumpkin Muffin Bites {1 WW+ Dessert}

Joseph was out with a friend for dinner last night so my little man and I decided to bake up some goodies for dessert. I started out making regular muffins but then decided to make them mini instead! I'm glad I did. These things were the perfect size for my toddler and the perfect size for me.

Plus they're only 1 point each so I can control how much indulgence I want and not have to use up too many points. The mini chocolate chips really make these tastier. You get chocolate in every single bite and feel like you're really getting away with something.

Super easy and yummy results! It's a win-win with this recipe :) And if you're making the standard muffin size you should get 24 muffins at 3 WW+ points each (versus my 72 mini muffins). But remember to calculate the points value if you change anything. The original recipe did not include an egg but the egg doesn't add anything to the points value and, I think, definitely adds something to the recipe.

Inspired By: Our Best Bites


Chocolate Chip Pumpkin Muffin Bites
  • 1 package spice cake mix
  • 1 15oz can pumpkin puree (not pumpkin pie mix)
  • 1 egg
  • 1 3/4 cup mini chocolate chips
Preheat oven to 350 degrees. Grease a mini muffin pan with Pam cooking spray. Mix cake mix, pumpkin puree and egg together until combined. Fold in chocolate chips. Place 1 tablespoon of batter into prepared mini muffin pan. Place in oven and bake for 8 minutes or until a toothpick comes out clean.

72 Servings | 1 WW+ Point each

Chocolate Chip Banana Bread {6 WW+ Dessert}

I was craving sweets yesterday. I needed to bake and it needed to be on-plan. So I went in search of ingredients in the house and found 3 very ripe bananas. And instead of eating them I looked for a recipe that would use them up.

I came across this recipe on the Weight Watcher's website and read the reviews. Most people thoroughly enjoyed this bread so I knew I had to try it. I've tried other banana breads before that were "lighter" but always had problems with the moistness of the bread (I hate that word...). So I added some applesauce to the batter to combat the lack of butter or mass quantities of oil. And I succeeded in keeping this bread tasty! With just a hint of cinnamon and a sprinkle of chocolate chips this was the perfect dessert to enjoy with a cup of coffee.

Inspiration: Weight Watchers


Chocolate Chip Banana Bread
  • 1 1/4 cup all-purpose flour
  • 1/2 cup unpacked brown sugar
  • 1/2 teaspoon table salt
  • 1/2 teaspoon baking soda
  • 1/4 teaspoon baking powder
  • 1 teaspoon vanilla extract
  • 3 tsp canola oil
  • 1 large egg, beaten
  • 2 large egg white, beaten
  • 3 large bananas, ripe
  • 1/4 cup unsweetened applesauce
  • 1 teaspoon ground cinnamon
  • 1/4 cup semisweet chocolate chips
  • 1 cup quick cooking rolled oats

Preheat oven to 350°F. In a large bowl, stir together dry ingredients. Add oil, applesauce and eggs; mix thoroughly.

In a smaller bowl, mash bananas with a potato masher or fork. Add bananas and oatmeal to batter. Fold in chocolate chips

Spray a loaf pan with cooking spray. Pour batter into pan and bake until top of loaf is firm to touch, 45 to 55 minutes. Remove from oven and allow to cool in pan for 5 minutes. Flip out and cool on a wire rack for another 10 minutes.

Serves 10 | 6 WW+ Points

Berry Muffin Revisited {3 WW+ Points Breakfast}

My son woke up this morning and requested muffins for breakfast. Since we were out of our staple Trader Joe's blueberry fiber muffins we had to make some from scratch. I used a recipe I had used in the past but had to make a few adjustments with what we had on hand since Daddy used some of the last of our baking ingredients last night for chocolate chip cookies (totally not WW friendly!).

These were pretty good. Definitely hit the spot and satisfied my muffin craving! And my son enjoyed them too. I think he loved helping make them more than eating them though. Cracking eggs are probably his favorite thing to do these days. Good thing Mommy and Daddy love to bake!

Inspiration: Adapted from Here


Healthy Berry Muffins

  • 1 1/2 cup all-purpose flour
  • 1/2 tsp baking soda
  • 2 tsp baking powder
  • 1/2 tsp table salt
  • 1 egg
  • 1/2 cup raw sugar
  • 1 tsp vanilla extract
  • 2 Tbsp canola oil
  • 1/4 cup Unsweetened Apple Sauce
  • 2/3 cup buttermilk
  • 1 cup blueberries

Preheat oven to 375 and lightly grease a muffin tin.
In a medium bowl, sift together the whole wheat and all purpose flours, baking powder, baking soda and salt. Set aside.
In a second bowl, beat the egg with the sugar until smooth. Mix in the vanilla, oil, zest, applesauce and buttermilk. Add the wet ingredients to the dry ingredients. Fold the berries into the mixture. Don't overmix the batter. Your muffins could become tough and the batter may start turning colors from overworking the batter.

Spoon the mixture into the muffin tin and bake for about 18-20 minutes, or until a toothpick inserted in the center comes out clean.

12 servings | 3 WW+ Points

Monkeying Around

I just recently stumbled across this recipe this past December. Sadly I don't know where I found it but I am so happy I did. I hadn't had a chance to blog about it because each time I make it everyone always pounces on it right away. Yeah, it's super good!

Well this past weekend I had a baby shower to go to for my friend Alanna and her one request for the day was to have Monkey Bread. So my friend Rachel asked if someone could bring it. I responded at once since I love the stuff and it's so easy. And I used up my extra points for the week on it... mmmmmm.

Source: Beantown Baker


Simple Monkey Bread

4 cans Pillsbury biscuit (get the kind that come in a 4 pack, the small ones, not the Grands)

Sugar coating:
  • 2/3 brown sugar - I was running low on brown sugar, so I used 1/3 cup white and 1/3 cup brown
  • 1/2 tsp cinnamon

Syrup topping:
  • 3/4 cup (1 1/2 sticks) butter
  • 1 cup brown sugar
  • 1/2 Tbsp cinnamon

Preheat oven to 350. Spray your angel food cake or bundt pan.

Mix the sugar coating in a ziplock bag (feel free to add more cinnamon and/or sugar if you run out during the coating process). Cut the biscuits into 4 (kitchen shears work great for this). Drop the biscuit pieces into the ziplock bag and shake to coat. Drop coated biscuit pieces into the prepared pan.

Bring syrup ingredients to a boil. Boil for 5 minutes, then pour over biscuit pieces. Bake for 35 minutes.

Turn over onto plate and serve while hot.

You don't want to know how many points this is per serving ;)

Cheddar!

I love an easy side item when it comes to dinner. Some days I ::gasp:: leave out the sides and just serve the main course. I try not to leave out vegetables but some days it's just hard to even get dinner on the table. With the help of a crock pot I had a roast ready to go and with the help of the frozen veggie bags from Costco I had the vegetable but I really wanted something savory and bready to go with my meal

Enter the baking mix from Trader Joes. This stuff is great. It's my normal mix for pancakes (when I don't make my own mix) and has lots of potential for other things like coffee cake and these biscuits!


Cheddar Biscuits

  • 3 3/4 cups Trader Joes Baking Mix
  • 1/4 cup softened salted butter (I always use unsalted)
  • 1 1/2 cups cold milk
  • 1/2 cup shredded cheddar cheese

Add baking mix and butter to a large bowl. Using a pastry knife cut butter into the mix until lumps resemble coarse meal (butter can also be pinched in with fingers)

Add milk and optional ingredients (cheddar in my case) for flavor variations. Stir all ingredients together until moistened. Using an ice cream scoop or large spoon, drop dough onto a baking pan. Bake in a 400 degree oven for 12-14 minutes or until golden brown Serve warm

Pumpkin Perfection

This past Sunday Joseph, the baby and I went to the pumpkin patch. And I had one thing on my mind... bringing home some sugar pumpkins! No carving pumpkins for me. I want ones I can eat. So we went, took lots of pictures of the little one playing with the pumpkins and picked out all kinds of wonderful squash and pumpkins.

This was my first time baking and pureeing a pumpkin but I think I did pretty well. It was soo easy. I now wonder why I never tried this before. This will definitely be the way I do pumpkin in the future.

Source: Adapted from BakeSpace and My Head


Pumpkin Muffins with Maple Honey Cream Cheese Frosting
  • 3 cups flour
  • 1 tsp. cinnamon
  • 1 tsp. nutmeg
  • 1 tbsp. and 1 tsp. pumpkin pie spice
  • 1 tsp. salt
  • 1 tsp. baking soda
  • 4 eggs
  • 1 ¼ cups applesauce
  • 2 cups sugar
  • 2 cups fresh pumpkin puree

Combine the flour, spices, salt and baking soda in a medium bowl. Mix well and set aside. In the bowl of an electric mixer, combine the eggs, applesauce, sugar and pumpkin puree. Mix until well combined. Add in the dry ingredients and mix on low speed until just combined.

Preheat the oven to 350°. Line two muffin pans with paper liners. To assemble the muffins, fill each muffin well with batter. Bake for 20-25 minutes. Let cool completely before serving.

Maple Honey Cream Cheese Frosting
  • 8oz cream cheese
  • 1/2 cup confectioners sugar
  • 3 tablespoons brown sugar
  • 1/4 cup honey
  • 1/4 cup maple
  • 1/2 cup whipping cream

Whip all ingredients until soft peaks form. You can either use the frosting right away or refrigerate it a bit to let it stiffen.

* Once you frost the muffins you can top with a few chopped pumpkin seeds for a little extra something.

Sandwich Bread

I love a simple sandwich bread. Well... any bread is simple when you have a bread maker. It's sooo much easier than kneading, waiting, kneading, waiting, baking, waiting and than eating! Now all I have to do is throw in the ingredients, push a button, and wait. Much less work than the old option (although I do love to make a few doughy things by hand...).

So this past week I got on a bread kick. Made bread twice. Usually I only make a loaf once or twice a month so twice in one week is pretty big :) Since you really have to eat most loaves in a day or two I always make the office happy when I bake because the bread comes to work along with me the day after.

This loaf was great for the ham sandwiches I made. YUM!

Source: The Bread Lover's Bread Machine Cookbook


Milk Bread
  • 1 1/3 cups whole milk (I used low fat...)
  • 2 tablespoons unsalted butter or margarine cut into pieces (I used butter)
  • 4 cups bread flour
  • 2 tablespoons sugar
  • 1 tablespoon plus 1 teaspoon gluten
  • 2 teaspoons salt
  • 2 1/2 teaspoons SAF yeast or 1 tablespoon bread machine yeast

Place all ingredients into the pan according to the order in the manufacturer's instructions (I put in order as shown above, liquids first, than dry ingredients with yeast last... I always make a little ditch in the middle of my dry ingredients to put the yeast so it doesn't touch the liquid too soon). Set crust on medium or dark, and program for the Basic cycle. Start the machine.

When baking cycle ends, immediately remove bread from pan and place on rack. Let cool to room temperature before slicing (I know how tempting this is but wait it out!).

Enjoy toasted with some butter or with a nice slab of meat or veggies on it in a sandwich!

Cinnamon Goodness


I recently co-hosted a baby shower for my friend Amanda (pictured above... isn't she such a cute pregnant woman!?) and needed a good breakfast/brunch recipe to try out. I started looking through my google reader and a few people were making Alton Brown's overnight cinnamon rolls. They looked sooo yummy so I decided to give them a try.

This is definitely a recipe I will use again. It was so simple and you can either bake the rolls in the morning or freeze them and bake them when you want them! The first batch (I made two seperate pans, one for the party and one for Joseph and I for Sunday morning) was a bit over baked so I suggest not going by a timer and checking them about 5 minutes earlier than the recipe says. The second batch was to die for! And the icing... oh, I'm using this for other things too. Not too cream cheesy, light and perfect!

I haven't ever really been afraid of yeast and love how things turn out when you use it so if you haven't delved into using yeast when baking I highly suggest this recipe. BTW... it says to let the dough rise for 2 1/2 hours but I let it rise for 5 (took the baby shopping) and I think they turned out even better. I read some of the comments on Alton's page and others also found that letting it rise longer yields better results.

Source: Alton Brown


Alton Brown's Overnight Cinnamon Rolls

  • 4 large egg yolks, room temperature
  • 1 large whole egg, room temperature
  • 2 ounces sugar, approximately 1/4 cup
  • 3 ounces unsalted butter, melted, approximately 6 tablespoons
  • 6 ounces buttermilk, room temperature
  • 20 ounces all-purpose flour, approximately 4 cups, plus additional for dusting
  • 1 package instant dry yeast, approximately 2 1/4 teaspoons
  • 1 1/4 teaspoons kosher salt
  • Vegetable oil or cooking spray

Filling:
  • 8 ounces light brown sugar, approximately 1 cup packed
  • 1 tablespoon ground cinnamon
  • Pinch salt
  • 3/4-ounce unsalted butter, melted, approximately 1 1/2 tablespoons

Icing:
  • 2 1/2 ounces cream cheese, softened, approximately 1/4 cup
  • 3 tablespoons milk
  • 5 1/2 ounces powdered sugar, approximately 1 1/2 cups

For the dough: in the bowl of a stand mixer with the whisk attachment, whisk the egg yolks, whole egg, sugar, butter, and buttermilk. Add approximately 2 cups of the flour along with the yeast and salt; whisk until moistened and combined. Remove the whisk attachment and replace with a dough hook. Add all but 3/4 cup of the remaining flour and knead on low speed for 5 minutes. Check the consistency of the dough, add more flour if necessary; the dough should feel soft and moist but not sticky. Knead on low speed 5 minutes more or until the dough clears the sides of the bowl. Turn the dough out onto a lightly floured work surface; knead by hand about 30 seconds. Lightly oil a large bowl. Transfer the dough to the bowl, lightly oil the top of the dough, cover and let double in volume, 2 to 2 1/2 hours.

Combine the brown sugar, cinnamon and salt in a medium bowl. Mix until well incorporated. Set aside until ready to use.

Butter a 9 by 13-inch glass baking dish. Turn the dough out onto a lightly floured work surface. Gently shape the dough into a rectangle with the long side nearest you. Roll into an 18 by 12-inch rectangle. Brush the dough with the 3/4-ounce of melted butter, leaving 1/2-inch border along the top edge. Sprinkle the filling mixture over the dough, leaving a 3/4-inch border along the top edge; gently press the filling into the dough. Beginning with the long edge nearest you, roll the dough into a tight cylinder. Firmly pinch the seam to seal and roll the cylinder seam side down. Very gently squeeze the cylinder to create even thickness. Using a serrated knife, slice the cylinder into 1 1/2-inch rolls; yielding 12 rolls. Arrange rolls cut side down in the baking dish; cover tightly with plastic wrap and store in the refrigerator overnight or up to 16 hours.

Remove the rolls from the refrigerator and place in an oven that is turned off. Fill a shallow pan 2/3-full of boiling water and set on the rack below the rolls. Close the oven door and let the rolls rise until they look slightly puffy; approximately 30 minutes. Remove the rolls and the shallow pan of water from the oven.

Preheat the oven to 350 degrees F.

When the oven is ready, place the rolls on the middle rack and bake until golden brown, or until the internal temperature reaches 190 degrees F on an instant-read thermometer, approximately 30 minutes.

While the rolls are cooling slightly, make the icing by whisking the cream cheese in the bowl of a stand mixer until creamy. Add the milk and whisk until combined. Sift in the powdered sugar, and whisk until smooth. Spread over the rolls and serve immediately.

Ethan watching the KA do its thing


A great idea for baby shower decorations is to use what you have around the house. I took some rope and some clothes pins and pinned up these onesies for decorations. And the mommy-to-be can take them home and use them for her little one!


I also love the diaper cake idea as a centerpiece for any baby shower. And it's functional! All the newborn diapers a mom needs in one little cake!

Yeasty Buns

I don't know why but today I had an inkling to bake something but I didn't want to bake cookies (although my husband would have really appreciated that). I started to think about dinner and panic struck. I had no idea what I was going to make. So I looked in the fridge to see if I'd thawed out any meat. I did! I had a pound of ground beef that I took out last night. Perfect! Burger night.

Oh, not perfect. No buns. And I have a weird husband who doesn't like to eat a burger without a bun. I know, I know... he's just not normal :) So what did I do? I made hamburger buns! I have been wanting to try out this recipe for quite some time. It's been printed out and in my recipe book for months! And I don't know why I didn't try it sooner. It was sooo easy. I used my kitchen aid mixer to help with some of the kneading so I didn't even have to do any hard work.

Source: Adapted from Allrecipes.com


Hamburger Buns
  • 1 cup milk
  • 1/2 cup water
  • 1/4 cup butter
  • 1 packet dry yeast
  • 4 1/2 cups flour (separate 1 3/4 cups out)
  • 2 tablespoons granulated sugar
  • 1 1/2 teaspoon salt
  • 1 egg
Heat milk, water & butter in a pan until very warm (120 degrees). Mix 1 3/4 cup flour, sugar, salt & yeast in a bowl. Add flour mixture to KA mixer (I used my kneading hook attachment for the whole thing). Add milk mixture to mixer and mix. Add egg to bowl and mix. Slowly add the additional flour 1/2 cup at a time until completely incorporated.

Once everything is mixed well and dough has pulled together knead in mixer for about 8 minutes. Remove dough from bowl and divide into 12 equal pieces. Roll into balls and flatten a bit. Place on a greased baking tray. Cover & let rise for 30-35 minutes.

Bake at 400 degrees for 10-12 minutes or until golden brown. Let cool and enjoy!

I served some teriyaki burgers on my buns and boy were they good!

Homemade is always better


Making these tortillas were a lot of fun! I didn't use the pasta attachment this recipe said to use... I just rolled them out by hand (can you tell?). These were super yummy with seasoned beef and cheese. I made quesadillas the next day with the left overs :)

Sweet Halloween

Joseph gets really weird inklings to bake things. The day before Halloween he decided to make sugar cookies. Totally normal, right? He wanted to make them into Halloween shape cookies, bats, pumpkins, ghosts. But than his plans changed as he started looking in our recipe books for a different sugar cookie.

He started looking in our Essentials of Baking book from Williams Sonoma and decided he was going to make cinnamon rolls instead! I was a bit shocked because even I haven't made cinnamon rolls before yet. I was so proud :) And it was the first time he used yeast in a recipe and did a great job!

He made the dough at night and than when I got home I took the rolls out to get to room temperature so that by the time Joseph got home he could pop them in the oven before we went over to the in-laws house. These babies went fast! We have two left to enjoy this morning :)

Source: William Sonoma Essentials of Baking


Cinnamon Rolls


Dough:
  • 2 packages (5 teaspoons) active dry yeast
  • 1 cup whole milk, heated to warm (105-115 degrees Fahrenheit)
  • 1/2 cup granulated sugar
  • 3 large eggs
  • 5 1/2 cups all purpose flour, plus extra for the work surface
  • 2 teaspoons salt
  • 1 teaspoon ground mace
  • grated zest of 1 orange
  • 1/2 cup unsalted butter, at room temperature

Filling & Egg Glaze:
  • 6 tablespoons granulated sugar
  • 2 teaspoons ground cinnamon
  • About 1/4 cup unsalted butter, melted, for brushing
  • 1 large egg, beaten

Vanilla Glaze:
  • 1/2 cup confectioners' (icing) sugar, sifted
  • 1/4 cup heavy (double) cream
  • 1 teaspoon vanilla extract (essence)

By Hand -
To make the dough, in a large bowl, dissolve the yeast in the warm milk and let stand until foamy, about 5 minutes. Add the granulated sugar, eggs, 5 cups of the flour, salt, mace, orange zest, and butter and stir with your hand or a wooden spoon until a rough mass forms. Using a plastic pastry scraper, scrap the dough out onto a lightly floured surface. Knead the dough, working in the remaining flour, until it is smooth and elastic, 5-7 minutes. The dough should be soft, but not sticky

Form the dough into a ball, transfer it to a lightly oiled bowl, and cover the bowl with plastic wrap. Let the dough rise in a warm, draft-free spot until it doubles in bulk, 1 1/2 - 2 hours.

To make the filling, in a small bowl, stir together the granulated sugar and cinnamon. Set aside. Line a half-sheet pan or rimless baking sheet with parchment (baking) paper.

Punch down the dough and turn it out onto a lightly floured work surface. Cut it in half with a sharp knife or a bench scraper. Lightly dust the surface of the dough with flour. Roll out one-half of the dough into a 10 by 16 inch rectangle. Brush the surface of the rectangle with half of the melted butter, then sprinkle evenly with half of the cinnamon-sugar mixture. Starting at the long side farthest from you, roll up the rectangle toward you into a log.

Cut the log crosswise into 8 slices each 2 inches thick. Place the slices, cut side up, in a circle, side by side and barely touching, on half of the prepared pan.

Repeat with the remaining half of the dough, melted butter, and cinnamon-sugar mixture, arranging the rolls on the other half of the pan. For crisper rolls, space them evenly on the pan.

Cover the rolls loosely with a kitchen towel and let them rise in a warm, draft-free spot until they have doubled in size and are spongy to the touch, 30-40 minutes. Alternatively, place the rolls in the refrigerator and let them rise slowly overnight.

Position a rack in the middle of the oven, and preheat to 400 degrees.

If you have refrigerated the rolls, let them come to room temperature for 30-40 minutes. Brush the rolls lightly with the beaten egg. Bake until golden brown and a toothpick inserted into the center of a roll comes out clean, 20-25 minutes (I used my nose to tell Joseph when to take them out).

Just before the rolls are ready, make the vanilla glaze. In a small bowl, stir together the confectioners' sugar, cream & vanilla until the sugar dissolves completely and the mixture thickens slightly.

Let the rolls cool slightly in the pan on a wire rack, then brush on the glaze while they are still warm. Pull the buns apart and serve warm.

Last Minute Dessert

I really wanted something sweet to end the day but ice cream just didn't sound good (yeah, I know, I'm weird when pregnant). So I started going through my baking books and ran across a recipe that fit my guidelines... no more than 1 egg cause that's all I had in the fridge. Well... I ran across a recipe that asked for no eggs AND could serve as breakfast the next day! Yay for me!

The recipe I found was a scone recipe in Williams Sonoma's Essentials of Baking book. This is a great book. We've made tarts, pies and muffins out of this book so I knew the scones wouldn't disappoint. These baked up nice and were very moist and tasty. I left out one of the main ingredients because I didn't have any and chose not to sub anything in and they were still amazing. Oh, and did I mention that it took me less than 30 minutes from start to finish? Oh yeah!

Source: Essentials of Baking p. 110


Currant Cream Scones

For the dough:
  • 2 cups all purpose flour
  • 1/2 cup sugar
  • 1 tablespoon baking powder
  • 1/2 teaspoon salt
  • 6 tablespoons butter
  • 3/4 cup heavy cream
  • 1/2 cup currants (I omitted)

For the Topping
  • 2 tablespoons heavy cream
  • 1 tablespoon sugar (fine sugar is recommended)
  • 1 teaspoon cinnamon
Preheat oven to 425 degrees. Place all dry ingredients into food processor and pulse 2-3 times to mix. Add butter, cut into 1/2 tablespoon pieces, and pulse for 7-8 times. Add cream and pulse until just moist.

Dump the dough onto a floured work surface and form into a flat circle, 1/2 inches in height. Cut round dough into six equal wedges and place onto a prepared pan. Top each wedge with heavy cream. Mix sugar and cinnamon in a small bowl and sprinkle over each wedge.

Bake for 13-17 minutes or until golden brown (I baked for 15 minutes and they were perfect). Serve warm. Store in an air tight container for up to two days.

Fab Foccacia

I wanted to make something unique for Mother's Day this year so I started looking for ideas for themed dinners. I found a great Pork Chop recipe from Noodle Nights and Muffin Mornings that had a yummy sounding Balsamic Glaze so I based the rest of my meal off of that.

To start I needed a great bread to soak up the glaze on the plate so I started looking around the blogs I frequent and found a great focaccia recipe on Annie's Eats. It looked challenging and I was up for a challenge. This recipe did not disappoint. For the effort I put into it the flavor, texture and look was PERFECT. I had nothing but rave reviews from Joseph's parents and brother and sister in law. I will definitely be making this again.

Source: Annie's Eats


Herb Focaccia Bread

  • 5 cups unbleached high-gluten or bread flour
  • 2 tsp. salt
  • 2 tsp. instant yeast
  • 6 tbsp. olive oil
  • 2 cups water, at room temperature
  • ¼ to ½ cup herb oil (recipe below)
Stir together the flour, salt and yeast in the bowl of an electric mixer. Add the oil and water and mix on low speed with the paddle attachment until the ingredients form a wet, sticky ball. Switch to the dough hook and mix on medium speed for 5-7 minutes, or as long as it takes to create a smooth, sticky dough. The dough should clear the sides of the bowl but stick to the bottom of the bowl. (You may need to add additional flour to firm up the dough enough to clear the sides of the bowl, but the dough should still be quite soft and sticky.)

Sprinkle enough flour on the counter to make a bed about 6 inches square. Using a scraper or spatula dipped in water, transfer the sticky dough to the bed of flour and dust liberally with flour, patting the dough into a rectangle. Wait 5 minutes for the dough to relax.

Coat your hands with flour and stretch the dough from each end to twice its size. Fold it, letter style, over itself to return it to a rectangular shape. Mist the top of the dough with spray oil, again dust with flour and cover loosely with plastic wrap.

Let rest for 30 minutes. Stretch and fold the dough again; mist with spray oil, dust with flour and cover. After 30 minutes, repeat this one more time.

Allow the covered dough to ferment on the counter for 1 hour. It should swell but not necessarily double in size.

Line a 17×12” sheet pan with baking parchment and proceed with the shaping and panning (instructions below).

Loosely cover the pan with plastic wrap and refrigerate the dough overnight (or for up to 3 days).

Remove the pan from the refrigerator 3 hours before baking. Drizzle additional herb oil over the surface and dimple it in. (You can use all of it if you want; the dough will absorb it even though it looks like a lot.) This should allow you to fill the pan completely with the dough a thickness of about ½-inch. Add any other pre-proof toppings desired. Again, cover the pan with plastic and proof the dough at room temperature for 3 hours, or until the dough doubles in size, rising to a thickness of nearly 1-inch.

Preheat the oven to 500° with the oven rack on the middle shelf. Gently place any pre-bake toppings on the dough.

Place the pan in the oven. Lower the oven setting to 450° and bake for 10 minutes. Rotate the pan 180 degrees and continue baking the focaccia for 5-10 minutes, or until it begins to turn a light golden brown. If you are using any during-baking toppings, sprinkle them on at this point and continue baking an additional 5 minutes or so. The internal temperature of the dough should register 200° (measured in the center), and the cheese, if using, should melt, not burn. Remove the pan from the oven and immediately transfer the focaccia out of the pan onto a cooling rack. If the parchment is stuck on the bottom, carefully remove it by lifting the corner of the focaccia and peeling it off the bottom with a gentle tug.

Allow the focaccia to cool for at least 20 minutes before slicing and serving.

Shaping Focaccia:
Drizzle ¼ cup of olive oil over the paper and spread it with your hands or a brush to cover the entire surface. Lightly oil your hands and using a plastic or metal pastry scraper, lift the dough off the counter and transfer it to the sheet pan, maintaining the rectangular shape as much as possible.

Spoon half of the herb oil over the dough. Use your fingertips to dimple the dough and spread it simultaneously. Do not use the flat of your hands – only the fingertips – to avoid tearing or ripping the dough. Try to keep the thickness as uniform as possible across the surface. Dimpling allows you to de-gas only part of the dough while preserving gas in the non-dimpled sections. If the dough becomes too springy, let it rest for about 15 minutes and then continue dimpling. Don’t worry if you are unable to fill the pan 100 percent, especially the corners. As the dough relaxes and proofs, it will spread out naturally. Use more herb oil as needed to ensure that the entire surface is coated in oil.

Herb Oil:
Warm ½ cup olive oil over low heat in a small saucepan. Add about 4 tsp. of dried herbs, such as basil, parsley, oregano, thyme, rosemary, or sage. Add about ¾ tsp. of kosher salt, ¼ tsp. black pepper, and 1-2 finely minced cloves garlic. You may also add paprika, ground cayenne pepper, fennel seeds or onion powder to taste. Allow to remain on low heat for about 1-1 ½ hours to allow the oil to become infused with the flavors. Store any leftover herb oil in the refrigerator for up to 2 weeks.

Banana blah...

I am on the hunt for a low-fat banana bread recipe and have 5 that I am going to work through over the next few weeks. I had 4 very ripe bananas so I used two in this recipe and am saving two for tomorrow when I attempt another recipe. This one was good except for the fact that the cooking time was way off. 1 hour of cooking = burnt, dry banana bread.

I added mini chocolate chips instead of pecans in order to make it a bit more of a dessert and these are the only reason why I am eating it... slowly :)

Source: Weight Watchers message boards


Chocolate Chip Banana Bread
  • 1 cup all purpose flour
  • 1 cup whole wheat flour
  • ½ tsp. salt
  • 1 tsp. baking soda
  • 2 bananas, very ripe
  • ½ cup egg substitute
  • ¼ cup honey
  • ¼ cup chopped pecans (I subbed mini chocolate chips)

Preheat oven to 350 degrees. Lightly spray a 9x5 loaf pan with nonstick spray. In a medium bowl, combine flours, salt and baking soda; set aside. In a large bowl, mash bananas with fork; add egg substitute, honey, flour mixture and pecans. Scrap into prepared pan and bake 1 hour or until tests done.

Yield: 12 servings
2 WW points per serving

LinkWithin

Related Posts Plugin for WordPress, Blogger...