Showing posts with label Dinner. Show all posts

Meatloaf Muffins {6 WW+ Dinner}

I love cute food. And these meatloaf muffins are pretty darn cute. I mean, they're small, they're colorful and they taste amazing. I've noticed that when I make our meals in smaller portions my kids seem to enjoy them a lot more and eat more than they normally would. So anything that I can convert from a normal, larger size to muffin tin size is awesome.

A few years back I made some meatloaf muffins and blogged about them but they weren't anything special. And since I love meatloaf I wanted to play with one of my favorite recipes a bit and tweak it to make me happy. Well this recipe has done it! Not only do my kids love these meatloaf muffins, I love them too! And the smaller size isn't just great for the kids, it means portion control for me


Meatloaf Muffins
  • 1 20 ounce package 93/7 lean ground turkey
  • 3/4 cup Trader Joe's fire roasted onions & peppers
  • 2 garlic cloves, minced
  • 1 teaspoon Italian seasoning
  • 1 tablespoon Worcestershire sauce
  • 1 egg
  • 1/2 cup whole wheat panko bread crumbs
  • 1/2 cup light shredded cheese
  • 1/4 cup ketchup
  • 2 teaspoons dijon mustard
  • 1 tablespoon brown sugar

Preheat oven to 350 and take out muffin pan. Saute onions, peppers, & garlic until tender. Add Italian seasoning & stir. Set aside to cool.

Place ground turkey, Worcestershire sauce, egg, panko & cheese in a large bowl and mix until combined. Add in the cooled veggies and mix in. Form 12 small balls of mixture and place each ball in muffin well (balls will be roughly 1-1 1/2" in diameter).

Bake meatloaf muffins for 18-20 minutes. While muffins are cooking mix together ketchup, mustard & sugar. Once the 18-20 minutes are up take the muffins out of the oven and top with ketchup mixture. Put the muffins back in the oven for another 5 minutes. Let rest 3-5 minutes before serving with your favorite sides and veggies.

Serves 6 | 3 WW+ Points per muffin

Nutritional Info: 115 calories, 7g carbs, 5g fat, 12g protein, 1g fiber, 171g sodium

Buffalo Chicken Chili {5 WW+ Dinner}


When I saw this recipe it reminded me so much of the buffalo chicken dip I made for a friend's girls night in and I had to try it. Now as soon as I put it on my menu for the week I knew that my husband wouldn't like it. But there are quite a few recipes that I pass on because my husband won't like it. So while doing this challenge I figured why not try a recipe I wanted to eat. Something just for me. And this definitely was that recipe.

I was right. The hubs decided to order a pizza instead of trying a bite of this chili but I enjoyed a huge bowl. It was spicy, flavorful and creamy. I added greek yogurt and frozen corn kernels instead of the original recipe's creamed corn, and I also included some mozzerella cheese to the mix at the end for some added creaminess. I think I might try this again and add more chicken and some cream cheese to the mix . But I'll wait till I have my girlfriends over so my husband won't have to order another pizza.

Inspiration: Taste & See


Buffalo Chicken Chili
  • 2 frozen chicken breasts
  • 1/2 bottle Franks red hot sauce
  • 1 cup corn
  • 1 medium onion, chopped
  • 1 cup salsa
  • 2 cans tomato sauce
  • 1 can beans of your choice (I used pinto)
  • 1 can diced green chilies 
  • 1/2 cup plain greek yogurt
  • 1 cup shredded light mozzarella cheese

Add all ingredients except yogurt and cheese to the slow cooker and cook on low for 8 hours. Take chicken out and shred, add back in and include greek yogurt and cheese to the chili. Stir well and let cook another 15-30 minutes.

Serve with celery, a nice baguette, tortilla chips or anything else you might have on hand. I enjoyed using my celery as a spoon to eat my bowl. Kept me away from the extra carbs...

Serves 6 | 5 WW+ Points


Meatball Subs {9 WW+ Dinner}

A few months back I made a tasty meatloaf parmesan dish. After I made the patties for our dinner for two I formed the rest of the meat mixture into meatballs to be used later. These meatballs became the perfect star to this sub. The sub was tasty, filling and pleasant to look at. And I loved not feeling guilty about eating so much bread since I removed a bit of the inner part to make room for the meatballs and sauce.

The size of this meatball sub was a bit hard to wrap my hands around. I had to smoosh it a little bit to fit it into my mouth. When you have to smoosh a sandwich you know it's going to be good and fill you up! I froze extra meatballs and grabbed them out of the freezer as needed when I wanted my meatball sub fix. Definitely a great way to have an easy meal for later on in the week when it gets busier!

Inspired by my Italian Meatloaf Parmesan


Italian Meatball Subs
  • 18 Italian Meatballs (without the cheese)
  • 2 small baguettes of french bread, some of the insides removed
  • 1 1/2 cups marinara sauce, store bought or homemade
  • 6 slices provalone cheese, cut in 1/2
Slightly toast the french rolls in a toaster oven. Place two pieces of cheese (one whole slice) on one side of the roll and broil until just melted.

Add 1/4 cup of marinara sauce to each roll, either on top of the cheese or on the other piece of bread, and top with three meatballs. Close the sandwich up and enjoy!

For toddlers, just cut the sandwich into thirds so they can fit it in their hands and mouth easier. I know this made it much more easy for my son to eat. 

Serves 6 | 9 WW+ Points

Homemade Hamburger Buns {7 WW+ Bread/Side}

I love everything  about making bread. The smells, the texture, the taste. It's amazing how creating one little roll or loaf makes me so happy and proud. I did it. I played with yeast and it didn't turn into a rock. So when my husband asked about making buns for an upcoming holiday dinner we were hosting at the beginning of summer I went in search of a great recipe.

I suggested a recipe over on Annie's Eats since Annie has never failed me with her recipes. My husband glanced over it, said ok, and started doing something else. So when it was time to make the buns I was surprised when he announced that he'd be making them. Wait, what? He was going to attempt to play with yeast? Ok, go for it honey!

And boy was I happy that he took over. The recipe he chose was not my suggestion. He went with his trusty King Arthur Flour website and chose a bun recipe from them. The buns turned out great however they weren't as soft as we like our buns to be. So he took it upon himself to search for another recipe (on the same site) and wanted to try it out this weekend after I announced I was making root beer pulled pork for dinner. And he found a recipe that I am sure will become a weekly regular in this house. These buns are perfect for not only hamburgers but sandwiches as well. And boy are they soft and fluffy!

Inspiration: King Arthur Flour


Homemade Buns
  • 3/4 to 1 cup* lukewarm water
  • 2 tablespoons butter
  • 1 large egg
  • 2 cups King Arthur Unbleached All-Purpose Flour
  • 1 1/2 cups King Arthur Whole Wheat Flour
  • 1/4 cup sugar
  • 1 1/4 teaspoons salt
  • 1 tablespoon instant yeast
  • 2 tablespoons melted butter, reserved for topping
Mix and knead all of the dough ingredients, except the melted butter, by hand, mixer, or bread machine (we went with the bread machine) to make a soft, smooth dough. Cover the dough, and let it rise for 1 to 2 hours, or until it's nearly doubled in bulk.
Gently deflate the dough, and divide it into 8 pieces. Shape each piece into a round ball; flatten to about 3" across. Place the buns on a lightly greased or parchment-lined baking sheet, cover, and let rise for about an hour, until noticeably puffy.

Brush the buns with about half of the melted butter. Bake the buns in a preheated 375°F oven for 15 to 18 minutes, until golden. Remove them from the oven, and brush with the remaining melted butter. This will give the buns a satiny, buttery crust.

Cool the buns on a rack.

Serves 8 | 7 WW+ Points (and so worth it!)

*For best results (a smooth, slightly soft dough), use the smaller amount of water in summer (or in a humid environment), the greater amount in winter (or in a dry climate); and something in between the rest of the time.

Italian Meatloaf Parmesan {7 WW+ Dinner}

I had exhausted all of my ground turkey and ground beef recipes and needed something that was different but would satisfy me and the husband. So I went to a blog that I knew wouldn't disappoint. Joelen always has the best spins on recipes. I knew if I tried something from her that I could please everyone in the family. And I was right!

This dish was great! Perfect and flavorful. I may just use this for our new meatball recipe. Plus I can double it up and freeze left over meatballs for future meals! I love being able to do that. Makes dinnertime that much easier with options in the freezer. If you have some ground turkey or ground beef in the fridge or freezer ready to use then try this one out!
 
Inspired by What's Cookin', Chicago? 
Originally from Michael Chiarello


Italian Meatloaf Parmigiana
  • 1 tablespoon extra-virgin olive oil
  • 1 red pepper, seeded, diced
  • 1/2 onion, diced
  • 2 teaspoons (about 3 cloves) chopped garlic
  • 1 pound 93% lean ground turkey
  • 1 egg
  • 1/2 cup seasoned bread crumbs
  • 1 cup grated Parmesan
  • 1 tablespoon Worcestershire sauce
  • 1 tablespoon balsamic vinegar
  • 1 tablespoons dried basil
  • 1 tablespoon dried parsley
  • 1 teaspoon salt
  • 1/2 teaspoon black pepper
  • 2 cups marinara sauce (jarred or homemade); divided
  • 1/2 cup part skim shredded mozzarella cheese
  • 1/2 cup fat free shredded mozzarella cheese
Preheat oven to 350 degrees F. Heat olive oil in a medium saute pan over medium heat and add the peppers, onions and garlic. Saute until just soft, remove to a plate and cool.

When the peppers and onions are cool, combine all of the remaining ingredients together except for the marinara and shredded cheese.

Form 6 large patties* from the meat mixture and place on a lightly greased baking sheet. Top with 1 cup of the marinara making sure to spread evenly over the top. Bake for approximately 25 to 30 minutes to ensure it's cooked through.

Remove from the oven and top with shredded cheese; return to oven for 5 minutes to allow cheese to melt. Remove from oven and let rest for 5 minutes.

Toss your favorite pasta with the reserved sauce. Serve meatloaf on top of the pasta.

Serves 6 | 7 WW+ Points (not including pasta)

* You can also form 12-18 meatballs instead of patties if you want a smaller portion of meat. I formed 2 patties and made the rest of the meat mixture into meatballs to use later. Worked out perfectly for lunches the next day.

Roasted Tomato & Asparagus Pasta with Chicken and Feta {10 WW+ Dinner}

After yet another busy weekend (surprise, surprise) I hadn't yet meal planned for the week (Still haven't! Someone please kick my butt!) and had to scour the cupboards and fridge yet again. Luckily I roasted an extra piece of chicken this weekend so I had one chicken breast to work with. It's kinda hard to make a meal out of one chicken breast so I decided on a pasta dish. That way I could dice up the chicken into small bites and make it go farther with the pasta. Well, it worked!

Along with some roasted vegetables I had left from another dish I made last week and some yummy flavored feta cheese I picked up on sale I threw together one of my more tasty last minute meals. This pasta dish is definitely perfect for the spring season. Simple, tasty and makes the ingredients stretch. Definitely budget friendly.


Roasted Tomato & Asparagus Pasta with Chicken and Feta
  • 2 cups tomatoes, whole (small round varieties like grape and cherry are best)
  • 1 bunch asparagus, cut into 1 inch sections
  • 1 tablespoon olive oil
  • 1 teaspoon salt
  • 1 teaspoon pepper
  • 2 cloves garlic, minced (or if you prefer roasted whole with vegetables)
  • 8oz pasta, gemelli or fusilli 
  • 1 roasted chicken breast, cut into small pieces
  • 2 tablespoons tomato paste
  • 1/2 cup reduced-fat feta, tomato and basil flavor
  • 1 tablespoon Italian seasoning
  • 1 tablespoon fresh parsley

Preheat oven to 425 degrees. Place foil on a rimmed cookie sheet and put vegetables on sheet. Drizzle with olive oil and sprinkle with salt and pepper. Roast for 20 minutes. (Alternative method - roast asparagus for 8 minutes on sheet and tomatoes for 20 minutes in glass dish. I'm lazy and did it all on one sheet).

While vegetables are roasting, boil and cook pasta.

Place roasted vegetables in a large bowl and add garlic, tomato paste and Italian seasoning. Stir to combine. Add pasta, chicken and cheese and toss. Top with fresh parsley and serve.

4 servings | 10 WW+ Points

Chicken Parmesan Bites {7 WW+ Dinner}

I have been trying to come up with healthy, fun dinners that my toddler would be more interested in. Lately all he's wanted is chicken nuggets so I've been thinking up ways to turn typical chicken dishes into more kid-friendly meals. And I've been craving chicken parmesan for a while so why not make it into parmesan bites? Put a side of noodles and sauce on the plate and I had one meal my son was more than likely to enjoy. Right? Right! 

I put a plate of three chicken parmesan bites, 1/4 cup of noodles w/ sauce and a few broccoli florettes in front of him tonight and he went to town! And the best part? I used only one chicken breast to feed my whole family. Isn't that awesome? And budget friendly!

I also only made 5 ounces of spaghetti for the three of us and used 1/4 of a jar of sauce. We were all very full and even had room on our plate for more broccoli. Who doesn't want more broccoli? And I'm sure I could decrease the points a bit if I baked the chicken but I really liked the texture of the outside of the chicken that came with the oil. Totally worth it.


Chicken Parmesan Bites 
  • 1 chicken, breast, cut into 1" pieces
  • 2 tablespoons 1% milk
  • 1/4 cup all-purpose flour
  • 1 egg white
  • 1/2 cup Progresso® Italian-Style Bread crumbs
  • 1/4 cup freshly grated Parmesan cheese 
  • 1 tablespoon olive oil
  • 1 teaspoon table salt
  • 1 teaspoon black pepper
Place chicken breast pieces in a bowl and cover with milk. Let soak for a few minutes while prepping the other ingredients. Place 1/4 cup of flour into a large ziploc bag. Measure out 1/4 cup of breadcrumbs and place into a container with salt and pepper. Grate parmesan cheese into the same container, stir to combine and set aside. Place egg white in a small bowl.

Take chicken and place in bag with flour. Shake vigorously until the chicken is well coated. Put coated chicken in bowl with egg white and stir to coat chicken. Place bread crumb mixture in bag you just used for flour. Put chicken back in the bag and shake again coating the chicken with bread crumbs.

Heat oil in a skillet on medium high heat. Add coated chicken to the pan and cook until golden brown, about 15 minutes. When chicken is cooked thoroughly remove from pan and serve with spaghetti and marinara sauce. Add some steamed veggies or a nice salad to make this a complete meal.

3 servings* (5 bites) | 7 WW+ Points

* Does not include spaghetti & marinara sauce

Teriyaki Chicken with Green Beans {8 WW+ Dinner}

I was planning on making something else for dinner last night but really didn't have the time or energy for a more involved meal. So I went with simple and raided the fridge for the last of the food available to us. Yeah... I haven't been to the grocery store in over a week. Bad mommy/wife! Good thing we have a very large pantry filled at all times with spices and sauces.

This meal turned out even better than I expected. I really didn't know where I was going when I started grabbing things from the fridge and pantry but I think I might just add this one to our monthly rotation. It's not only super tasty but fast and easy as well.


Teriyaki Chicken with Green Beans
  • 2 chicken breasts
  • 2 pounds haricot verts 
  • 1 small shallot, minced
  • 1 garlic clove, minced
  • 1 tablespoon olive oil
  • 1/2 cup teriyaki chicken
  • salt and pepper
  • 1 tablespoon sesame seeds
Cut chicken breast into 1 inch pieces. Heat oil on medium high in large skillet. Season chicken with salt and pepper. Saute shallot and garlic clove. Add chicken and cook until white on the outside.

Add green beans and cook another 3 to 5 minutes or until green beans are cooked to al dente and chicken is browned lightly. Add teriyaki sauce and stir to cover chicken and beans. Top with sesame seeds and serve.

Serves 3 | 8 WW+ Points

Crock Pot Lasagna {9 WW+ Dinner}

I had high hopes for this recipe. I tried it once and kinda screwed up (didn't have ricotta on hand so used cream cheese in a pinch). And the results were not pretty. So I was determined to revisit this dish and try again.

Good thing I did cause this meal was mighty tasty! And filling too. Only one serving plus a side salad filled me up and kept me satisfied all night. I most definitely cannot wait till tomorrow's leftovers for lunch. I'm sure this dish will keep me happy two days in a row.

Inspiration: Two Pink Hippos


Crock Pot Lasagna
  • 1 pound uncooked lean ground beef
  • 1 small onion, chopped
  • 2 garlic clove, minced
  • 28 ounces canned diced tomatoes
  • 15 ounces canned tomato sauce
  • 1 teaspoon kosher salt
  • 1 teaspoon dried oregano
  • 2 teaspoons dried basil
  • 1/4 teaspoon crushed red pepper flakes
  • 1 cup fat free ricotta cheese
  • 2 ounces fat free mozzarella cheese, shredded
  • 4 ounces part-skim mozzarella cheeses, shredded and divided
  • 6 dry lasagna noodles, no-cook
  • 1/2 cup Parmesan cheese, shredded
In a saucepan, over medium-high heat, combine beef, onion and garlic. Break up meat with a wooden spoon while everything cooks, about 5-7 minutes. Stir in crushed tomatoes, tomato sauce, salt, oregano, basil and red pepper flakes; simmer 5 minutes more to allow flavors to blend.

In a separate bowl, stir together ricotta cheese, 2 ounces of part skim mozzarella cheese, and 2 ounces of fat free mozzarella cheese.

Spoon 1/3 of beef mixture into a 6-quart slow cooker. Break 2 lasagna sheets in thirds and arrange over beef mixture; top with 1/3 of ricotta mixture. Repeat with two layers and finish with remaining 1/3 of beef mixture.

Cook on low setting for 4 hours. Turn off crock pot.

In a separate bowl, combine remaining 1/2 cup of reserved part-skim mozzarella cheese and Parmesan cheese. Sprinkle over the top of the lasagna. Cover the crock pot until the cheese melts and lasagna firms up, about 10 minutes.

Serves 6 | 9 WW+ Points

Pesto Dill Salmon Burgers {8 WW+ Dinner}

I had some salmon I froze from dinner last week that I wanted to use up this week but didn't quite want grilled salmon again. So I went in search of a yummy alternative. I went to my trusty google reader, filled with tons and tons of recipes from other food bloggers, and settled on this salmon burger from Beantown Baker.

I wasn't quite sure how I'd like it as I'd never had a salmon burger before but was ready for a challenge. I kinda got grossed out when I put the salmon in the food processor but I got through it. the mix came together really well. Next time I may dice my salmon pieces a bit smaller though. Although it didn't change the taste of the burger, the bigger pieces made it harder for the patties to be formed and stay formed.

All in all I thought this burger was quite tasty. Although I may spice it up a bit next time. 

Inspiration: Beantown Baker


Pesto Dill Salmon Burgers
  • 12 oz salmon, diced
  • 2 teaspoons dried dill weed
  • 1 tablespoon pesto sauce
  • 1 teaspoon table salt
  • 1 teaspoon black pepper
  • 2 teaspoons mustard
  • 2 teaspoons olive oil
  • 4 Thomas' Light Multi-Grain English Muffin 
 Toppings
  • 2 tablespoons reduced-calorie mayonnaise
  • 2 teaspoons mustard
  • 1 cup spinach
  • 1 small tomato, sliced
In the food processor, puree half of the diced salmon.

In a medium bowl, combine the pureed mixture with the remaining diced salmon, dill, pesto, mustard and salt and pepper.

Shape into 4 4oz patties. Make an indentation in the center.

Heat a cast-iron skillet over medium-high heat. Coat skillet with oil. Cook the patties for 4-5 minutes per side. Serve on English muffins with spinach and mayonnaise mixed with mustard.

Serves 4 | 8 WW+ Points

Country Fried Steak with Gravy {7 WW+ Dinner}

I've finally found a dish I haven't really enjoyed since starting this most recent weight watchers journey. I'll probably try and re-work the country friend steak recipe I've already used to make it more points friendly instead of using this one again. But it was tasty enough to finish the whole meal. I'll give it that much. It just didn't have enough "yum" for me if you know what I mean... and if you don't, sorry.

Inspiration: LaLoosh


Country Fried Steak
  • 1 pound cube steak, trimmed and cut into 4 portions
  • 1/4 cup all-purpose flour
  • 1/4 cup White Whole Wheat Flour
  • 1/4 cup Kashi Go Lean Crunch Cereal, processed finely in food processor
  • 1 1/4 cups fat-free beef broth
  • 1/4 cup low fat buttermilk
  • 1 tablespoon water
  • 2 egg white, lightly whisked
  • 1/4 cup cornstarch
  • 1 teaspoon table salt
  • 1 teaspoon black pepper
  • 1 teaspoon cumin
  • 1/2 teaspoon cayenne pepper
  • 1 teaspoon garlic powder

Preheat oven to 350F. Coat a baking sheet with cooking spray.

Place all-purpose flour on a large plate. Place egg whites in a shallow dish. Whisk Fiber One breadcrumbs, whole-wheat flour, the 1/4 cup cornstarch, garlic and paprika in another shallow dish. Season both sides of steak with 1/2 teaspoon each salt and pepper. Dredge the steak in the flour, shaking off excess; dip in the egg whites, then dredge in the Fiber One/flour mixture.

Spray a large nonstick skillet with nonfat cooking spray, and heat over medium-high heat. Reduce heat to medium and add 2 pieces of the steak; cook until browned on both sides, turning once, 3 to 5 minutes total. Transfer the steak to the prepared baking sheet and repeat with the remaining pieces of steak. Transfer the baking sheet to the oven and bake until cooked through, about 10 minutes.

Meanwhile, add broth to the pan and boil over medium-high heat, stirring occasionally, until reduced to about 1 cup, approx 3 to 5 minutes. Whisk water and the remaining 1 tablespoon cornstarch until smooth. Remove the pan from the heat and stir in the left over Fiber One/flour mixture. Return to the heat and cook, stirring, until thickened, 1 to 2 minutes. Stir in buttermilk; season with the remaining salt and pepper. Serve the steak topped with the gravy.

Serves 4 | 7 WW+ Points

Thyme Chicken & Red Potatoes {7WW+ Dinner}

This is a meal that was pushed back from last week to this week and I'm really glad I didn't cut it. I'm usually hesitant to make crock pot chicken dishes because I've had some really bad experiences in the past (i.e. the chicken was so dry my husband started choking due to the piece being stuck in his throat... but we won't talk about that). So even though the ingredients sounded great I wasn't too thrilled to jump in and make it. But the dish surprised me.

The chicken was moist and flavorful and the carrots and potatoes were sweet and tender. I didn't even need a small sweet for dessert. The fresh parsley and lemon gave a fresh zing to the dish that definitely kicked it up a bit. And while there is a bit of prep beforehand, it's worth it. The sauteed onions and celery just add to the sweetness of this dish.

If I made it again I'd probably stop letting it cook after 6 hours instead of 8 since the chicken was *almost* dry. Good thing I followed my nose and stopped the cooker after 7 hours. The chicken was just right! And next time I'll try and remember to buy sage so I can make the meal according to the original recipe... haha... like I ever do that!

Inspiration: Weight Watchers


Thyme Chicken & Red Potatoes
  • 2 tsp olive oil, extra-virgin
  • 1 large red onion, chopped
  • 5 stalks celery, diced
  • 2 cloves garlic, minced
  • 1 tablespoon all-purpose flour
  • 1 cup reduced-sodium, fat free chicken broth
  • 2 uncooked boneless, skinless chicken breast, cut in half
  • 1 pound uncooked red potatoes, cut into quarters
  • 1 pound baby carrots
  • 1 bay leaf
  • 1/2 teaspoon table salt
  • 1/4 teaspoon black pepper, freshly ground
  • 1 teaspoon dried thyme
  • 1/2 cup parsley, fresh, chopped
  • 1/8 teaspoon lemon zest, 1 strip
  • 2 teaspoons fresh lemon juice

Heat the oil in a large nonstick saucepan over medium heat. Add the onion, celery, and garlic; cook, stirring occasionally, until softened, about 8 minutes. Add the flour and cook, stirring constantly, about 1 minute. Add the broth and bring to a simmer, stirring constantly. Let simmer 1-2 minutes or until thickened.

Put the potatoes, carrots, chicken bay leaf, salt, and pepper (in that order) in a 5–6-quart slow cooker; pour the broth mixture over the chicken and vegetables. Cover the slow cooker and cook until chicken and vegetables are fork-tender, 6-8 hours on low.

Discard the bay leaf. Add the parsley, thyme, lemon zest, and lemon juice to the slow cooker; cover and cook on high until the flavors blend, about 10 minutes.

4 Servings | 7 WW+ Points

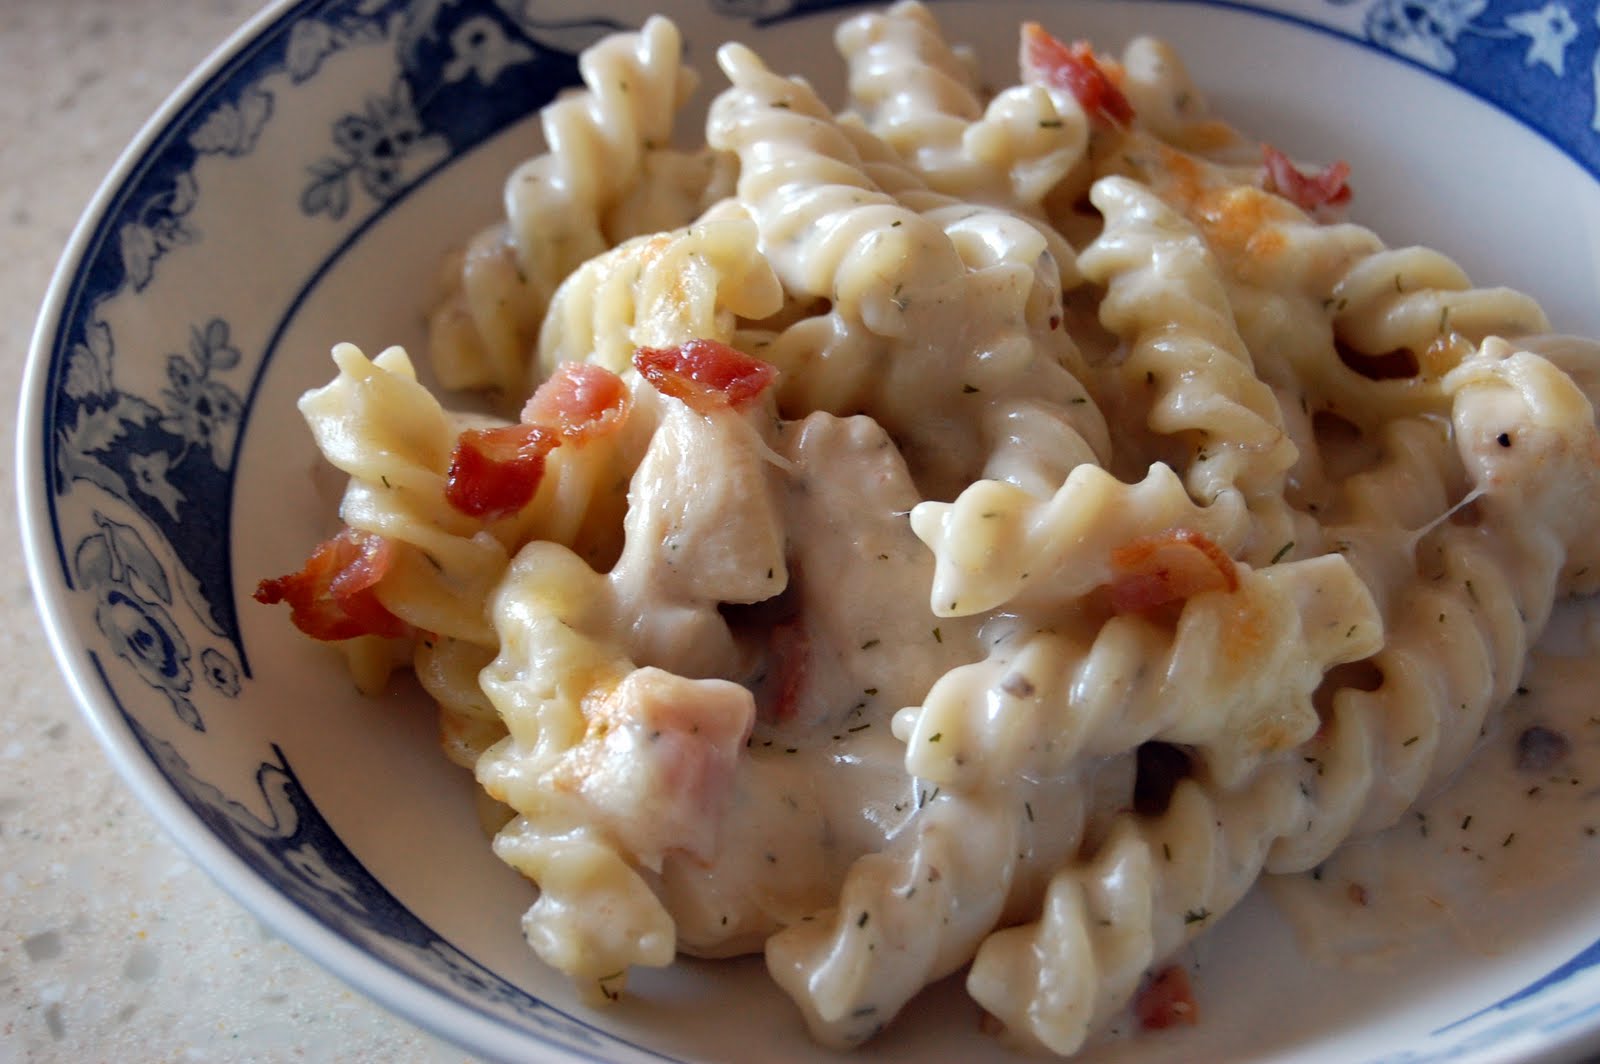
Chicken, Bacon, Ranch Mac & Cheese {10 WW+ Dinner}

I was so surprised with how much I enjoyed this dish. I wasn't expecting much although many of my friends gave it rave reviews. I don't know... I guess I've done mac and cheese so much that one other way just didn't seem exciting to me. But this dish is definitely not your typical mac and cheese. It reminded me a bit of an alfredo almost and was definitely tasty. I think Joseph even approved.

Next time I make this version (and I do plan on making it) I'm going to add some broccoli to the mix as well so I don't have to serve a veggie on the side. It's always easier to make a complete meal in one dish. And it makes the broccoli taste that much better... cheese will do that to a veggie!

Inspiration: Cooking Light, March 2010 issue


Chicken, Bacon, Ranch Mac & Cheese
  • 8 ounces uncooked Fusilli pasta
  • 3 slices pre-cooked bacon, cut into small pieces (reserve 1/3)
  • 8 ounces skinless, boneless chicken breast, cut into 1/2-inch pieces (about 1 breast)
  • 1 tablespoon butter
  • 1 tablespoon all-purpose flour
  • 12 ounces 1% milk
  • 1 can condensed 98% fat-free cream of mushroom soup 
  • 1 ounce Trader Joe's light shredded 3 cheese blend
  • 1 ounce Trader Joe's organic shredded mozzarella
  • 2 ounces Trader Joe's shredded pepper jack cheese blend, plus 1/8 cup to reserve
  • 1/2 teaspoon onion powder
  • 1/2 teaspoon garlic powder
  • 1 teaspoon dried dill
  • 1/2 teaspoon salt
  • Cooking spray

Cook pasta according to package directions, omitting salt and fat; drain.

Cook chicken in a large nonstick skillet over medium heat. Add bacon to the pan and warm through. Remove from heat and set aside.

Melt butter in a large saucepan over medium heat; sprinkle flour evenly into pan. Cook 2 minutes, stirring constantly with a whisk. Combine milk and soup, stirring with a whisk; gradually add milk mixture to saucepan, stirring with a whisk. Bring to a boil; cook 2 minutes or until thick. Remove from heat; let stand 4 minutes or until sauce cools to 155°. Add cheese blend, onion powder, garlic powder, dill, salt and pepper, stirring until cheese melts. Stir in pasta and chicken.

Preheat broiler.

Spoon mixture into an 8-inch square baking dish coated with cooking spray. Sprinkle evenly with reserved bacon and Pepper Jack cheese blend. Broil 3 minutes or until cheese melts.

Serves 6 | 10 WW+ Points

Chicken Pad Thai {7 WW+ Dinner}

Tonight was one of those nights that I forgot to read the recipe for dinner... and therefore I scoured the rest of the week's meals to find a back up plan. I wasn't too sure about this recipe. I really don't eat a lot of Thai food and definitely don't make it at home. Mostly because Joseph won't eat it. He isn't too adventurous when it comes to food. But I'm glad I was pleasantly surprised. I did miss the peanuts and peanut oil but it's better to have a live husband then to indulge in peanuts. And without the peanuts I reduced this meal by 2 points. How awesome is that?

Now back to the dish... it was fresh, flavorful and very... spring like. Yum. I ate my portion in a small bowl that only held one cup because I knew mentally I'd want another bowl and wouldn't be able to afford 14 points for dinner. So when I was done with my small 1 cup bowl I went and got seconds. And I was satisfied. Not overly full; satisfied. The way I should be.

Inspiration: Weight Watchers


Chicken Pad Thai sans Peanuts
  • 7 ounces packaged rice noodles
  • 1 1/8 pounds uncooked boneless, skinless chicken breast, cut into 3/4-inch cubes
  • 1/4 cup fish sauce, divided
  • 4 cups broccoli, florets
  • juice of 1 lime, divided
  • 3 tablespoons sugar
  • 3 tablespoons water
  • 1 1/2 teaspoon ginger root, fresh, finely minced
  • 2 sprays cooking spray
  • 1 1/2 cups bean sprouts
  • 1/2 cup cilantro, fresh, minced
  • 2 medium carrots, shredded
  • 2 cloves garlic, minced
  • 1/2 teaspoon chili oil

Start boiling a pot of water for noodles and a pot of water for steaming broccoli.

Place chicken in a small bowl and cover with 1 tablespoon of fish sauce and sprinkle with some salt and pepper; set aside. Cut up broccoli, shred carrots, mince cilantro, garlic & ginger root; set aside.

Place noodles in boiling water & steam broccoli until crisp-tender, about 8 to 10 minutes.

Meanwhile, in another small bowl, combine remaining 3 tablespoons of fish sauce, 1/2 of the juice of one lime, sugar, water and ginger; mix well and set aside.

Coat a large wok or skillet with cooking spray and warm over medium-high heat. When hot, add chicken; cook, stirring occasionally until chicken is cooked through, about 4 minutes. Remove chicken from pan and cover to keep warm; set aside.

Drain noodles thoroughly. Off heat, coat same wok or skillet with cooking spray and warm over medium-high heat. When hot, sauté garlic and carrots until garlic is just fragrant, about 30 seconds. Add noodles, fish sauce mixture, and chili oil; cook, stirring, until sauce is mostly absorbed, about 3 minutes. Stir in chicken and broccoli; remove from heat. Add remaining 1/2 of lime juice, bean sprouts and cilantro; mix well. Serve immediately. Yields about 2 cups per serving.

Serves 6 | 7 WW+ Points

Shrimp Marinara {9 WW+ Dinner}

I think I just found my new go to when we're out of ground beef and I want spaghetti. This dish was fabulous! I tweaked it a bit to add some more veggies and I decided to use my dutch oven instead of the slow cooker (I tend to have MUCH better luck with the dutch oven than with the slow cooker) and this recipe turned out better than I expected. I didn't have fresh shrimp, just a bag of frozen cooked shrimp from Trader Joe's but it worked great. And I can always keep some in the freezer so consider this an official staple meal in this household!

Inspiration: Two Pink Hippos


Shrimp Marinara
  • 2 tablespoons olive oil
  • 1/2 small onion, diced
  • 1/2 cup carrots, shredded
  • 1 zucchini, shredded
  • 2 cloves garlic, minced
  • 6 ounce can tomato paste
  • 2 tbsp dried parsley
  • 1/4 teaspoon pepper
  • 1/2 teaspoon dried basil
  • 1 teaspoon dried oregano
  • 1/2 teaspoon salt
  • 1/2 teaspoon garlic salt
  • 28 ounces can diced tomatoes
  • 1 pound frozen cooked shrimp, tails off
  • 30 ounces organic spaghetti

Start heating a large pot of water to a boil for pasta.

Add oil to dutch oven and cook on medium high. Add onions, carrots & zucchini. Saute until tender, about 5 minutes. Add garlic and saute for another minute. Add tomato paste, spices, & tomatoes into dutch oven and let cook until boiling. Once it's boiling, turn heat to low and let simmer.

Once pasta water is boiling, sprinkle with some salt and add pasta. Add shrimp to sauce. Cook pasta until done and drain. Shrimp will be warmed thoroughly as soon as the pasta is done. Plate pasta and top with shrimp marinara.


Serves 6 | 9 WW+ Points

Olive, Pepperoni and Bruschetta Pizza {6 WW+ Dinner}

You know when you have an awesome idea for dinner and crave it all week. And than something happens and you don't get to put your idea into action? Well that happened tonight. And guess what? Dinner still turned out really well.

I made this weeks dinner list in a hurry. We were busy and in the middle of Joseph's birthday weekend but I still needed a plan. So when the week went by in a hurry and Thursday finally came I just opened the recipe link from the blog for my husband and left it at that. He'd figure it out and I'd come home to a yummy dinner of chicken and potatoes.

Well... we both didn't read past the skillet part to the part where we used the slow cooker to finish the meal. Yup. Joseph waited till one hour before I was supposed to be home to look at the recipe again and realized what had happened. So as I was driving home I asked him to grab the dough out of the fridge... I was going to make some pizza! I had wanted to use Italian sausage but we had to use it for the crock pot lasagna we had earlier in the week so I grabbed some pepperonis. This pizza was super yummy! And the best part? Joseph and my son didn't know there was spinach in there! Always a good thing to get veggies in without their knowledge.


Olive, Pepperoni and Bruschetta Pizza
  • 1 ball Trader Joe's Garlic & Herb pizza dough
  • 1 cup spinach, cut finely
  • 2 ounces Trader Joe's Organic Shredded Mozzarella Cheese
  • 2 ounces Trader Joe's Lite Shredded Mozzarella Cheese
  • 6 ounces Trader Joe's Bruschetta
  • 10 (20 grams) Hormel pepperonis
  • 2 ounces sliced olives
Let pre-made or store bought dough rest for 30 minutes before rolling out. While dough rests, place a pizza stone on the bottom of a cold oven and turn the oven to 450 degrees.

Take out all sauce & toppings and have them prepped and ready to go before you start rolling out the dough.

Sprinkle your work space with a little bit of corn meal or flour so the dough doesn't stick.

Take pizza dough and flatten into a disk and then fold the dough into a ball. Start to slowly work and stretch the dough into a flattened circle with your hands. You can roll it out to a larger size with a good rolling pin or continue to use your hands.

Once the dough is to the size you want (I went with 12 inches as suggested on the dough packaging), roll the outer sides inwards to create a thin crust. Brush the crust with a small amount of olive oil.

Once the dough is completely rolled out and the crust is formed take the stone out of the oven. Place the formed dough onto the stone and spoon bruschetta onto the dough and evenly spread it around to the crust rim.

Place spinach, pepperoni and black olives on top of the sauce and then sprinkle the cheese over the toppings. Bake in the oven for 9 minutes or until cheese is bubbling.

Let rest 3 minutes on the stone once it's done and then serve with your favorite salad.

6 Servings | 6 WW+ Points

Teriyaki Salmon {9 WW+ Dinner}

I'm always up for a good fish recipe to try during Lent. This Lent I haven't been too adventurous. I've been sticking with tuna noodle casserole and marinated frozen fillets from Trader Joe's. It's simple and easy. And when I get home from work on Friday I need simple and easy.

But I've gotten kind of stuck and wanted to get out of this rut. I LOVE trying out new recipes and really like stepping out of our typical meals. Or taking a typical meal and changing it up a bit. This recipe took something I'd normally do with chicken and used fish. And boy was it tasty!

For those readers on Weight Watchers, if you'd like to reduce the points in this meal you can reduce the fish size to 3 ounces. I just prefer a larger portion of fish when points allow so I feel more full.

I'm hoping to try a few more fish recipes before the end of Lent. If you have any to suggest please do!

Inspiration: What's Cookin, Chicago?


Teriyaki Salmon
  • 4 6 ounce salmon fillets
  • 1/4 cup reduced sodium soy sauce
  • 1/2 tablespoon grated ginger
  • 1 tablespoon honey
  • 2 minced garlic cloves

Mix all of the ingredients in a ziploc bag and let marinate in the fridge for 6-24 hours. Preheat grill (or grill pan) and spray with cooking spray. 

Remove the salmon from the bag and place on grill. Cook on each side until opaque and flakey, about 5 minutes depending on the thickness of the fillets. 

Serves 4 | 9 WW+ Points

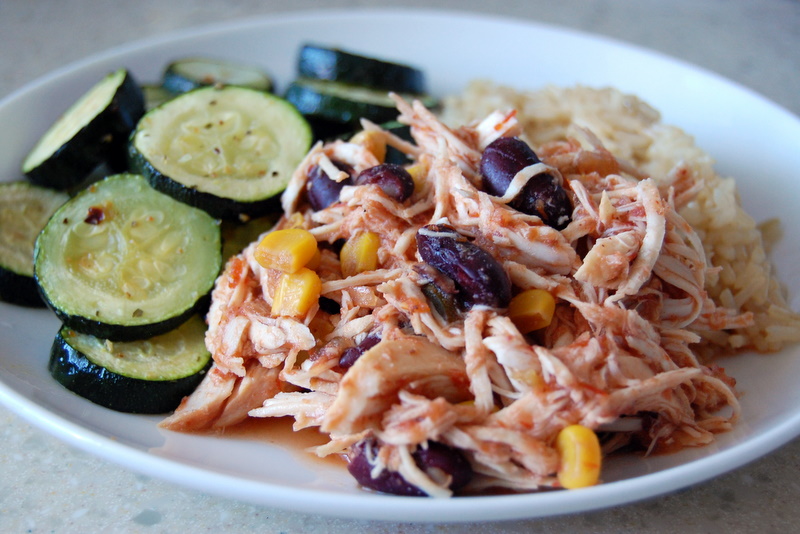
Crockpot Salsa Chicken {4 WW+ Dinner}

This is the easiest crock pot dish for those just starting out with their crockpot. You don't have to thaw any meat, you don't have to worry about the chicken drying out, you don't have to worry about the size of your crockpot. The ingredients all meld so well together and taste delicious however you serve it up.

I served the chicken with rice and zucchini but you can put the chicken in tacos, enchiladas or anything else you can think of. I'm already planning on using the left overs on Saturday for enchilada lasagna. I was going to go with beef but have more than enough left over chicken to use up so I'm making it easy on myself and saving the beef for another day. Another great way to use this as left overs is to put it on top of a salad or make a soup out of it.

Inspiration: Crockpot 365


 Crockpot Salsa Chicken
  • 3 chicken breasts (can be frozen)
  • 1 cup corn
  • 1 cup kidney beans
  • 1 1/2 cups salsa
  • 2 tablespoons dry taco seasoning
  • Salt & Pepper to taste

Place the chicken in the crockpot and top with the other ingredients. Set the crock pot to cook on low for 6-8 hours or until the chicken is cooked thoroughly. Remove the chicken from the crock pot and shred. Place it back in the crock pot and set it to warm while you prepare the rest of your meal (rice, beans, vegetables, etc).

Serves 6 | 4 WW+ Points

You can top with your favorite light sour cream and a sprinkle of cheese for just 2 more points! That's what I did and it was delicious! My whole meal was 9 WW+ points total and included a serving of salsa chicken, a tablespoon of light sour cream, a sprinkle of light shredded cheese, a 1/2 cup of brown rice and a cup of roasted zucchini. It was delicious and filling.

Italian Sausage and Peppers Pasta {9 WW+ Dinner}

I love trying a Weight Watcher recipe from their website and find that it actually tastes flavorful! So many times in the past I've tried one and it's just been waaaay too bland. Maybe it's just me but I always find myself adding lots of herbs and spices to their recipes.

Not this one. It was perfect. The onions and peppers were delicious when paired with the red wine and my son loved that the onions got stained "burple" from the red wine. The italian sausage was definitely the way to go with this meal. I think if you subbed anything else it wouldn't be as tasty without a LOT of spices thrown in.

And while I didn't absolutely love this dish, I'll probably make it sometime in the future. Just not every month :)

Inspiration: WeightWatchers.com


Italian Sausage and Peppers Pasta
  • 2 teaspoons olive oil, extra-virgin
  • 1 green peppers, cut into 2-inch long thin strips
  • 1 onion, thinly sliced
  • 1/2 cup red wine
  • 1 1/2 tablespoon minced garlic
  • 15 ounce canned diced tomatoes
  • 1/4 teaspoon table salt 
  • fresh black pepper
  • 1/3 cup fresh basil, chopped
  • 3 links mild Italian sausage
  • 8 ounces gemelli (or fusilli) pasta

Bring a large pot of lightly salted water to a boil.

Meanwhile, to make sauce, in a large nonstick skillet over medium-high heat, cook sausage, stirring and breaking up meat with back of a wooden spoon, until cooked through, about 3 to 5 minutes; remove to a plate.

Heat oil in same skillet. Add yellow peppers and onion; cook, stirring frequently, until vegetables are lightly colored and crisp-tender, about 5 minutes.

Add wine and garlic; cook until most of liquid evaporates, about 1 minute. Add tomatoes, crushed red pepper, salt and browned sausage; bring to a boil. Reduce heat to medium-low, cover and simmer until vegetables are tender and sauce is heated through, about 10 minutes.

While sauce simmers, add pasta to boiling water and cook according to package instructions. Drain pasta; return to pot. Add sauce and basil; toss to mix and coat. Yields about 1 1/3 cups per serving.

6 Servings | 9 WW+ Points

Smothered Buttermilk Chicken with Peas {9 WW+ Dinner}

When planning this week's menu I think that tonight's meal was the one I was most looking forward to. The recipe sounded almost like a chicken pot pie filling over a biscuit and it ended up tasting pretty similar to it! The only thing I'd change is I'd add more spices.

Since I had to work today I had Joseph prepare this meal and he did great. He changed the amount of water added from the original recipe since he didn't think there was enough and he added in a splash of chicken broth to add more flavor. Another change he'd make is to switch the water with chicken broth for more flavor as well.

All in all I loved this meal and will definitely be attempting it again with some more spices. I even had a second helping (don't worry... I had enough points!). Don't get me wrong, one serving would have been more than enough to satisfy me normally but I hadn't eaten since lunchtime due to a busy day at work. I also paired this with a delicious spinach & romaine salad.

Inspiration: Food.com


Smothered Buttermilk Chicken with Peas

  • 1 pound boneless, skinless chicken breast, cut into 3/4 inch pieces
  • 1 1/2 cups carrots, sliced into coins
  • 1/3 cup onion, chopped
  • 1 1/2 cup water
  • 2 tablespoons butter, melted
  • 1/4 teaspoons sea salt
  • 1/4 teaspoons black pepper
  • 1 bay leaf
  • 1 chicken gravy mix packet
  • 1/3 cup buttermilk
  • 2 teaspoons all-purpose flour
  • 1 cup(s) frozen green peas, thawed
  • 6 Trader Joe's refrigerated Buttermilk Biscuits

In a 4 to 6 quart slow cooker, mix together the chicken, carrots, onion, water, butter, salt, pepper, and bay leaf. Cover and cook on LOW for 6-8 hours.

During the last 20 minutes of cooking time, stir in the gravy mix.Remove the bay l eaf; mix the buttermilk and flour together; stir flour mixture and peas into chicken mixture. Increase heat to HIGH; cover and cook 10-15 minutes or until peas are hot.

While the chicken mixture is cooking, prepare biscuits as directed on can. Split biscuits; serve chicken mixture over biscuits.

Serves 6 | 9 WW+ Points

LinkWithin

Related Posts Plugin for WordPress, Blogger...