Showing posts with label Breakfast. Show all posts

Green Monster Smoothie {5 WW+ Breakfast}

After the killer smores brownies we indulged in last night I needed a breakfast that was easy to make and full of veggie goodness. My friend CB over at See Cupcake Run had just posted about an awesome smoothie she made with two handfuls of spinach so I knew I could get my leafy greens in. Then when I saw the recipe and it called for peanut butter and bananas I knew I had to try it.

For 5 points, this smoothie is so much more than a cup of spinach. Honestly, I couldn't even taste the spinach. All I tasted was banana and peanut butter. And next time I might shake it up by trying sunflower butter instead of peanut butter. Or maybe lowfat chocolate milk. Although that might have to be saved for dessert due to all of the sugar in chocolate milk. We'll see!

Inspired by See Cupcake Run


Green Monster Smoothie
  • 1 cup 1% milk
  • 1/2 ripe, frozen banana, peeled
  • 2 handfuls organic spinach
  • 1 tablespoon ground flax
  • 1 tablespoon better n' peanut butter
  • 1-3 ice cubes
Add 1 cup of milk to the blender.

Now add in the chia or flax (if using) and nut butter.

Next, add in the spinach followed by the banana on top.

Blend until smooth.

Add in your ice cubes and blend some more.

Serves 1 | 5 WW+ Points

Double Chocolate Zucchini Bread {4 WW+ Breakfast}

I love the end of summer. For one it starts to cool down at night and secondly my mother-in-law is always sure to bring over some yummy (but very large) zucchini. Figuring out ways to use up the zucchini is always fun and shredding it to put in baked goods and savory meals is usually the way to go. Especially since my son has a fascination with our food processor.

When searching for a recipe to use up some of our zucchini I stumbled upon a delicious looking muffin recipe. Chocolate and zucchini? Why it's a match made in heaven! This bread tastes exactly like a chocolate cake. My son would have had no clue that there was zucchini in it had he not been the one to help mix the ingredients together. And the mini chocolate chips just add a bit of deliciousness and push this bread over the edge. Next time I might consider adding a few walnuts to the mix. Mmmm....

Inspiration: Meg's Everyday Indulgence


Double Chocolate Zucchini Bread
  • 2 cups all-purpose flour 
  • 1 cup unsweetened cocoa
  • 1 teaspoon table salt
  • 2 teaspoons baking soda
  • 1 teaspoon ground allspice
  • 1 1/2 teaspoons ground cinnamon 
  • 1 1/2 cups unpacked brown sugar 
  • 1 cup unsweetened applesauce
  • 3/4 cup regular egg substitute
  • 1 teaspoon vanilla extract
  • 1/2 cup buttermilk
  • 2 cups zucchini, shredded
  • 1 cup mini chocolate chips
Preheat oven to 350 degrees. Prepare 2 loaf pans with nonstick cooking spray.

In a large bowl whisk together flour, cocoa, salt, baking soda, allspice and cinnamon; set aside.

In a medium bowl whisk together the sugar and applesauce. Beat in egg substitute until just combined. Stir in vanilla, buttermilk, zucchini and chocolate chips. Gently stir the liquid ingredients into the dry ingredients until just combined.

Divide batter equally among the two loaf pans. Bake until toothpick inserted into the center comes out clean and muffin tops are springy to the touch, 45 to 55 minutes; rotating halfway through baking time. Cool loafs in pan for 5 minutes, then transfer to wire rack and cool 5 minutes before serving.

Serves 20 | 4 WW+ Points

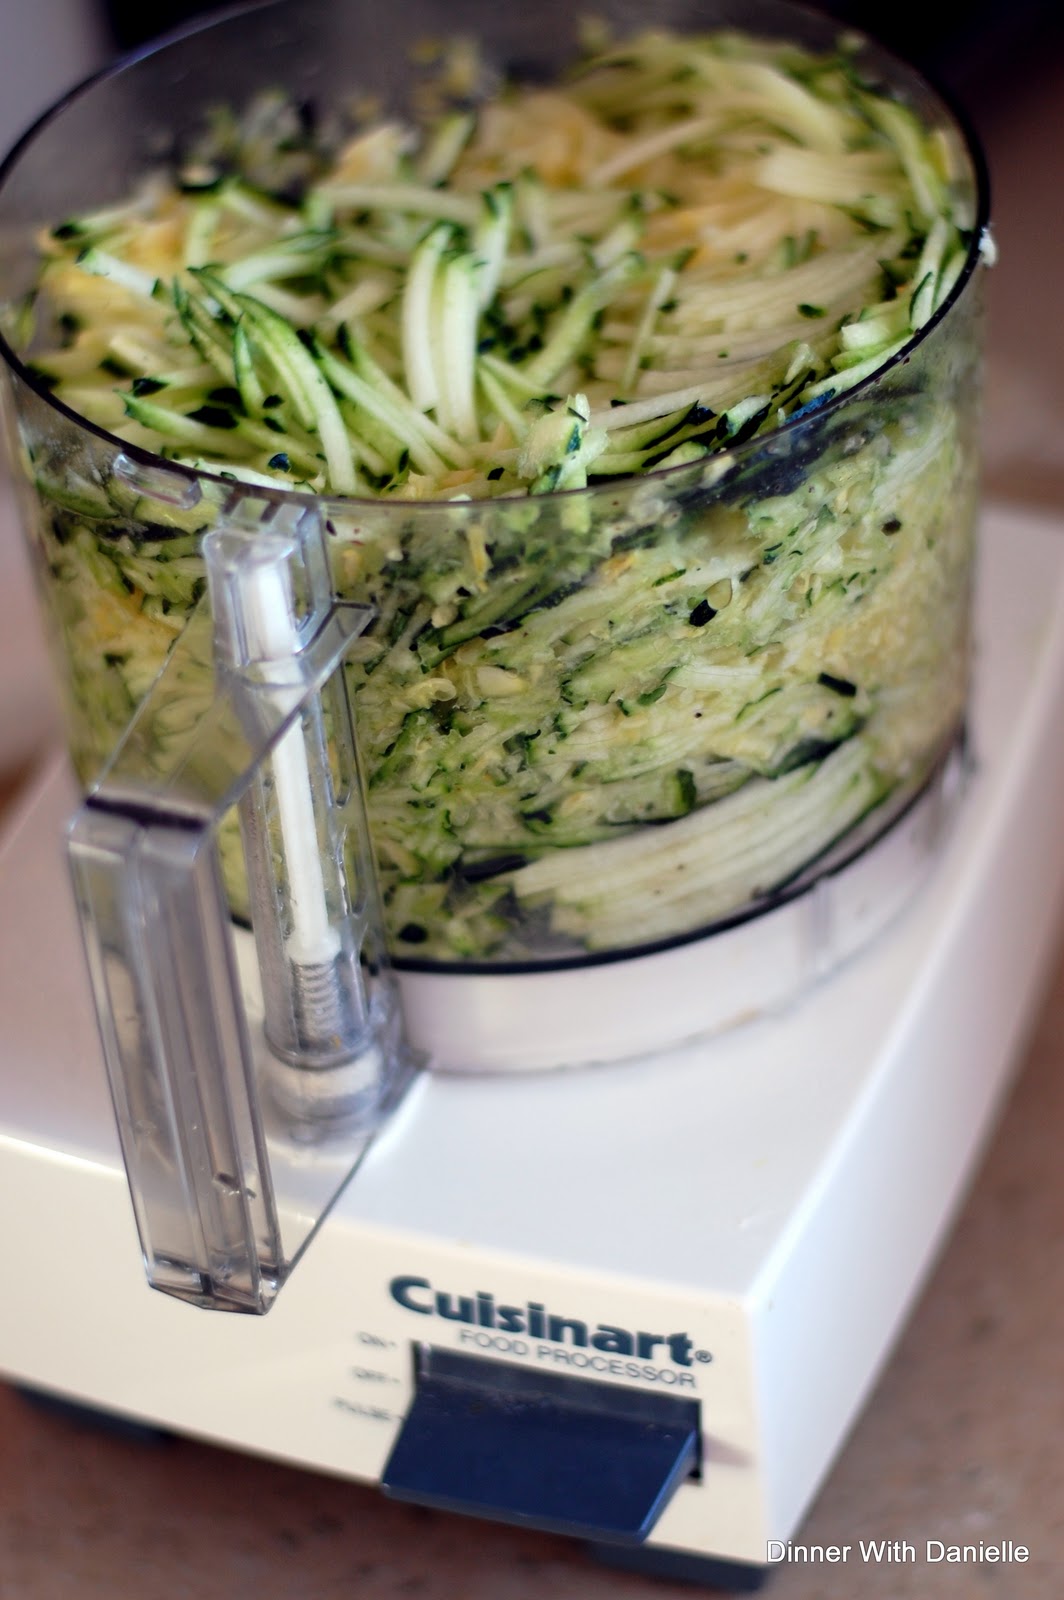
Side Note: One LARGE freshly picked zucchini from my mother-in-law's garden yielded this much shredded zucchini!


Cranberry Cream Scones {9 WW+ Breakfast}

I know I've said this before but whenever I need something quick and tasty for either breakfast or dessert I almost always go to scones. How can you not? They're super filling, very versatile and quick to throw together. You can put just about anything in a scone. Have some raisins? Throw them in! Down to a handful blueberries? Why not use those. And while your at it get some fun ingredients together for toppings. Cinnamon sugar, cream, powdered sugar icing, chocolate, strawberry jam... lots of options!

I also love that I can form the scone into any shape I want. I can make them into biscuits. I can cut them into small triangles or big triangles. I could even use cookie cutters to cut out shapes. This will be perfect for an upcoming party I'm starting to plan for a special someone's first birthday. And the best part about this recipe is that they not only taste super good on the day they're made but they taste great the day after as well. The perfect companion to a cup of coffee or tea.

Inspiration: Williams-Sonoma Essentials of Baking


Cranberry Cream Scones
  • 2 cups all-purpose flour
  • 1/4 cup sugar
  • 1 tablespoon baking powder
  • 1/2 teaspoon table salt
  • 6 tablespoons regular butter 
  • 1/4 cup dried cranberries
  • 1/2 cup 1% milk
  • 1/4 cup Vanilla Fat Free Creamer
  • 1 tablespoon sugar
  • 1 teaspoon ground cinnamon
 Preheat the oven to 425 degrees. Line a baking sheet with parchment paper.

In a food processor, combine the flour, sugar, baking powder, and salt and pulse 2-3 times to mix. Add the butter and pulse 7-8 times just until the mixture forms large, coarse crumbs the size of peas. Scatter the cranberries into the dough and pulse until just moist.

Turn dough onto a lightly floured countertop or work space and press it together gently until the dough forms a ball. Pat in a round about 1/2 an inch thick and 6-7 inches wide. Cut the round into 6 wedges*, or use a 3-inch biscuit cutter to cut out rounds. Place the wedges 1 inch apart on the prepared pan.

To make the sugar topping, stir together the sugar and cinnamon in a small bowl. Mix the milk and creamer in another small bowl or measuring cup. Brush the wedges with the milk mixture and sprinkle with the cinnamon sugar.

Bake until golden brown, 13-17 minutes. Transfer to a wire rack to cool slightly and serve warm.

Serves 6 | 9 WW+ Points

* You can cut the wedges into thirds to create smaller scones that are more WW point friendly (3 points each) for a quick snack or treat.

    Almond Chocolate Banana Bread {9 WW+ Breakfast}

    We always have a bunch of bananas on our countertops. It's just the easiest way to get breakfast on the go when we're running from one activity or another. So sometimes we're left with a few very ripe bananas that no one is willing to eat. And we have to use them up so I am always looking for a good banana bread recipe. I've finally found one that I think I'll stick with for a while.

    The best part about this recipe is that it's so light and airy. The bread is not dense at all. I think the cake flour really helps. And it was a total accident that I used cake flour instead of AP or whole wheat flour because we were out of everything else. I am NEVER out of flour. I mean I use it weekly so we're always buying it but I'm glad I was out. The substitution was great! And the addition of a chocolate bar made the bread even more amazing.

    I recommend enjoying this banana bread the same day it's baked for the best results. I found that when I placed it in an airtight container for safe keeping that it lost that delicious crunch to the crust of the bread. And I think that the crust was the other reason why I fell in love with this recipe. But if you must, you can store and serve later. I'm sure it'll be gobbled up quickly though!

    Inspired By FamilyFun


    The Best Banana Bread
    • 2 cups cake flour
    • 1 teaspoon baking powder
    • 1/2 teaspoon baking soda
    • 1/2 teaspoon salt
    • 1/2 cup (1 stick) unsalted butter, softened
    • 3/4 cup sugar
    • 2 eggs, at room temperature
    • 1 teaspoon vanilla extract
    • 3 medium-large very ripe bananas (1 cup mashed)
    • 1/2 cup plain non-fat greek yogurt
    • 1 Hershey's Chocolate Bar with Almonds, broken into small pieces

    Heat the oven to 325ยบ. Line a 5- by 9-inch loaf pan, preferably one with a light interior, with enough waxed paper to drape over the long sides. This will make the baked bread a cinch to remove and the pan easy to clean. Set the pan aside

    Sift together the flour, baking powder, baking soda, and salt into a medium bowl. In a large bowl, cream the butter using an electric mixer. Gradually add the sugar, scraping down the sides of the bowl as necessary. Add the eggs one at a time, beating well after each addition. Next, add the vanilla extract and blend briefly. Set both bowls aside.

    Peel the bananas and place them in a separate bowl. Mash them with a fork or a potato masher and measure out 1 cup. Add the sour cream and stir to blend. Set the bowl aside.

    Using a wooden spoon, blend a third of the dry mixture into the butter-sugar mixture. Add the rest of the ingredients in this order, stirring well after each addition: half of the banana mixture, half of the remaining dry mixture, the rest of the banana mixture, the rest of the dry mixture. Next, fold in chocolate pieces.

    Scrape the batter into the prepared pan and smooth the top with a spoon. Bake on the center oven rack until a tester inserted deep into the center of the bread comes out clean, about 70 to 75 minutes.

    Transfer the bread to a cooling rack and cool it in the pan for about 20 minutes. Using the waxed paper, lift the bread from the pan and place it on the rack. Pull down the sides of the paper and allow the bread to cool thoroughly before slicing.

    10 Servings | 9 WW+ Points

    Apple Carrot Nut Muffins {3 WW+ Breakfast}

    I was hosting a playgroup playdate at my house yesterday morning and didn't really have much planned in the form of snacks. I had the usual toddler fair of dried cranberries, cheerios and pretzels but nothing of substance for the mamas. So I asked Ethan what he wanted. And like your typical kid he asked for cupcakes. So I made the next best thing.

    I grabbed one of my recipe books and started flipping. And fell upon a recipe that I had all of the ingredients for (sans a few substitutions). And the results were pretty darn yummy. I'll definitely be making these muffins for future get togethers.

    Inspiration: Williams Sonoma Essentials of Baking


    Apple Carrot Nut Muffins
    • 1 cup all-purpose flour
    • 1 cup bread flour
    • 1/3 cup SPLENDA® brown sugar blend (or 2/3 cup regular brown sugar)
    • 2 teaspoon baking powder
    • 1/2 teaspoon baking soda
    • 1/2 teaspoon table salt
    • 2 egg
    • 1 1/2 cup vanilla fat-free yogurt
    • 1/4 cup butter
    • 2 small apples, 1 shredded and 1 diced small
    • 1 cup shredded carrots
    • 1/2 cup pecan halves, chopped
    • 1 tablespoon sugar
    • 1 teaspoon ground cinnamon

    Preheat oven to 425 degrees. Grease 2 muffin tins or prep with cupcake liners.

    In a large bowl whisk flours, sugar, baking powder, soda & salt together until well mixed.  In a seperate large bowl whisk eggs. Add yogurt and butter. Stir until combined.

    Add liquid ingredients to dry ingredients and mix just until incorporated together, about 15 strokes. Do not overmix. Fold in apples, carrots & pecan halves.

    Fill muffin tins 2/3rds of the way full. Mix 1 tablespoon sugar with 1 teaspoon cinnamon. Top each muffin with sugar blend. Bake for 15-18 minutes or until golden brown.

    24 servings | 3 WW+ Points*

    *by omitting the nuts you can reduce this recipe to 2 WW+ points each

    A great quick breakfast alternative for those on the go

    Chocolate Chip Pumpkin Muffin Bites {1 WW+ Dessert}

    Joseph was out with a friend for dinner last night so my little man and I decided to bake up some goodies for dessert. I started out making regular muffins but then decided to make them mini instead! I'm glad I did. These things were the perfect size for my toddler and the perfect size for me.

    Plus they're only 1 point each so I can control how much indulgence I want and not have to use up too many points. The mini chocolate chips really make these tastier. You get chocolate in every single bite and feel like you're really getting away with something.

    Super easy and yummy results! It's a win-win with this recipe :) And if you're making the standard muffin size you should get 24 muffins at 3 WW+ points each (versus my 72 mini muffins). But remember to calculate the points value if you change anything. The original recipe did not include an egg but the egg doesn't add anything to the points value and, I think, definitely adds something to the recipe.

    Inspired By: Our Best Bites


    Chocolate Chip Pumpkin Muffin Bites
    • 1 package spice cake mix
    • 1 15oz can pumpkin puree (not pumpkin pie mix)
    • 1 egg
    • 1 3/4 cup mini chocolate chips
    Preheat oven to 350 degrees. Grease a mini muffin pan with Pam cooking spray. Mix cake mix, pumpkin puree and egg together until combined. Fold in chocolate chips. Place 1 tablespoon of batter into prepared mini muffin pan. Place in oven and bake for 8 minutes or until a toothpick comes out clean.

    72 Servings | 1 WW+ Point each

    Chocolate Chip Banana Bread {6 WW+ Dessert}

    I was craving sweets yesterday. I needed to bake and it needed to be on-plan. So I went in search of ingredients in the house and found 3 very ripe bananas. And instead of eating them I looked for a recipe that would use them up.

    I came across this recipe on the Weight Watcher's website and read the reviews. Most people thoroughly enjoyed this bread so I knew I had to try it. I've tried other banana breads before that were "lighter" but always had problems with the moistness of the bread (I hate that word...). So I added some applesauce to the batter to combat the lack of butter or mass quantities of oil. And I succeeded in keeping this bread tasty! With just a hint of cinnamon and a sprinkle of chocolate chips this was the perfect dessert to enjoy with a cup of coffee.

    Inspiration: Weight Watchers


    Chocolate Chip Banana Bread
    • 1 1/4 cup all-purpose flour
    • 1/2 cup unpacked brown sugar
    • 1/2 teaspoon table salt
    • 1/2 teaspoon baking soda
    • 1/4 teaspoon baking powder
    • 1 teaspoon vanilla extract
    • 3 tsp canola oil
    • 1 large egg, beaten
    • 2 large egg white, beaten
    • 3 large bananas, ripe
    • 1/4 cup unsweetened applesauce
    • 1 teaspoon ground cinnamon
    • 1/4 cup semisweet chocolate chips
    • 1 cup quick cooking rolled oats

    Preheat oven to 350°F. In a large bowl, stir together dry ingredients. Add oil, applesauce and eggs; mix thoroughly.

    In a smaller bowl, mash bananas with a potato masher or fork. Add bananas and oatmeal to batter. Fold in chocolate chips

    Spray a loaf pan with cooking spray. Pour batter into pan and bake until top of loaf is firm to touch, 45 to 55 minutes. Remove from oven and allow to cool in pan for 5 minutes. Flip out and cool on a wire rack for another 10 minutes.

    Serves 10 | 6 WW+ Points

    Baked Peanut Butter and Banana Oatmeal Squares {4 WW+ Breakfast}

    If you're a peanut butter lover AND watching your figure don't walk, run to go make these! They are soo tasty. And super filling. And really, if you look at the recipe, there's nothing "diet" about them. I mean they have butter and real sugar! No skimping out on this one. And if you're like me and eat a hearty breakfast every morning help yourself to two servings piled with bananas on top and non-fat vanilla yogurt on the side for an awesome and very tasty breakfast.

    Seriously... go make these now.

    Inspiration: Two Pink Hippos (if you don't already follow these ladies you should!)


    Baked Peanut Butter & Banana Oatmeal Squares
    • 1 1/2 cups quick cooking oats
    • 1/2 cup peanut butter
    • 1/4 cup packed brown sugar
    • 1/4 cup white sugar
    • 1/4 cup melted butter
    • 3/4 cup 1% milk
    • 1 egg
    • 2 ripe bananas, mashed
    • 1 teaspoon baking powder
    • 1 teaspoon vanilla
    • 1 teaspoon cinnamon
    • 3/4 tsp salt
    • cooking spray
    Preheat oven to 350 degrees. Spray a 9 x13 baking dish. Mix all ingredients in a bowl then spread out evenly in the baking dish. Bake 20-25 until the edges are golden brown.

    15 Servings | 4 WW+ Points

    Eggs Done Right... Again {7 WW+ Breakfast}

    This has been my go to breakfast when I need something hearty enough to hold me over until lunchtime. It may be a lot of points but it's worth every one of them! So super tasty. And I told you I was making good use of the left over pulled pork we had the other night!

    I really think you can't go wrong when you mix eggs with salsa. They just always taste right. And I'm sure I'll start putting more veggies in my eggs. I think zucchini would work really well with this dish if I sauteed a bit before scrambling into the eggs. Or some diced mushrooms... mmmm! The best part is that I can scramble up the egg yolks for my son's breakfast so I don't waste a thing! He likes his with cheese and a side of fruit.

    You can also use a La Tortilla Factory Low Carb tortilla and shave off a point from this meal. You can also do without the pork and shave 2 points off this meal.  There are so many variations to scrambled eggs. Don't stick with the same ol' same ol'. Spice it up!


    Pork and Salsa Egg Scramble
    • 1 egg
    • 3 egg whites
    • 1 tablespoon milk
    • salt and pepper to taste
    • 1/3 serving pulled pork
    • 1 tortilla
    • 1/8 cup Trader Joe's Lite Shredded 3 Cheese Blend
    • 1/3 cup salsa
    Spray non-stick pan with some Pam cooking spray. Blend egg, egg whites, milk and seasoning together with a fork. Add pork to the pan and cook for 1/2 a minute. Add eggs on top of the pork. Scramble and cook until done to your liking.

    Place eggs on your plate. Put tortilla in the pan and heat for 1 minute. Flip and sprinkle heated side with cheese. After about 1/2 a minute fold the tortilla in half and remove from pan. Add to plate with eggs and serve with a side of salsa.

    Load that tortilla up with some eggs, top with the salsa and take a bite... 

    1 Serving | 7 WW+ Points

    Simply Perfect Berry Breakfast {4 WW+ Breakfast}

    I have this for breakfast just about every other day. It's my go to for a simple quick meal that will keep me full until snack time. It's also the perfect meal to give to my son as well (sans the cereal). He LOVES yogurt and he loves fruit so putting them together is just a natural combination. But he gets the plain full fat version while I indulge in the fat free vanilla version. He doesn't know the difference yet so why ruin a good thing?


    Yogurt and Berries with a Crunch
    • 1/2 cup Kashi GoLean Crunch
    • 1/2 cup Fat Free Vanilla Yogurt
    • 1/2 cup strawberries (or fruit of your choice)

    Mix everything together and enjoy with a hot cup of coffee. I take my coffee with splenda and hot cocoa mix (YUM!).

    1 Serving | 4 WW+ Points 

    Berry Muffin Revisited {3 WW+ Points Breakfast}

    My son woke up this morning and requested muffins for breakfast. Since we were out of our staple Trader Joe's blueberry fiber muffins we had to make some from scratch. I used a recipe I had used in the past but had to make a few adjustments with what we had on hand since Daddy used some of the last of our baking ingredients last night for chocolate chip cookies (totally not WW friendly!).

    These were pretty good. Definitely hit the spot and satisfied my muffin craving! And my son enjoyed them too. I think he loved helping make them more than eating them though. Cracking eggs are probably his favorite thing to do these days. Good thing Mommy and Daddy love to bake!

    Inspiration: Adapted from Here


    Healthy Berry Muffins

    • 1 1/2 cup all-purpose flour
    • 1/2 tsp baking soda
    • 2 tsp baking powder
    • 1/2 tsp table salt
    • 1 egg
    • 1/2 cup raw sugar
    • 1 tsp vanilla extract
    • 2 Tbsp canola oil
    • 1/4 cup Unsweetened Apple Sauce
    • 2/3 cup buttermilk
    • 1 cup blueberries

    Preheat oven to 375 and lightly grease a muffin tin.
    In a medium bowl, sift together the whole wheat and all purpose flours, baking powder, baking soda and salt. Set aside.
    In a second bowl, beat the egg with the sugar until smooth. Mix in the vanilla, oil, zest, applesauce and buttermilk. Add the wet ingredients to the dry ingredients. Fold the berries into the mixture. Don't overmix the batter. Your muffins could become tough and the batter may start turning colors from overworking the batter.

    Spoon the mixture into the muffin tin and bake for about 18-20 minutes, or until a toothpick inserted in the center comes out clean.

    12 servings | 3 WW+ Points

    Spinach & Mushroom Egg Scramble {5 WW+ Points Breakfast}

    When I have the time to make breakfast in the morning (remember those two kiddos under the age of 2?) this is my go-to meal. Its something I can make and know I can forget about being hungry until lunchtime. It satisfies my craving for something hearty without adding fatty foods like bacon and full-fat cheese.

    I love that adding mushrooms adds that hearty feel and the cheese still makes me feel like I get that goey, delicious part of a good egg scramble. Plus this recipe is so versatile! Sometimes I saute some onions and peppers as well to add to it. This just increases my daily intake of veggies which is really what my goal is most days (in other words, how do I hide all of these veggies so I don't know I'm eating them!).

    I also add a piece of toast and 1/2 a tablespoon of butter for a bit of indulgence. Haha... bread and butter an indulgence. Never thought I'd say that :) But this way I don't think I'm gypping myself. I still get to eat what I normally would eat only I added a bit more "healthy" to it.


    Spinach & Mushroom Egg Scramble
    • 1 egg
    • 3 egg whites
    • 1 teaspoon Mrs Dash Garlic & Herb
    • 2 tablespoons 1% milk
    • 1 cup spinach
    • 1 cup mushrooms
    • 1 ounce Trader Joe's Lite Shredded Mozzarella cheese
    • cooking spray

    Spray pan with cooking spray and saute diced mushrooms & spinach until cooked down/wilted. Whisk together the egg, egg whites, seasoning & milk while mushrooms and spinach cook. Pour egg mixture over vegetables and scramble until done to your liking. You can add an extra spray of cooking spray to the pan before adding the eggs if you aren't using a non-stick pan.

    Servings 1 | 5 WW+ points

    Adventures in Toddler Food: Apple Carrot Sauce

    About two weeks ago the family went up to pick apples at an apple orchard just east of us. We brought home about 6 pounds worth of apples and I knew I wanted to make two things: applesauce and apple pie. Well, I made the applesauce yesterday and the dough for the pie is in the fridge for today!

    Instead of keeping the applesauce as just apples I added some carrots in as well to give it more nutrition. My son LOVES apple carrot crushers from Trader Joe's and I just knew he'd love this mix. And guess what? I was totally right!

    Source: A Year of Slow Cooking


    Apple Carrot Sauce
    • 8 small/medium or 4 large apples, skinned ,cored, and cut in quarters
    • 6 carrots, trimmed, cleaned & cut into coins
    • Juice from 1 lemon
    • 1/2 teaspoon cinnamon
    • 1 teaspoon vanilla
    • 1 tablespoon brown sugar
    • 1/4 cup water
    Skin, core, and cut your apples into quarters. Clean, trim and cut carrots. Add the pieces of apple and carrot into your crockpot. Add the juice from the lemon, and the water. Pour in the vanilla, and add the cinnamon and brown sugar.
    Cover and cook on high for 4 hours. When the apples and carrots are super tender, mash with a potato masher or large fork. Place the mash into a food processor or blender to blend into a smooth consistency (you do not have to do this but I like the texture of the blended sauce).

    Serve and enjoy!

    My son trying to lick the bowl before asking for more...

    Adventures in Toddler Food: Fruit/Veggie Muffins

    As you're probably aware from the previous posts about toddler food I'm always trying to figure out new ways of getting vegetables into my child without him realizing it (and than spitting it out or throwing it on the ground). A great way to get these veggies in is by putting them in muffins & pancakes. I love muffins. What's not to love? The fluffiness, the flavor, the versatility. And the convenience.

    I also love using natural sweeteners in place of pure sugar. In this recipe we do use a bit of brown sugar but only 1/2 a cup (for 15 muffins!). To sweeten it a bit more we add applesauce. The bananas also add their sweetness as well. You can also replace all of the oil with applesauce as well but I don't mind a little oil if my child is going to eat the whole muffin. Sometimes calories are needed on picky food days.

    This muffin isn't super sweet but gives just enough flavor to entice little ones. It was good enough for this little man to devour almost a whole one! And he's only (almost) 8 months old! Mommas like them too so it's a win-win.

    Source: Edible Ventures


    Banana Zucchini Muffins
    • 1/3 cup vegetable oil
    • 1/3 cup unsweetened applesauce
    • 2 eggs
    • 1/2 cup light brown sugar
    • 1 teaspoon vanilla
    • 1 cup white whole wheat flour
    • 1 cup all purpose flour
    • 1/2 teaspoon baking soda
    • 1/2 teaspoon baking powder
    • 1/4 teaspoon salt
    • 1 teaspoon cinnamon
    • 1/2 teaspoon nutmeg
    • 1/2 teaspoon pumpkin pie spice
    • 1 medium zucchini, shredded & moisture squeezed out
    • 2 ripe medium bananas, mashed
    Preheat oven to 375. Line a muffin tin with reusable (or not) muffin cups or grease and flour the pan.

    In a medium bowl, whisk together the oil, applesauce, eggs, brown sugar, and vanilla.

    In a large bowl, combine flour, baking soda, baking powder, salt, and spices. Make a well in the center and add the wet ingredients. Stir until just blended. Then stir in the grated zucchini and mashed banana.

    Divide the batter among the 12 muffin cups (an ice cream scoop works well). Bake for 20 minutes, or until golden brown and a toothpick inserted in a muffin comes out clean. Let cool about 5-10 minutes, then remove from pan and eat!

    Savory Egg Bites

    The first time I tried these cups my friend Rachel made them for our friend Amanda's baby shower. These cups were fabulous! So yummy and flavorful with every bite. I think I might have consumed 3-4! Well recently I had a playgroup get together at my house and I changed up the original recipe a bit to use the ingredients I already had at home. They were a hit! All the kids loved them and so did the mommies.

    Last weekend at a baby shower for our friend, Alanna, Rachel made her version of these cups for everyone. So good. And since I didn't take a picture of them when I made my version I just snapped a photo of hers. I hope no one minds.

    Source: Allrecipes


    Egg Cups


    * 2 chicken sausage links (I used sun dried tomato)
    * 10 eggs, beaten
    * 1 (16 ounce) container cottage cheese
    * 1 cup Gouda cheese, shredded
    * 1 onion, diced and sauteed
    * 1 zucchini, diced and sauteed w/ onion

    * 1/2 cup all-purpose flour
    * 1/2 cup butter, melted
    * 1 teaspoon baking powder
    * 1/2 teaspoon salt

    Directions

    Place sausage in a large, deep skillet. Cook over medium high heat until evenly brown. Drain and set aside. In a large bowl, combine eggs, cottage cheese, cheese, veggies and cooled meat. Cover and refrigerate overnight

    The next morning, preheat oven to 350 degrees. Remove cheese mixture from refrigerator; stir in flour, butter, baking powder and salt. Spoon batter into 24 lightly greased muffin cups.

    Bake in preheated oven for 25 to 30 minutes, until puffs are slightly golden on top.

    Monkeying Around

    I just recently stumbled across this recipe this past December. Sadly I don't know where I found it but I am so happy I did. I hadn't had a chance to blog about it because each time I make it everyone always pounces on it right away. Yeah, it's super good!

    Well this past weekend I had a baby shower to go to for my friend Alanna and her one request for the day was to have Monkey Bread. So my friend Rachel asked if someone could bring it. I responded at once since I love the stuff and it's so easy. And I used up my extra points for the week on it... mmmmmm.

    Source: Beantown Baker


    Simple Monkey Bread

    4 cans Pillsbury biscuit (get the kind that come in a 4 pack, the small ones, not the Grands)

    Sugar coating:
    • 2/3 brown sugar - I was running low on brown sugar, so I used 1/3 cup white and 1/3 cup brown
    • 1/2 tsp cinnamon

    Syrup topping:
    • 3/4 cup (1 1/2 sticks) butter
    • 1 cup brown sugar
    • 1/2 Tbsp cinnamon

    Preheat oven to 350. Spray your angel food cake or bundt pan.

    Mix the sugar coating in a ziplock bag (feel free to add more cinnamon and/or sugar if you run out during the coating process). Cut the biscuits into 4 (kitchen shears work great for this). Drop the biscuit pieces into the ziplock bag and shake to coat. Drop coated biscuit pieces into the prepared pan.

    Bring syrup ingredients to a boil. Boil for 5 minutes, then pour over biscuit pieces. Bake for 35 minutes.

    Turn over onto plate and serve while hot.

    You don't want to know how many points this is per serving ;)

    Pumpkin Perfection

    This past Sunday Joseph, the baby and I went to the pumpkin patch. And I had one thing on my mind... bringing home some sugar pumpkins! No carving pumpkins for me. I want ones I can eat. So we went, took lots of pictures of the little one playing with the pumpkins and picked out all kinds of wonderful squash and pumpkins.

    This was my first time baking and pureeing a pumpkin but I think I did pretty well. It was soo easy. I now wonder why I never tried this before. This will definitely be the way I do pumpkin in the future.

    Source: Adapted from BakeSpace and My Head


    Pumpkin Muffins with Maple Honey Cream Cheese Frosting
    • 3 cups flour
    • 1 tsp. cinnamon
    • 1 tsp. nutmeg
    • 1 tbsp. and 1 tsp. pumpkin pie spice
    • 1 tsp. salt
    • 1 tsp. baking soda
    • 4 eggs
    • 1 ¼ cups applesauce
    • 2 cups sugar
    • 2 cups fresh pumpkin puree

    Combine the flour, spices, salt and baking soda in a medium bowl. Mix well and set aside. In the bowl of an electric mixer, combine the eggs, applesauce, sugar and pumpkin puree. Mix until well combined. Add in the dry ingredients and mix on low speed until just combined.

    Preheat the oven to 350°. Line two muffin pans with paper liners. To assemble the muffins, fill each muffin well with batter. Bake for 20-25 minutes. Let cool completely before serving.

    Maple Honey Cream Cheese Frosting
    • 8oz cream cheese
    • 1/2 cup confectioners sugar
    • 3 tablespoons brown sugar
    • 1/4 cup honey
    • 1/4 cup maple
    • 1/2 cup whipping cream

    Whip all ingredients until soft peaks form. You can either use the frosting right away or refrigerate it a bit to let it stiffen.

    * Once you frost the muffins you can top with a few chopped pumpkin seeds for a little extra something.

    Cinnamon Goodness


    I recently co-hosted a baby shower for my friend Amanda (pictured above... isn't she such a cute pregnant woman!?) and needed a good breakfast/brunch recipe to try out. I started looking through my google reader and a few people were making Alton Brown's overnight cinnamon rolls. They looked sooo yummy so I decided to give them a try.

    This is definitely a recipe I will use again. It was so simple and you can either bake the rolls in the morning or freeze them and bake them when you want them! The first batch (I made two seperate pans, one for the party and one for Joseph and I for Sunday morning) was a bit over baked so I suggest not going by a timer and checking them about 5 minutes earlier than the recipe says. The second batch was to die for! And the icing... oh, I'm using this for other things too. Not too cream cheesy, light and perfect!

    I haven't ever really been afraid of yeast and love how things turn out when you use it so if you haven't delved into using yeast when baking I highly suggest this recipe. BTW... it says to let the dough rise for 2 1/2 hours but I let it rise for 5 (took the baby shopping) and I think they turned out even better. I read some of the comments on Alton's page and others also found that letting it rise longer yields better results.

    Source: Alton Brown


    Alton Brown's Overnight Cinnamon Rolls

    • 4 large egg yolks, room temperature
    • 1 large whole egg, room temperature
    • 2 ounces sugar, approximately 1/4 cup
    • 3 ounces unsalted butter, melted, approximately 6 tablespoons
    • 6 ounces buttermilk, room temperature
    • 20 ounces all-purpose flour, approximately 4 cups, plus additional for dusting
    • 1 package instant dry yeast, approximately 2 1/4 teaspoons
    • 1 1/4 teaspoons kosher salt
    • Vegetable oil or cooking spray

    Filling:
    • 8 ounces light brown sugar, approximately 1 cup packed
    • 1 tablespoon ground cinnamon
    • Pinch salt
    • 3/4-ounce unsalted butter, melted, approximately 1 1/2 tablespoons

    Icing:
    • 2 1/2 ounces cream cheese, softened, approximately 1/4 cup
    • 3 tablespoons milk
    • 5 1/2 ounces powdered sugar, approximately 1 1/2 cups

    For the dough: in the bowl of a stand mixer with the whisk attachment, whisk the egg yolks, whole egg, sugar, butter, and buttermilk. Add approximately 2 cups of the flour along with the yeast and salt; whisk until moistened and combined. Remove the whisk attachment and replace with a dough hook. Add all but 3/4 cup of the remaining flour and knead on low speed for 5 minutes. Check the consistency of the dough, add more flour if necessary; the dough should feel soft and moist but not sticky. Knead on low speed 5 minutes more or until the dough clears the sides of the bowl. Turn the dough out onto a lightly floured work surface; knead by hand about 30 seconds. Lightly oil a large bowl. Transfer the dough to the bowl, lightly oil the top of the dough, cover and let double in volume, 2 to 2 1/2 hours.

    Combine the brown sugar, cinnamon and salt in a medium bowl. Mix until well incorporated. Set aside until ready to use.

    Butter a 9 by 13-inch glass baking dish. Turn the dough out onto a lightly floured work surface. Gently shape the dough into a rectangle with the long side nearest you. Roll into an 18 by 12-inch rectangle. Brush the dough with the 3/4-ounce of melted butter, leaving 1/2-inch border along the top edge. Sprinkle the filling mixture over the dough, leaving a 3/4-inch border along the top edge; gently press the filling into the dough. Beginning with the long edge nearest you, roll the dough into a tight cylinder. Firmly pinch the seam to seal and roll the cylinder seam side down. Very gently squeeze the cylinder to create even thickness. Using a serrated knife, slice the cylinder into 1 1/2-inch rolls; yielding 12 rolls. Arrange rolls cut side down in the baking dish; cover tightly with plastic wrap and store in the refrigerator overnight or up to 16 hours.

    Remove the rolls from the refrigerator and place in an oven that is turned off. Fill a shallow pan 2/3-full of boiling water and set on the rack below the rolls. Close the oven door and let the rolls rise until they look slightly puffy; approximately 30 minutes. Remove the rolls and the shallow pan of water from the oven.

    Preheat the oven to 350 degrees F.

    When the oven is ready, place the rolls on the middle rack and bake until golden brown, or until the internal temperature reaches 190 degrees F on an instant-read thermometer, approximately 30 minutes.

    While the rolls are cooling slightly, make the icing by whisking the cream cheese in the bowl of a stand mixer until creamy. Add the milk and whisk until combined. Sift in the powdered sugar, and whisk until smooth. Spread over the rolls and serve immediately.

    Ethan watching the KA do its thing


    A great idea for baby shower decorations is to use what you have around the house. I took some rope and some clothes pins and pinned up these onesies for decorations. And the mommy-to-be can take them home and use them for her little one!


    I also love the diaper cake idea as a centerpiece for any baby shower. And it's functional! All the newborn diapers a mom needs in one little cake!

    Waffle Mania

    I love waffles. Have I ever mentioned that? I am sure I haven't. It's just so easy to whip up a fresh batch of batter and cook them on the waffle iron. And if you love waffles like I do, you might appreciate this recipe a bit more. I've had it for a while. I became a fan of these last December right after I first joined Weight Watchers. I ate these as a dessert sometimes covered in 2 tablespoons of Cool Whip lite. What kind of waffle, might you ask, would serve as dessert too? Pumpkin waffles! Perfect for the fall or winter and super tasty and fun.

    Since I don't currently have an oven or stove I decided that I needed something warm for breakfast. Than Joseph asked me to get some bagels from Einstein Bagels. How could I resist a husband who's working so hard to give me the kitchen of my dreams? So I set aside my craving of waffles and went to go get breakfast.

    As soon as I got home I was absorbed in finishing Midnight Sun and 12:30 rolled by quickly. Joseph asked what was for lunch. Waffles immediately popped into my head but I knew he wouldn't want any. So I grabbed him a pot pie from the freezer and set out to hunt down the ingredients for the recipe and my waffle iron. I set up shop in the garage and started cooking. Boy were these good!

    Source: Weight Watchers


    Pumpkin Waffles
    • 1 cup all-purpose flour
    • 2 teaspoons baking powder
    • 1/2 teaspoon baking soda
    • 1/8 teaspoon table salt
    • 3/4 teaspoon ground cinnamon
    • 1/4 teaspoon ground nutmeg
    • 1 large egg, lightly beaten
    • 1/4 cup dark brown sugar, packed
    • 1 tablespoon vegetable oil
    • 1/2 cup canned pumpkin
    • 1 1/4 cup lowfat buttermilk (I used 2% due to a lack of buttermilk and lemon juice)

    Lightly spoon flour into a dry measuring cup; level with a knife. Combine flour, baking powder, and next four ingredients into a large bowl; stir well with a whisk.

    Combine egg, brown sugar, oil, pumpkin & milk in a bowl; stir with a whisk until blended. Add pumpkin mixture to flour mixture and stir until well combined.

    Coat a waffle iron with cooking spray; preheat. Spoon about 1/4 cup of batter per waffle onto hot waffle iron, spread batter to edges. Cook 5-7 minutes or until steaming stops; repeat with remaining batter.

    5 servings, 2 waffles per serving
    4 points per serving

    Sweet Halloween

    Joseph gets really weird inklings to bake things. The day before Halloween he decided to make sugar cookies. Totally normal, right? He wanted to make them into Halloween shape cookies, bats, pumpkins, ghosts. But than his plans changed as he started looking in our recipe books for a different sugar cookie.

    He started looking in our Essentials of Baking book from Williams Sonoma and decided he was going to make cinnamon rolls instead! I was a bit shocked because even I haven't made cinnamon rolls before yet. I was so proud :) And it was the first time he used yeast in a recipe and did a great job!

    He made the dough at night and than when I got home I took the rolls out to get to room temperature so that by the time Joseph got home he could pop them in the oven before we went over to the in-laws house. These babies went fast! We have two left to enjoy this morning :)

    Source: William Sonoma Essentials of Baking


    Cinnamon Rolls


    Dough:
    • 2 packages (5 teaspoons) active dry yeast
    • 1 cup whole milk, heated to warm (105-115 degrees Fahrenheit)
    • 1/2 cup granulated sugar
    • 3 large eggs
    • 5 1/2 cups all purpose flour, plus extra for the work surface
    • 2 teaspoons salt
    • 1 teaspoon ground mace
    • grated zest of 1 orange
    • 1/2 cup unsalted butter, at room temperature

    Filling & Egg Glaze:
    • 6 tablespoons granulated sugar
    • 2 teaspoons ground cinnamon
    • About 1/4 cup unsalted butter, melted, for brushing
    • 1 large egg, beaten

    Vanilla Glaze:
    • 1/2 cup confectioners' (icing) sugar, sifted
    • 1/4 cup heavy (double) cream
    • 1 teaspoon vanilla extract (essence)

    By Hand -
    To make the dough, in a large bowl, dissolve the yeast in the warm milk and let stand until foamy, about 5 minutes. Add the granulated sugar, eggs, 5 cups of the flour, salt, mace, orange zest, and butter and stir with your hand or a wooden spoon until a rough mass forms. Using a plastic pastry scraper, scrap the dough out onto a lightly floured surface. Knead the dough, working in the remaining flour, until it is smooth and elastic, 5-7 minutes. The dough should be soft, but not sticky

    Form the dough into a ball, transfer it to a lightly oiled bowl, and cover the bowl with plastic wrap. Let the dough rise in a warm, draft-free spot until it doubles in bulk, 1 1/2 - 2 hours.

    To make the filling, in a small bowl, stir together the granulated sugar and cinnamon. Set aside. Line a half-sheet pan or rimless baking sheet with parchment (baking) paper.

    Punch down the dough and turn it out onto a lightly floured work surface. Cut it in half with a sharp knife or a bench scraper. Lightly dust the surface of the dough with flour. Roll out one-half of the dough into a 10 by 16 inch rectangle. Brush the surface of the rectangle with half of the melted butter, then sprinkle evenly with half of the cinnamon-sugar mixture. Starting at the long side farthest from you, roll up the rectangle toward you into a log.

    Cut the log crosswise into 8 slices each 2 inches thick. Place the slices, cut side up, in a circle, side by side and barely touching, on half of the prepared pan.

    Repeat with the remaining half of the dough, melted butter, and cinnamon-sugar mixture, arranging the rolls on the other half of the pan. For crisper rolls, space them evenly on the pan.

    Cover the rolls loosely with a kitchen towel and let them rise in a warm, draft-free spot until they have doubled in size and are spongy to the touch, 30-40 minutes. Alternatively, place the rolls in the refrigerator and let them rise slowly overnight.

    Position a rack in the middle of the oven, and preheat to 400 degrees.

    If you have refrigerated the rolls, let them come to room temperature for 30-40 minutes. Brush the rolls lightly with the beaten egg. Bake until golden brown and a toothpick inserted into the center of a roll comes out clean, 20-25 minutes (I used my nose to tell Joseph when to take them out).

    Just before the rolls are ready, make the vanilla glaze. In a small bowl, stir together the confectioners' sugar, cream & vanilla until the sugar dissolves completely and the mixture thickens slightly.

    Let the rolls cool slightly in the pan on a wire rack, then brush on the glaze while they are still warm. Pull the buns apart and serve warm.

    LinkWithin

    Related Posts Plugin for WordPress, Blogger...