Showing posts with label Weight Watchers. Show all posts

Meatloaf Muffins {6 WW+ Dinner}

I love cute food. And these meatloaf muffins are pretty darn cute. I mean, they're small, they're colorful and they taste amazing. I've noticed that when I make our meals in smaller portions my kids seem to enjoy them a lot more and eat more than they normally would. So anything that I can convert from a normal, larger size to muffin tin size is awesome.

A few years back I made some meatloaf muffins and blogged about them but they weren't anything special. And since I love meatloaf I wanted to play with one of my favorite recipes a bit and tweak it to make me happy. Well this recipe has done it! Not only do my kids love these meatloaf muffins, I love them too! And the smaller size isn't just great for the kids, it means portion control for me


Meatloaf Muffins
  • 1 20 ounce package 93/7 lean ground turkey
  • 3/4 cup Trader Joe's fire roasted onions & peppers
  • 2 garlic cloves, minced
  • 1 teaspoon Italian seasoning
  • 1 tablespoon Worcestershire sauce
  • 1 egg
  • 1/2 cup whole wheat panko bread crumbs
  • 1/2 cup light shredded cheese
  • 1/4 cup ketchup
  • 2 teaspoons dijon mustard
  • 1 tablespoon brown sugar

Preheat oven to 350 and take out muffin pan. Saute onions, peppers, & garlic until tender. Add Italian seasoning & stir. Set aside to cool.

Place ground turkey, Worcestershire sauce, egg, panko & cheese in a large bowl and mix until combined. Add in the cooled veggies and mix in. Form 12 small balls of mixture and place each ball in muffin well (balls will be roughly 1-1 1/2" in diameter).

Bake meatloaf muffins for 18-20 minutes. While muffins are cooking mix together ketchup, mustard & sugar. Once the 18-20 minutes are up take the muffins out of the oven and top with ketchup mixture. Put the muffins back in the oven for another 5 minutes. Let rest 3-5 minutes before serving with your favorite sides and veggies.

Serves 6 | 3 WW+ Points per muffin

Nutritional Info: 115 calories, 7g carbs, 5g fat, 12g protein, 1g fiber, 171g sodium

S'mores Brownies {6 WW+ Dessert}

We were in need of a little sweetness in our home and when my son saw some marshmallows in the cupboard he asked if we could make something with them. Ok, first he asked if he could just eat them but when I turned him down he got creative. When I asked what he wanted to make with them he said chocolate. So I took that to the next level and asked if he wanted to make marshmallow brownies. Of course he was all up for that!

When I went into the cupboard for the chocolate bar my dear friend, Miranda, gave to us from her home in Switzerland when she visited earlier in the week I saw the graham crackers and knew we had to attempt to make smores brownies. The base we used is the classic Dorie Greenspan brownies sans the espresso powder and walnuts and than we just added our toppings. I might try and do this with different ones next time... peanut butter, caramel, the combinations are endless!

And the end product... well, it was totally worth it.

Inspired by a Pinterest search


Smores Brownies
  • 5 tablespoons of butter, cut into 1" pieces
  • 4 ounces of dark chocolate
  • 2 ounces of unsweetened chocolate
  • 3/4 cup sugar
  • 2 eggs
  • 1 teaspoon vanilla extract
  • 1/4 teaspoon salt
  • 1/3 cup flour
  • 1 cup mini marshmallows
  • 1 cup crushed graham crackers (about 4 sheets)

Preheat oven to 325 degrees. Chop up chocolate. Layer 9" pan with foil (see my tip here) and coat foil with butter.


Place butter in a heat proof bowl and top with chocolate. Place over simmering water and heat until fully melted. Remove from heat.


Mix in sugar (don't worry if it turns grainy, that's normal).


Add eggs, one at a time. Whisk each egg in thouroughly before adding the other. Add vanilla and whisk to combine. Whisk a bit more to make sure everything is well incorporated. Add salt and flour into the mix and stir until just combined.


Pour batter into prepared pan and top with marshmallows. Then top with graham cracker pieces.


Bake for 30-33 minutes. Top should be lightly browned and puffy.


Let cool completely before removing from pan. Marshmallow topping should settle down a lot while cooling. Then, lift foil and place on cooling rack. Carefully remove foil from edges. Cut into squares (warning: this will be very sticky!) and serve.

Serves 12 | 6 WW+ Points

Slow Cooker Red Wine Braised Short Ribs {6 WW+ Dinner}


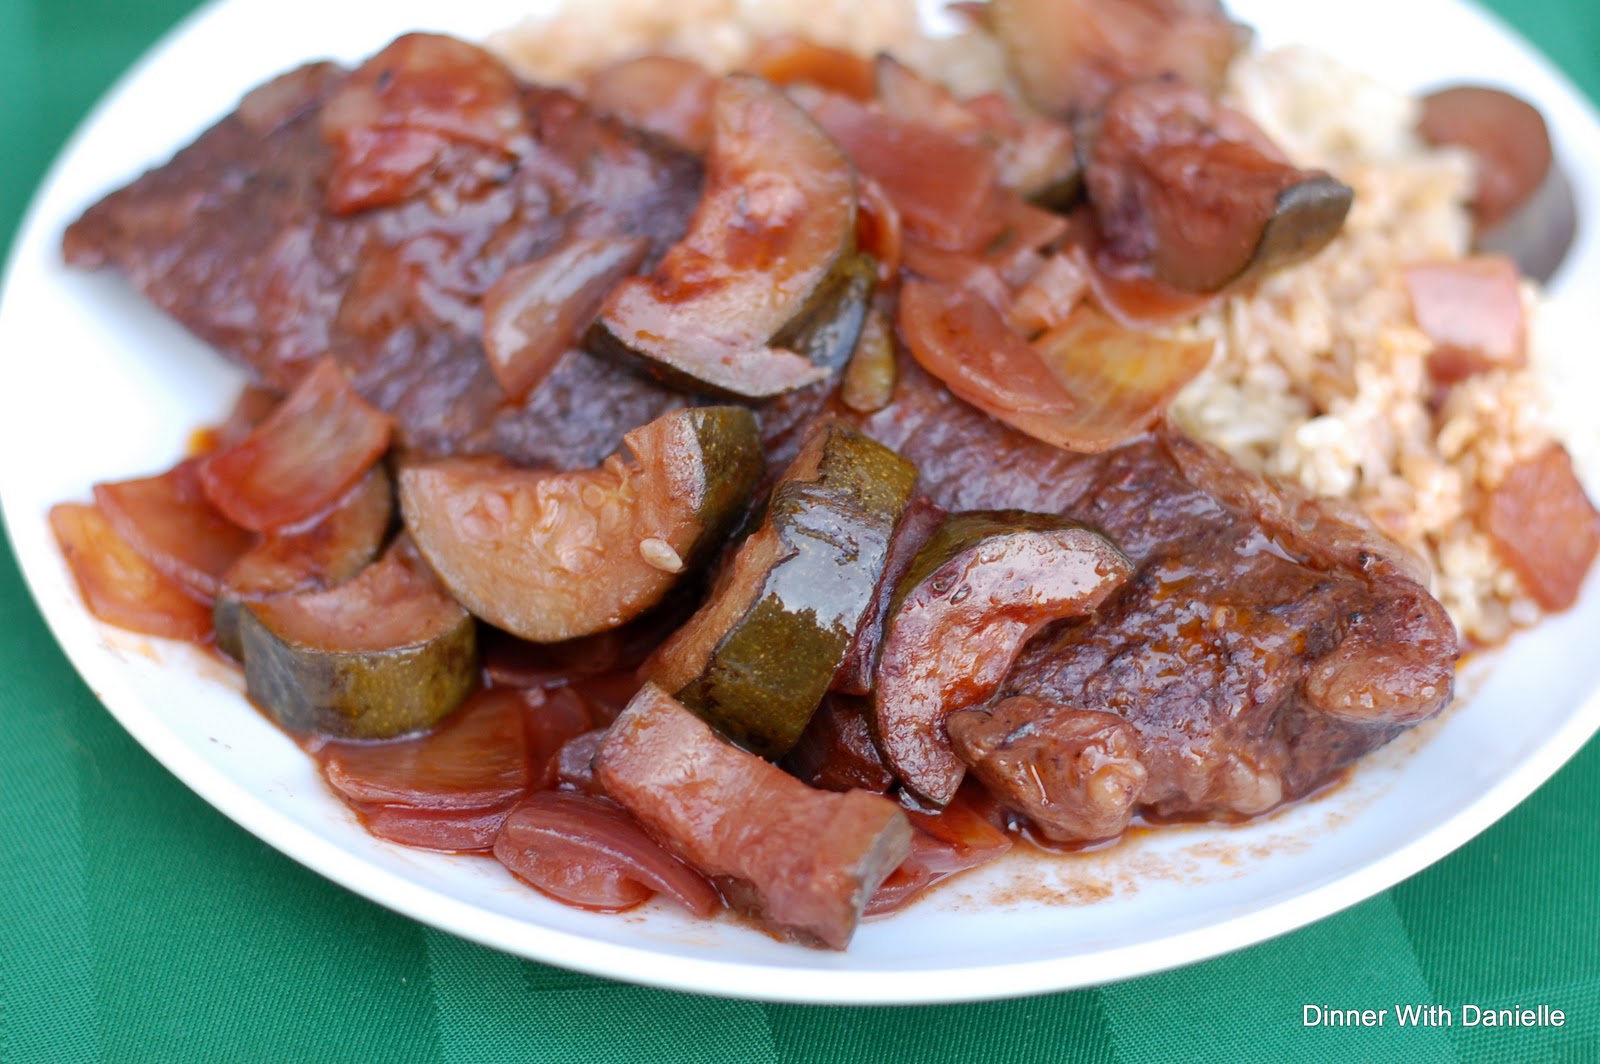
On the last visit to Costco  we left with some boneless short ribs in our cart. I have no idea how they got there but knew I had to find a recipe to cook them up. My husband went in search of the perfect recipe and found a great one in our America's Test Kitchen cookbook. He kept mentioning it and finally I was ready to try it out. Too bad I didn't fully read the recipe before commiting to making it. I would have found out that we needed bone-in ribs, not boneless. And I forgot to cut the ribs smaller. And had no celery or carrots on hand. Oy!

In the end, with all odds against me, I was happy with what the end results was. The meat was tender, had amazing flavor, and was the perfect portion. I served the ribs over brown rice and included the veggies with the sauce instead of discarding them because they tasted delicious. But if you try the original recipe with carrots and celery you might want to discard and serve with your favorite steamed or roasted veggie (or a great salad!).

Inspiration: America's Test Kitchen via The Little Kitchen


Slow Cooker Red Wine Braised Short Ribs
  • 2 pounds boneless short ribs, cut into 3" pieces
  • Salt and pepper
  • 1 tablespoons vegetable oil
  • 1 onions, chopped medium
  • 1 zucchini, chopped medium
  • 1 clove garlic, minced
  • 1 tablespoon tomato paste
  • 1 teaspoon dried thyme
  • 2 tablespoons all-purpose flour
  • 1 cup dry red wine
  • 1 tablespoon balsamic vinegar
  • 1 cup low-sodium chicken broth
  • 2 bay leaves

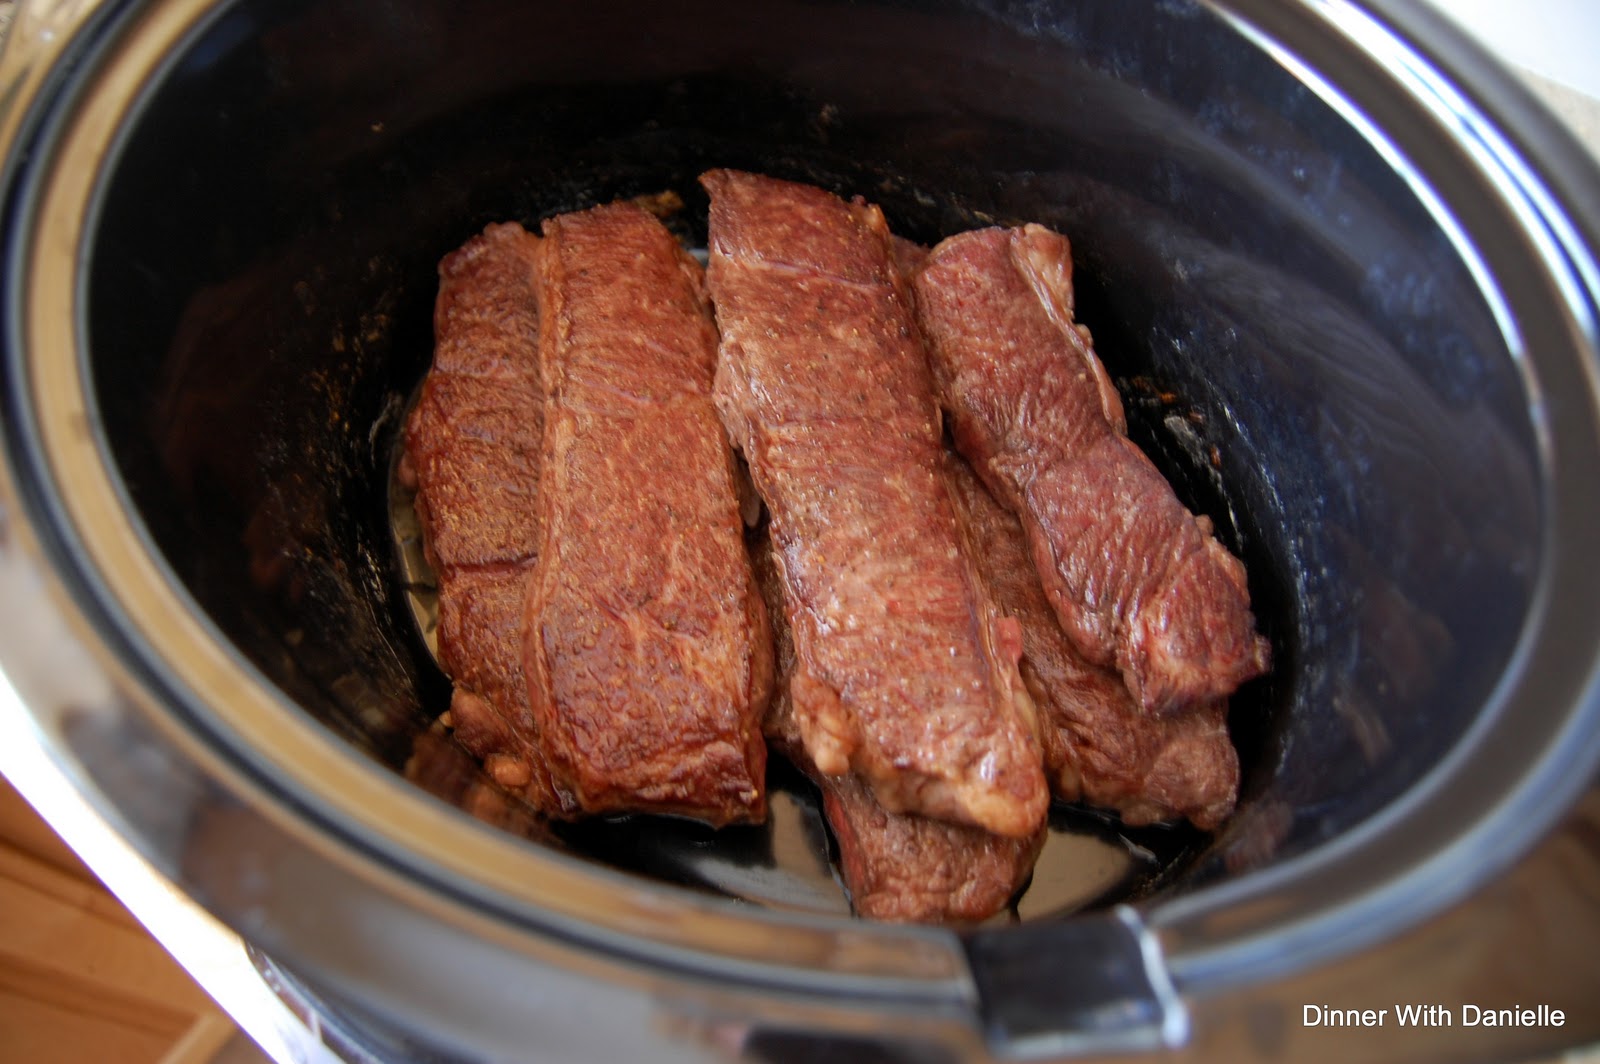
Dry short ribs with paper towels and season with salt and pepper. Heat 1 tablespoon oil in 12‑inch skillet over medium-high heat until just smoking. Brown short ribs well on all sides, 7 to 10 minutes; transfer to slow cooker.


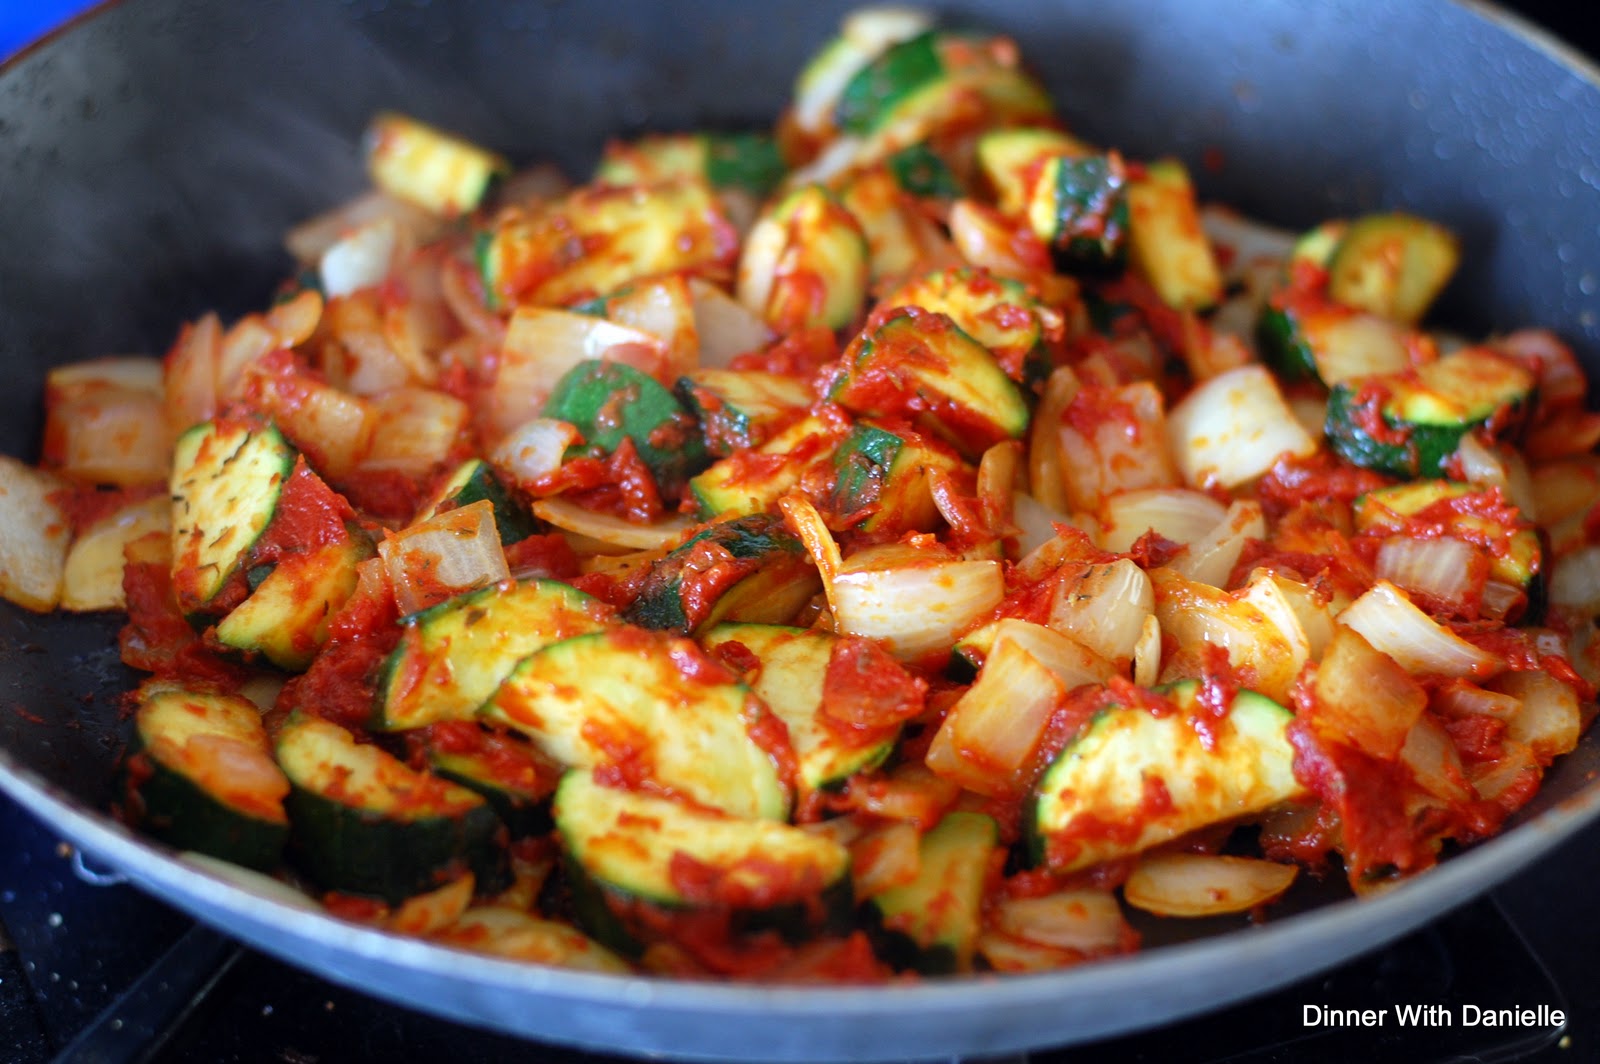
Add onions, zucchini, garlic, , tomato paste, and thyme to fat in skillet and cook over medium-high heat until onions are softened and lightly browned, 8 to 10 minutes. Stir in flour and cook for 1 minute. Slowly whisk in wine and vinegar, scraping up any browned bits and smoothing out any lumps. Bring to simmer and cook until reduced to 1 cup, about 5 minutes; transfer to slow cooker.


Stir broth and bay leaves into slow cooker. Cover and cook until beef is tender, 9 to 11 hours on low or 5 to 7 hours on high.

Transfer short ribs to serving platter and tent loosely with aluminum foil. Let braising liquid settle for 5 minutes, then remove fat from surface using large spoon. Strain braising liquid, discarding solids, and season with salt and pepper to taste. Stir in parsley. Spoon 1 cup sauce over short ribs and serve with remaining sauce.

Serves 8 | 6 WW+ Points

Pumpkin Cheesecake Bars {5 WW+ Dessert}

When Fall comes there is one thing I am most excited about. The return of canned pumpkin on the shelves! I start out small. Buying maybe 4 cans of pumpkin on my first spotting. Then I get a bit crazy. I need to stock up for the rest of the year. How can I not have 10 or so cans of pumpkin in my pantry by mid-October? And what do I use these cans and cans of pumpkin for? Healthier recipes!

Pumpkin is a great ingredient in baking, cooking and no-bake recipes such as this one. It's simple and easy to use and best of all... it's super tasty and healthy! Now I've already been making my pumpkin waffles, pumpkin muffins and even a pumpkin oatmeal shake. But I hadn't yet tried anything with pumpkin and cheesecake before. So this past weekend I decided to try out a no-bake recipe for pumpkin cheesecake bars. And they were delicious. If you have a can of pumpkin lying around you have to try it!

Inspiration: Kraft Foods


Pumpkin Cheesecake Bars
  • 1 package (8 oz.) neufchatel cheese, softened*
  • 1 cup canned pumpkin
  • 1/3 cup agave nectar (or 1/2 cup sugar)
  • 1/2 tsp. pumpkin pie spice
  • 1 tub (8 oz.) Cool Whip Free whipped topping, thawed, divided
  • 1 package graham crackers (about 24), crushed
  • 4 tablespoons light butter, melted
Line an 8x8 or 9x9 baking dish with plastic wrap. Mix graham cracker crumbs and melted butter until the crumbs resemble moist sand. Push crumb mixture into dish with your fingers evenly to create a level crust on the bottom. Make sure to get the crumbs into the corners of the dish as well.

Beat cream cheese, pumpkin, agave and pumpkin pie spice with electric mixer on low speed for one minute. Increase speed to medium and mix for another 3 minutes or until no lumps are visible. Gently stir in 2-1/2 cups of the whipped topping. Cover and refrigerate remaining whipped topping for later use.

Spoon cream cheese mixture into crust and refrigerate 3 hours or overnight. Serve topped with remaining whipped topping. Store leftover cheesecake in refrigerator.

*How to Soften Cream Cheese
Place completely unwrapped package of cream cheese in microwavable bowl. Microwave on HIGH 10 to 15 seconds or until slightly softened. If you cannot find neufchatel cheese in your grocery store just go for the reduced fat cream cheese. Same thing, different name.

Serves 16 | 5 WW+ Points

Meatball Subs {9 WW+ Dinner}

A few months back I made a tasty meatloaf parmesan dish. After I made the patties for our dinner for two I formed the rest of the meat mixture into meatballs to be used later. These meatballs became the perfect star to this sub. The sub was tasty, filling and pleasant to look at. And I loved not feeling guilty about eating so much bread since I removed a bit of the inner part to make room for the meatballs and sauce.

The size of this meatball sub was a bit hard to wrap my hands around. I had to smoosh it a little bit to fit it into my mouth. When you have to smoosh a sandwich you know it's going to be good and fill you up! I froze extra meatballs and grabbed them out of the freezer as needed when I wanted my meatball sub fix. Definitely a great way to have an easy meal for later on in the week when it gets busier!

Inspired by my Italian Meatloaf Parmesan


Italian Meatball Subs
  • 18 Italian Meatballs (without the cheese)
  • 2 small baguettes of french bread, some of the insides removed
  • 1 1/2 cups marinara sauce, store bought or homemade
  • 6 slices provalone cheese, cut in 1/2
Slightly toast the french rolls in a toaster oven. Place two pieces of cheese (one whole slice) on one side of the roll and broil until just melted.

Add 1/4 cup of marinara sauce to each roll, either on top of the cheese or on the other piece of bread, and top with three meatballs. Close the sandwich up and enjoy!

For toddlers, just cut the sandwich into thirds so they can fit it in their hands and mouth easier. I know this made it much more easy for my son to eat. 

Serves 6 | 9 WW+ Points

Double Chocolate Zucchini Bread {4 WW+ Breakfast}

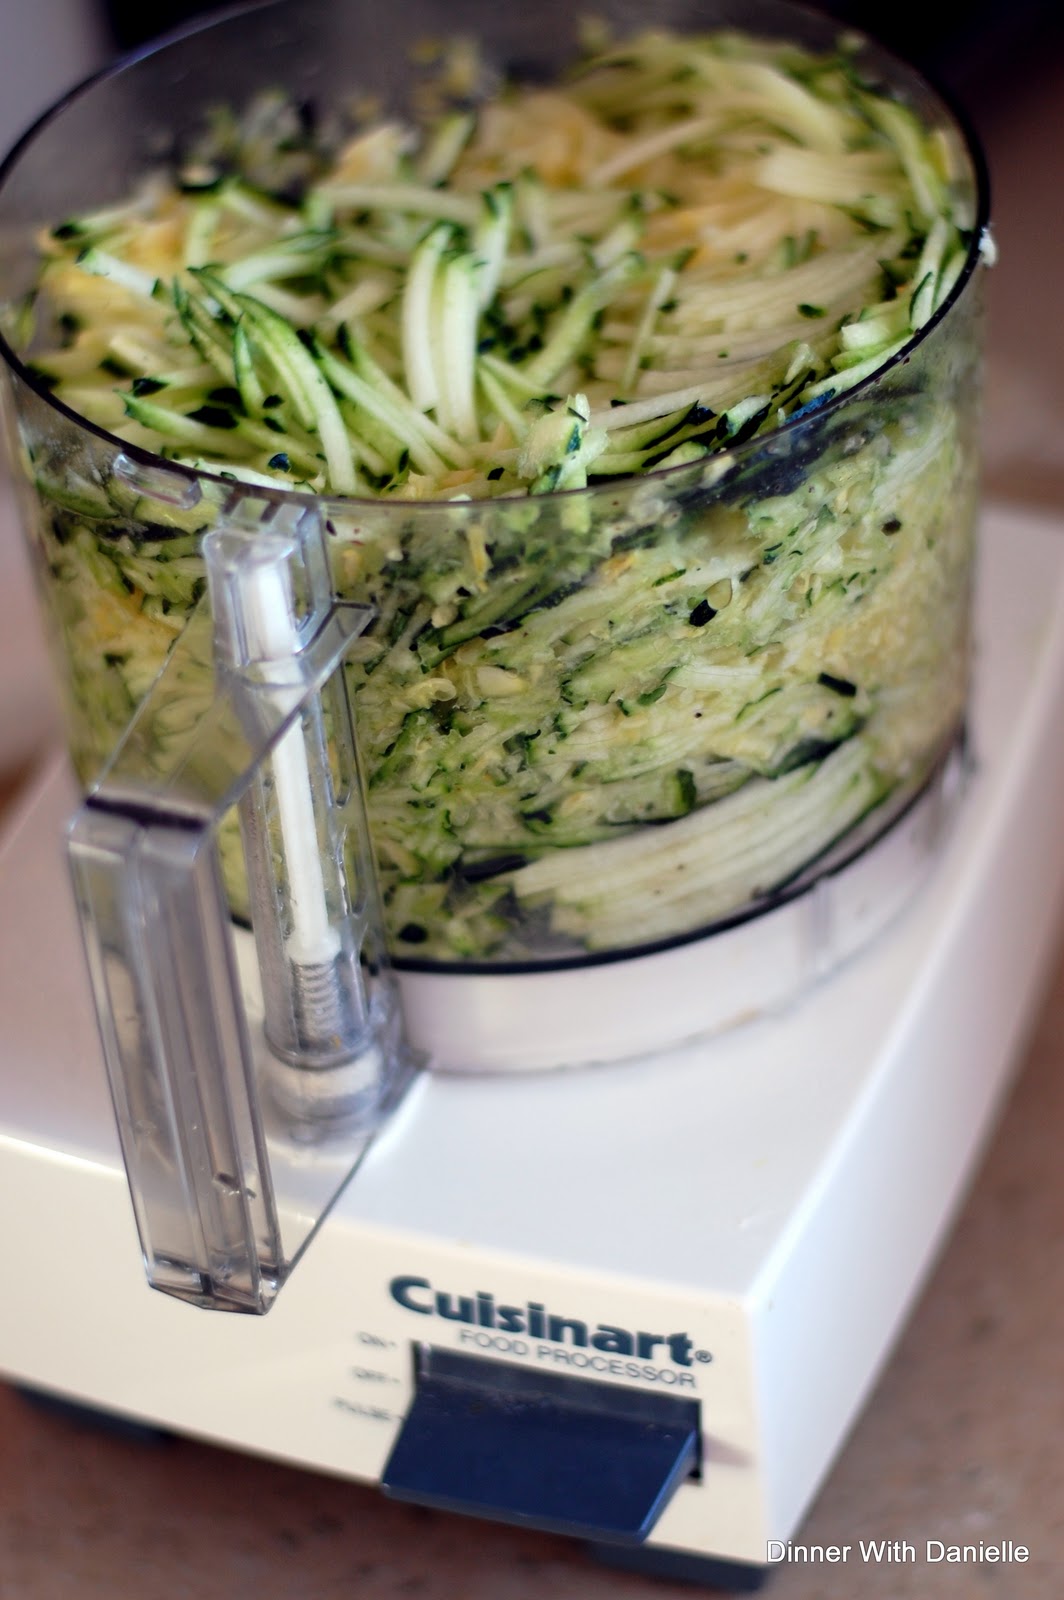
I love the end of summer. For one it starts to cool down at night and secondly my mother-in-law is always sure to bring over some yummy (but very large) zucchini. Figuring out ways to use up the zucchini is always fun and shredding it to put in baked goods and savory meals is usually the way to go. Especially since my son has a fascination with our food processor.

When searching for a recipe to use up some of our zucchini I stumbled upon a delicious looking muffin recipe. Chocolate and zucchini? Why it's a match made in heaven! This bread tastes exactly like a chocolate cake. My son would have had no clue that there was zucchini in it had he not been the one to help mix the ingredients together. And the mini chocolate chips just add a bit of deliciousness and push this bread over the edge. Next time I might consider adding a few walnuts to the mix. Mmmm....

Inspiration: Meg's Everyday Indulgence


Double Chocolate Zucchini Bread
  • 2 cups all-purpose flour 
  • 1 cup unsweetened cocoa
  • 1 teaspoon table salt
  • 2 teaspoons baking soda
  • 1 teaspoon ground allspice
  • 1 1/2 teaspoons ground cinnamon 
  • 1 1/2 cups unpacked brown sugar 
  • 1 cup unsweetened applesauce
  • 3/4 cup regular egg substitute
  • 1 teaspoon vanilla extract
  • 1/2 cup buttermilk
  • 2 cups zucchini, shredded
  • 1 cup mini chocolate chips
Preheat oven to 350 degrees. Prepare 2 loaf pans with nonstick cooking spray.

In a large bowl whisk together flour, cocoa, salt, baking soda, allspice and cinnamon; set aside.

In a medium bowl whisk together the sugar and applesauce. Beat in egg substitute until just combined. Stir in vanilla, buttermilk, zucchini and chocolate chips. Gently stir the liquid ingredients into the dry ingredients until just combined.

Divide batter equally among the two loaf pans. Bake until toothpick inserted into the center comes out clean and muffin tops are springy to the touch, 45 to 55 minutes; rotating halfway through baking time. Cool loafs in pan for 5 minutes, then transfer to wire rack and cool 5 minutes before serving.

Serves 20 | 4 WW+ Points

Side Note: One LARGE freshly picked zucchini from my mother-in-law's garden yielded this much shredded zucchini!


Almond Chocolate Banana Bread {9 WW+ Breakfast}

We always have a bunch of bananas on our countertops. It's just the easiest way to get breakfast on the go when we're running from one activity or another. So sometimes we're left with a few very ripe bananas that no one is willing to eat. And we have to use them up so I am always looking for a good banana bread recipe. I've finally found one that I think I'll stick with for a while.

The best part about this recipe is that it's so light and airy. The bread is not dense at all. I think the cake flour really helps. And it was a total accident that I used cake flour instead of AP or whole wheat flour because we were out of everything else. I am NEVER out of flour. I mean I use it weekly so we're always buying it but I'm glad I was out. The substitution was great! And the addition of a chocolate bar made the bread even more amazing.

I recommend enjoying this banana bread the same day it's baked for the best results. I found that when I placed it in an airtight container for safe keeping that it lost that delicious crunch to the crust of the bread. And I think that the crust was the other reason why I fell in love with this recipe. But if you must, you can store and serve later. I'm sure it'll be gobbled up quickly though!

Inspired By FamilyFun


The Best Banana Bread
  • 2 cups cake flour
  • 1 teaspoon baking powder
  • 1/2 teaspoon baking soda
  • 1/2 teaspoon salt
  • 1/2 cup (1 stick) unsalted butter, softened
  • 3/4 cup sugar
  • 2 eggs, at room temperature
  • 1 teaspoon vanilla extract
  • 3 medium-large very ripe bananas (1 cup mashed)
  • 1/2 cup plain non-fat greek yogurt
  • 1 Hershey's Chocolate Bar with Almonds, broken into small pieces

Heat the oven to 325º. Line a 5- by 9-inch loaf pan, preferably one with a light interior, with enough waxed paper to drape over the long sides. This will make the baked bread a cinch to remove and the pan easy to clean. Set the pan aside

Sift together the flour, baking powder, baking soda, and salt into a medium bowl. In a large bowl, cream the butter using an electric mixer. Gradually add the sugar, scraping down the sides of the bowl as necessary. Add the eggs one at a time, beating well after each addition. Next, add the vanilla extract and blend briefly. Set both bowls aside.

Peel the bananas and place them in a separate bowl. Mash them with a fork or a potato masher and measure out 1 cup. Add the sour cream and stir to blend. Set the bowl aside.

Using a wooden spoon, blend a third of the dry mixture into the butter-sugar mixture. Add the rest of the ingredients in this order, stirring well after each addition: half of the banana mixture, half of the remaining dry mixture, the rest of the banana mixture, the rest of the dry mixture. Next, fold in chocolate pieces.

Scrape the batter into the prepared pan and smooth the top with a spoon. Bake on the center oven rack until a tester inserted deep into the center of the bread comes out clean, about 70 to 75 minutes.

Transfer the bread to a cooling rack and cool it in the pan for about 20 minutes. Using the waxed paper, lift the bread from the pan and place it on the rack. Pull down the sides of the paper and allow the bread to cool thoroughly before slicing.

10 Servings | 9 WW+ Points

Italian Pasta Salad {4WW+ Appetizer}

I hosted a baby shower this past weekend (more recipes and pictures to come) and one of the dishes I made was this pasta salad. It was super easy to make and came together quickly. I love that I didn't have to use a packet or mix to put it together. Another bonus was that I had all of the ingredients on hand and didn't have to run to the store to buy anything. I'll definitely be making this again for those summer barbecues and picnics.  I just need to figure out what other spices to throw in to make it pop some more. Any ideas?

Inspiration: Brown Eyed Baker


Italian Pasta Salad
  • 1 package Trader Joe's fusilli pasta, cooked and drained
  • 3 ounces Hormel Pepperoni Minis
  • 6 Kraft provolone slices, diced
  • 5 ounces Frigo part skim mozzarella 
  • 1 6 ounce can large black olives
  • 1 15 ounce can garbanzo beans (rinsed and drained)
  • 2 roma tomatoes, diced
  • 1 teaspoon dried parsley
  • 1 teaspoon dried basil
For the Dressing:
  • 1/8 cup red wine vinegar
  • 1 tablespoons lemon juice
  • 1/4 teaspoon honey
  • 1/2 teaspoon coarse salt
  • 1/4 cup olive oil

In a large bowl, toss together the pasta, pepperoni, cheese, olives, beans, tomatoes, parsley and basil.

To make the dressing, whisk together the vinegar, lemon juice, honey and salt. While whisking vigorously, slowly drizzle in the olive oil. Once combined, pour over pasta mixture to coat and toss. Store, covered, in the refrigerator.

Serves 20 | 4 WW+ Points (1/2 cup)

Crock Pot Lasagna {9 WW+ Dinner}

I had high hopes for this recipe. I tried it once and kinda screwed up (didn't have ricotta on hand so used cream cheese in a pinch). And the results were not pretty. So I was determined to revisit this dish and try again.

Good thing I did cause this meal was mighty tasty! And filling too. Only one serving plus a side salad filled me up and kept me satisfied all night. I most definitely cannot wait till tomorrow's leftovers for lunch. I'm sure this dish will keep me happy two days in a row.

Inspiration: Two Pink Hippos


Crock Pot Lasagna
  • 1 pound uncooked lean ground beef
  • 1 small onion, chopped
  • 2 garlic clove, minced
  • 28 ounces canned diced tomatoes
  • 15 ounces canned tomato sauce
  • 1 teaspoon kosher salt
  • 1 teaspoon dried oregano
  • 2 teaspoons dried basil
  • 1/4 teaspoon crushed red pepper flakes
  • 1 cup fat free ricotta cheese
  • 2 ounces fat free mozzarella cheese, shredded
  • 4 ounces part-skim mozzarella cheeses, shredded and divided
  • 6 dry lasagna noodles, no-cook
  • 1/2 cup Parmesan cheese, shredded
In a saucepan, over medium-high heat, combine beef, onion and garlic. Break up meat with a wooden spoon while everything cooks, about 5-7 minutes. Stir in crushed tomatoes, tomato sauce, salt, oregano, basil and red pepper flakes; simmer 5 minutes more to allow flavors to blend.

In a separate bowl, stir together ricotta cheese, 2 ounces of part skim mozzarella cheese, and 2 ounces of fat free mozzarella cheese.

Spoon 1/3 of beef mixture into a 6-quart slow cooker. Break 2 lasagna sheets in thirds and arrange over beef mixture; top with 1/3 of ricotta mixture. Repeat with two layers and finish with remaining 1/3 of beef mixture.

Cook on low setting for 4 hours. Turn off crock pot.

In a separate bowl, combine remaining 1/2 cup of reserved part-skim mozzarella cheese and Parmesan cheese. Sprinkle over the top of the lasagna. Cover the crock pot until the cheese melts and lasagna firms up, about 10 minutes.

Serves 6 | 9 WW+ Points
Pesto Dill Salmon Burgers {8 WW+ Dinner}

I had some salmon I froze from dinner last week that I wanted to use up this week but didn't quite want grilled salmon again. So I went in search of a yummy alternative. I went to my trusty google reader, filled with tons and tons of recipes from other food bloggers, and settled on this salmon burger from Beantown Baker.

I wasn't quite sure how I'd like it as I'd never had a salmon burger before but was ready for a challenge. I kinda got grossed out when I put the salmon in the food processor but I got through it. the mix came together really well. Next time I may dice my salmon pieces a bit smaller though. Although it didn't change the taste of the burger, the bigger pieces made it harder for the patties to be formed and stay formed.

All in all I thought this burger was quite tasty. Although I may spice it up a bit next time. 

Inspiration: Beantown Baker


Pesto Dill Salmon Burgers
  • 12 oz salmon, diced
  • 2 teaspoons dried dill weed
  • 1 tablespoon pesto sauce
  • 1 teaspoon table salt
  • 1 teaspoon black pepper
  • 2 teaspoons mustard
  • 2 teaspoons olive oil
  • 4 Thomas' Light Multi-Grain English Muffin 
 Toppings
  • 2 tablespoons reduced-calorie mayonnaise
  • 2 teaspoons mustard
  • 1 cup spinach
  • 1 small tomato, sliced
In the food processor, puree half of the diced salmon.

In a medium bowl, combine the pureed mixture with the remaining diced salmon, dill, pesto, mustard and salt and pepper.

Shape into 4 4oz patties. Make an indentation in the center.

Heat a cast-iron skillet over medium-high heat. Coat skillet with oil. Cook the patties for 4-5 minutes per side. Serve on English muffins with spinach and mayonnaise mixed with mustard.

Serves 4 | 8 WW+ Points

Meatballs and Polenta {10 WW+ Dinner}

Wow. I haven't had as tasty a dinner as last night's in a LONG time. Well, at least one that I made. This meal just hit the spot. Definitely a comfort food meal that's perfect for any time of year. The flavors really melded together and the richness of the meat and polenta was spot on. I've only ever tried the already cooked polenta in the log looking thing. And it just wasn't my cup of tea. Joseph didn't much care for it either. But this meal? Yeah, it was perfect.

I did vary a lot from the original recipe. I don't know what overcame me but as I was looking at the original ingredients I knew I could "one up" myself and make a fabulous meatball. And I did. These were tasty and flavorful. I even froze two thirds of the baked batch to use for future meals. I love making extras to use in the future!

Just serve with your favorite veggies, or a large salad, for a completely balanced meal. 

Inspiration: Two Pink Hippos


Meatballs and Polenta
  • 1 pound 99% fat-free raw ground turkey breast
  • 1 pound 85% lean/15% fat raw ground beef
  • 1 egg
  • 1/3 cup seasoned bread crumbs
  • 1/2 cup fresh parsley, diced
  • 1 teaspoon fennel seed
  • 1 teaspoon sea salt
  • 1 teaspoon black pepper
  • 1 tablespoon Worcestershire sauce
  • 2 teaspoon onion powder
  • 2 teaspoon garlic powder
  • 1 tablespoon Italian seasoning

  • 15 oz canned tomatoes
  • 1/2 cup onion, diced
  • 1 garlic clove, minced
  • 1 tablespoon basil, minced
  • 1 teaspoon crushed red pepper flakes

  • 1/2 cup pre-cooked polenta, dry
  • 2 cups fat-free chicken broth
  • 1/2 oz mozzarella, shredded, fat free
  • 1/2 oz part-skim mozzarella cheese
  • 2 teaspoon regular butter
Preheat oven to 450 degrees.

Combine the beef, turkey, egg, bread crumbs, worcestershire sauce, and herbs & spices in a bowl.

Use your hands to mix the ingredients together. Form meatballs about 2" diameter and place them on a baking pan. (I weighed each meatball at 2 oz and got 19 meatballs.) Bake for 25 minutes.

While the meatballs are baking, dice your onion and mice the garlic and basil. Saute the onion & garlic until onions are translucent, about 3 minutes. Add in the tomatoes and basil. Let simmer.

After meatballs are done bake, transfer from the oven to the sauce. Cook for another 10-20 minutes, turning the meatballs occasionally so all meatballs are coated with sauce.

Place chicken broth in a medium pot. Set to medium high and bring to a boil. Once boiling whisk in the polenta. Continue to wisk for 3 minutes or until thick. Add cheese and salt, to taste, and continue to whisk until the cheese has melted and is combined with the polenta. Remove from heat and divide in half on two plates.

Serve meatballs over polenta. Top with a little chopped parsley and grated Parmesan if desired.

1 2oz meatball = 1 serving
1/2 polenta (roughly 1 cup) = 1 serving

2 Servings | 10 WW+ Points

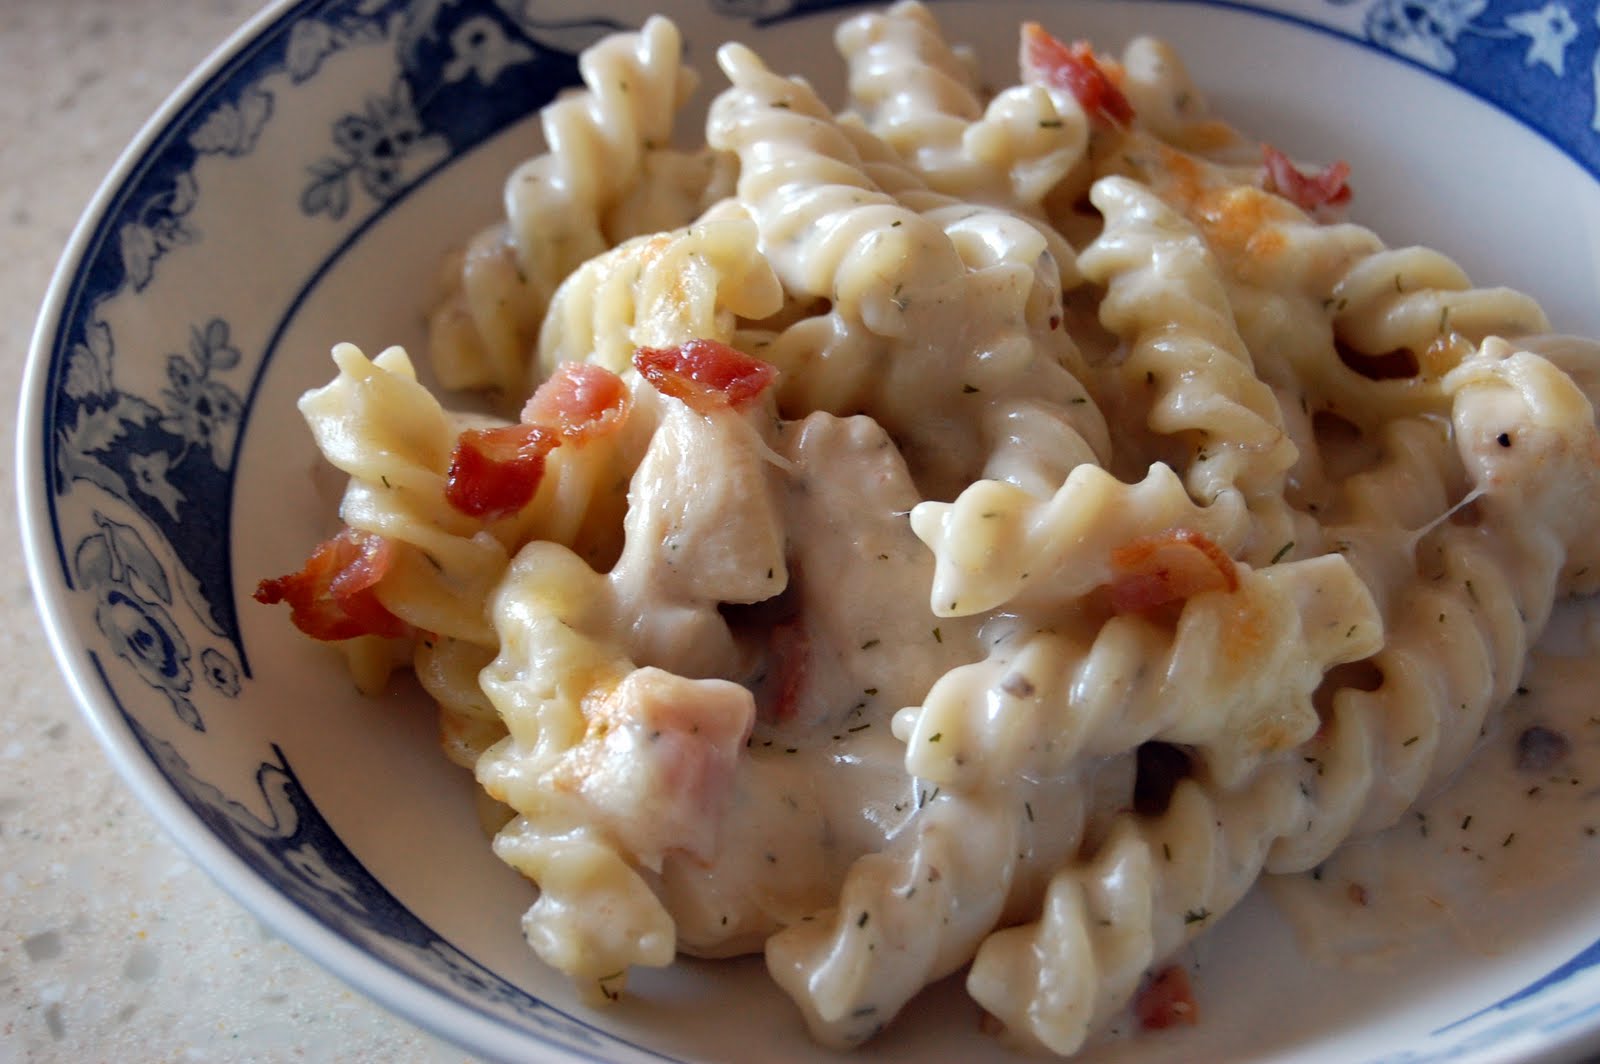
Chicken, Bacon, Ranch Mac & Cheese {10 WW+ Dinner}

I was so surprised with how much I enjoyed this dish. I wasn't expecting much although many of my friends gave it rave reviews. I don't know... I guess I've done mac and cheese so much that one other way just didn't seem exciting to me. But this dish is definitely not your typical mac and cheese. It reminded me a bit of an alfredo almost and was definitely tasty. I think Joseph even approved.

Next time I make this version (and I do plan on making it) I'm going to add some broccoli to the mix as well so I don't have to serve a veggie on the side. It's always easier to make a complete meal in one dish. And it makes the broccoli taste that much better... cheese will do that to a veggie!

Inspiration: Cooking Light, March 2010 issue


Chicken, Bacon, Ranch Mac & Cheese
  • 8 ounces uncooked Fusilli pasta
  • 3 slices pre-cooked bacon, cut into small pieces (reserve 1/3)
  • 8 ounces skinless, boneless chicken breast, cut into 1/2-inch pieces (about 1 breast)
  • 1 tablespoon butter
  • 1 tablespoon all-purpose flour
  • 12 ounces 1% milk
  • 1 can condensed 98% fat-free cream of mushroom soup 
  • 1 ounce Trader Joe's light shredded 3 cheese blend
  • 1 ounce Trader Joe's organic shredded mozzarella
  • 2 ounces Trader Joe's shredded pepper jack cheese blend, plus 1/8 cup to reserve
  • 1/2 teaspoon onion powder
  • 1/2 teaspoon garlic powder
  • 1 teaspoon dried dill
  • 1/2 teaspoon salt
  • Cooking spray

Cook pasta according to package directions, omitting salt and fat; drain.

Cook chicken in a large nonstick skillet over medium heat. Add bacon to the pan and warm through. Remove from heat and set aside.

Melt butter in a large saucepan over medium heat; sprinkle flour evenly into pan. Cook 2 minutes, stirring constantly with a whisk. Combine milk and soup, stirring with a whisk; gradually add milk mixture to saucepan, stirring with a whisk. Bring to a boil; cook 2 minutes or until thick. Remove from heat; let stand 4 minutes or until sauce cools to 155°. Add cheese blend, onion powder, garlic powder, dill, salt and pepper, stirring until cheese melts. Stir in pasta and chicken.

Preheat broiler.

Spoon mixture into an 8-inch square baking dish coated with cooking spray. Sprinkle evenly with reserved bacon and Pepper Jack cheese blend. Broil 3 minutes or until cheese melts.

Serves 6 | 10 WW+ Points

Chicken Pad Thai {7 WW+ Dinner}

Tonight was one of those nights that I forgot to read the recipe for dinner... and therefore I scoured the rest of the week's meals to find a back up plan. I wasn't too sure about this recipe. I really don't eat a lot of Thai food and definitely don't make it at home. Mostly because Joseph won't eat it. He isn't too adventurous when it comes to food. But I'm glad I was pleasantly surprised. I did miss the peanuts and peanut oil but it's better to have a live husband then to indulge in peanuts. And without the peanuts I reduced this meal by 2 points. How awesome is that?

Now back to the dish... it was fresh, flavorful and very... spring like. Yum. I ate my portion in a small bowl that only held one cup because I knew mentally I'd want another bowl and wouldn't be able to afford 14 points for dinner. So when I was done with my small 1 cup bowl I went and got seconds. And I was satisfied. Not overly full; satisfied. The way I should be.

Inspiration: Weight Watchers


Chicken Pad Thai sans Peanuts
  • 7 ounces packaged rice noodles
  • 1 1/8 pounds uncooked boneless, skinless chicken breast, cut into 3/4-inch cubes
  • 1/4 cup fish sauce, divided
  • 4 cups broccoli, florets
  • juice of 1 lime, divided
  • 3 tablespoons sugar
  • 3 tablespoons water
  • 1 1/2 teaspoon ginger root, fresh, finely minced
  • 2 sprays cooking spray
  • 1 1/2 cups bean sprouts
  • 1/2 cup cilantro, fresh, minced
  • 2 medium carrots, shredded
  • 2 cloves garlic, minced
  • 1/2 teaspoon chili oil

Start boiling a pot of water for noodles and a pot of water for steaming broccoli.

Place chicken in a small bowl and cover with 1 tablespoon of fish sauce and sprinkle with some salt and pepper; set aside. Cut up broccoli, shred carrots, mince cilantro, garlic & ginger root; set aside.

Place noodles in boiling water & steam broccoli until crisp-tender, about 8 to 10 minutes.

Meanwhile, in another small bowl, combine remaining 3 tablespoons of fish sauce, 1/2 of the juice of one lime, sugar, water and ginger; mix well and set aside.

Coat a large wok or skillet with cooking spray and warm over medium-high heat. When hot, add chicken; cook, stirring occasionally until chicken is cooked through, about 4 minutes. Remove chicken from pan and cover to keep warm; set aside.

Drain noodles thoroughly. Off heat, coat same wok or skillet with cooking spray and warm over medium-high heat. When hot, sauté garlic and carrots until garlic is just fragrant, about 30 seconds. Add noodles, fish sauce mixture, and chili oil; cook, stirring, until sauce is mostly absorbed, about 3 minutes. Stir in chicken and broccoli; remove from heat. Add remaining 1/2 of lime juice, bean sprouts and cilantro; mix well. Serve immediately. Yields about 2 cups per serving.

Serves 6 | 7 WW+ Points

Shrimp Marinara {9 WW+ Dinner}

I think I just found my new go to when we're out of ground beef and I want spaghetti. This dish was fabulous! I tweaked it a bit to add some more veggies and I decided to use my dutch oven instead of the slow cooker (I tend to have MUCH better luck with the dutch oven than with the slow cooker) and this recipe turned out better than I expected. I didn't have fresh shrimp, just a bag of frozen cooked shrimp from Trader Joe's but it worked great. And I can always keep some in the freezer so consider this an official staple meal in this household!

Inspiration: Two Pink Hippos


Shrimp Marinara
  • 2 tablespoons olive oil
  • 1/2 small onion, diced
  • 1/2 cup carrots, shredded
  • 1 zucchini, shredded
  • 2 cloves garlic, minced
  • 6 ounce can tomato paste
  • 2 tbsp dried parsley
  • 1/4 teaspoon pepper
  • 1/2 teaspoon dried basil
  • 1 teaspoon dried oregano
  • 1/2 teaspoon salt
  • 1/2 teaspoon garlic salt
  • 28 ounces can diced tomatoes
  • 1 pound frozen cooked shrimp, tails off
  • 30 ounces organic spaghetti

Start heating a large pot of water to a boil for pasta.

Add oil to dutch oven and cook on medium high. Add onions, carrots & zucchini. Saute until tender, about 5 minutes. Add garlic and saute for another minute. Add tomato paste, spices, & tomatoes into dutch oven and let cook until boiling. Once it's boiling, turn heat to low and let simmer.

Once pasta water is boiling, sprinkle with some salt and add pasta. Add shrimp to sauce. Cook pasta until done and drain. Shrimp will be warmed thoroughly as soon as the pasta is done. Plate pasta and top with shrimp marinara.


Serves 6 | 9 WW+ Points

Olive, Pepperoni and Bruschetta Pizza {6 WW+ Dinner}

You know when you have an awesome idea for dinner and crave it all week. And than something happens and you don't get to put your idea into action? Well that happened tonight. And guess what? Dinner still turned out really well.

I made this weeks dinner list in a hurry. We were busy and in the middle of Joseph's birthday weekend but I still needed a plan. So when the week went by in a hurry and Thursday finally came I just opened the recipe link from the blog for my husband and left it at that. He'd figure it out and I'd come home to a yummy dinner of chicken and potatoes.

Well... we both didn't read past the skillet part to the part where we used the slow cooker to finish the meal. Yup. Joseph waited till one hour before I was supposed to be home to look at the recipe again and realized what had happened. So as I was driving home I asked him to grab the dough out of the fridge... I was going to make some pizza! I had wanted to use Italian sausage but we had to use it for the crock pot lasagna we had earlier in the week so I grabbed some pepperonis. This pizza was super yummy! And the best part? Joseph and my son didn't know there was spinach in there! Always a good thing to get veggies in without their knowledge.


Olive, Pepperoni and Bruschetta Pizza
  • 1 ball Trader Joe's Garlic & Herb pizza dough
  • 1 cup spinach, cut finely
  • 2 ounces Trader Joe's Organic Shredded Mozzarella Cheese
  • 2 ounces Trader Joe's Lite Shredded Mozzarella Cheese
  • 6 ounces Trader Joe's Bruschetta
  • 10 (20 grams) Hormel pepperonis
  • 2 ounces sliced olives
Let pre-made or store bought dough rest for 30 minutes before rolling out. While dough rests, place a pizza stone on the bottom of a cold oven and turn the oven to 450 degrees.

Take out all sauce & toppings and have them prepped and ready to go before you start rolling out the dough.

Sprinkle your work space with a little bit of corn meal or flour so the dough doesn't stick.

Take pizza dough and flatten into a disk and then fold the dough into a ball. Start to slowly work and stretch the dough into a flattened circle with your hands. You can roll it out to a larger size with a good rolling pin or continue to use your hands.

Once the dough is to the size you want (I went with 12 inches as suggested on the dough packaging), roll the outer sides inwards to create a thin crust. Brush the crust with a small amount of olive oil.

Once the dough is completely rolled out and the crust is formed take the stone out of the oven. Place the formed dough onto the stone and spoon bruschetta onto the dough and evenly spread it around to the crust rim.

Place spinach, pepperoni and black olives on top of the sauce and then sprinkle the cheese over the toppings. Bake in the oven for 9 minutes or until cheese is bubbling.

Let rest 3 minutes on the stone once it's done and then serve with your favorite salad.

6 Servings | 6 WW+ Points

Crockpot Salsa Chicken {4 WW+ Dinner}

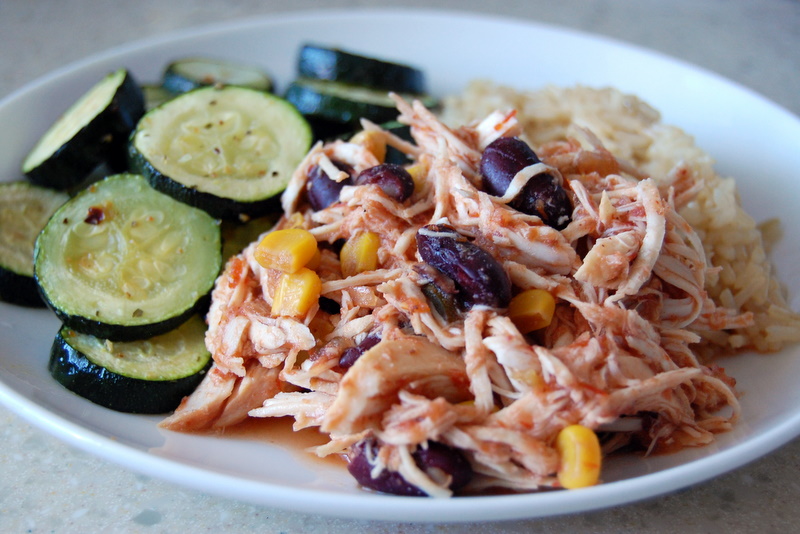
This is the easiest crock pot dish for those just starting out with their crockpot. You don't have to thaw any meat, you don't have to worry about the chicken drying out, you don't have to worry about the size of your crockpot. The ingredients all meld so well together and taste delicious however you serve it up.

I served the chicken with rice and zucchini but you can put the chicken in tacos, enchiladas or anything else you can think of. I'm already planning on using the left overs on Saturday for enchilada lasagna. I was going to go with beef but have more than enough left over chicken to use up so I'm making it easy on myself and saving the beef for another day. Another great way to use this as left overs is to put it on top of a salad or make a soup out of it.

Inspiration: Crockpot 365


 Crockpot Salsa Chicken
  • 3 chicken breasts (can be frozen)
  • 1 cup corn
  • 1 cup kidney beans
  • 1 1/2 cups salsa
  • 2 tablespoons dry taco seasoning
  • Salt & Pepper to taste

Place the chicken in the crockpot and top with the other ingredients. Set the crock pot to cook on low for 6-8 hours or until the chicken is cooked thoroughly. Remove the chicken from the crock pot and shred. Place it back in the crock pot and set it to warm while you prepare the rest of your meal (rice, beans, vegetables, etc).

Serves 6 | 4 WW+ Points

You can top with your favorite light sour cream and a sprinkle of cheese for just 2 more points! That's what I did and it was delicious! My whole meal was 9 WW+ points total and included a serving of salsa chicken, a tablespoon of light sour cream, a sprinkle of light shredded cheese, a 1/2 cup of brown rice and a cup of roasted zucchini. It was delicious and filling.

Smothered Buttermilk Chicken with Peas {9 WW+ Dinner}

When planning this week's menu I think that tonight's meal was the one I was most looking forward to. The recipe sounded almost like a chicken pot pie filling over a biscuit and it ended up tasting pretty similar to it! The only thing I'd change is I'd add more spices.

Since I had to work today I had Joseph prepare this meal and he did great. He changed the amount of water added from the original recipe since he didn't think there was enough and he added in a splash of chicken broth to add more flavor. Another change he'd make is to switch the water with chicken broth for more flavor as well.

All in all I loved this meal and will definitely be attempting it again with some more spices. I even had a second helping (don't worry... I had enough points!). Don't get me wrong, one serving would have been more than enough to satisfy me normally but I hadn't eaten since lunchtime due to a busy day at work. I also paired this with a delicious spinach & romaine salad.

Inspiration: Food.com


Smothered Buttermilk Chicken with Peas

  • 1 pound boneless, skinless chicken breast, cut into 3/4 inch pieces
  • 1 1/2 cups carrots, sliced into coins
  • 1/3 cup onion, chopped
  • 1 1/2 cup water
  • 2 tablespoons butter, melted
  • 1/4 teaspoons sea salt
  • 1/4 teaspoons black pepper
  • 1 bay leaf
  • 1 chicken gravy mix packet
  • 1/3 cup buttermilk
  • 2 teaspoons all-purpose flour
  • 1 cup(s) frozen green peas, thawed
  • 6 Trader Joe's refrigerated Buttermilk Biscuits

In a 4 to 6 quart slow cooker, mix together the chicken, carrots, onion, water, butter, salt, pepper, and bay leaf. Cover and cook on LOW for 6-8 hours.

During the last 20 minutes of cooking time, stir in the gravy mix.Remove the bay l eaf; mix the buttermilk and flour together; stir flour mixture and peas into chicken mixture. Increase heat to HIGH; cover and cook 10-15 minutes or until peas are hot.

While the chicken mixture is cooking, prepare biscuits as directed on can. Split biscuits; serve chicken mixture over biscuits.

Serves 6 | 9 WW+ Points

WFD? {Weekly Meal Planning}

Along with joining Weight Watchers again comes menu and meal planning. I haven't been doing it for the past few weeks but now that I'm going into week 9 I feel like I have to be more accountable for what we fix for dinner. Plus, I don't need any excuses to forego a meal at home for fast food or restaurant food that's double what my homemade cooking would cost me in points (as well as money!).

So I'm going to start posting my weekly dinner meal plan for all to see. I may blog all of the dishes, I may blog just one, and I may just be using another meal I already blogged about. But I'll list them all here and will try to review each and every one at the end of the week (if my kids give me the time).

Week of 3/27/2011

Sunday - 9 WW+ Points
Italian Sausage and Pepper Pasta via Weight Watchers
Monday - 10 WW+ Points
Smothered Buttermilk Chicken With Peas via food.com 
Tuesday - 5 WW+ Points (plus pasta points)
Skinny Italian Spinach Meatballs via Gina's Skinny Recipes
Wednesday - 9 WW+ Points
Slow Cooker Salsa Chicken via Crockpot 365
Thursday - 8 WW+ Points
Enchilada Lasagna via this blog
Friday - 9 WW+ Points
Honey Teriyaki Salmon via Joelen's Culinary Adventures  
Saturday -
Disneyland for Joseph's birthday

Skinny Sloppy Joes {5 WW+ Dinner}

I think I've said it before but I love Gina's Skinny Recipes. She is such an inspiration for taking a normal, full fat recipe and making it work for the Weight Watchers lifestyle. Plus everything I've tried from her blog always tastes super good.

I did tweak the recipe a bit as I only had certain things on hand but I still think that this tasted fabulous. And you definitely couldn't tell there were so many veggies in here. My husband may have but he couldn't identify more than onions when I asked him to tell me what veggies he was eating. I served this with a nice green salad and low fat balsamic. But it'd also be perfect mixed with quinoa or brown rice!

Inspiration: Skinny Taste


Skinny Sloppy Joes
  • 1 pound 85/15 organic ground beef sirloin
  • 1 tablespoon Mrs Dash garlic & herb
  • 1 cup baby carrots, minced
  • 1/2 medium onion, minced
  • 2 cloves garlic, minced
  • 3/4 cup Trader Joe's fire roasted peppers & onions, minced
  • 4 oz sliced crimini mushrooms, minced
  • 1 tablespoon red wine vinegar
  • 1/2 tablespoon Worcestershire sauce
  • 2 cups tomato sauce
  • 2 tablespoons tomato paste
  • salt & pepper to taste
  • Bun or bread of your choice (not included in WW+ calculation)

Dice all of the vegetables really fine (Gina suggests using a food processor or blender but I just minced them up and sauteed really well).

Heat a large skillet over medium high heat. Add the meat to the pan and break it up as it cooks. Season with seasoning and cook the meat until it browns, then add onion, garlic, carrots, mushrooms and red peppers to the skillet.

Reduce heat to medium and add red wine vinegar and Worcestershire sauce, cook 5 more minutes. Add tomato sauce and paste to pan, stir to combine. Cover and reduce heat to simmer and cook an additional 5 minutes. Add salt and pepper to taste if needed.

Using a measuring cup, pile 1/2 cup of sloppy meat onto toasted buns.

Serves 7 | 5 WW+ Points

Simply Perfect Berry Breakfast {4 WW+ Breakfast}

I have this for breakfast just about every other day. It's my go to for a simple quick meal that will keep me full until snack time. It's also the perfect meal to give to my son as well (sans the cereal). He LOVES yogurt and he loves fruit so putting them together is just a natural combination. But he gets the plain full fat version while I indulge in the fat free vanilla version. He doesn't know the difference yet so why ruin a good thing?


Yogurt and Berries with a Crunch
  • 1/2 cup Kashi GoLean Crunch
  • 1/2 cup Fat Free Vanilla Yogurt
  • 1/2 cup strawberries (or fruit of your choice)

Mix everything together and enjoy with a hot cup of coffee. I take my coffee with splenda and hot cocoa mix (YUM!).

1 Serving | 4 WW+ Points 

LinkWithin

Related Posts Plugin for WordPress, Blogger...